


24
Printer Installation
d.
Turn the take-up spool clockwise just enough
to take up any slack in the ribbon.
6.
.
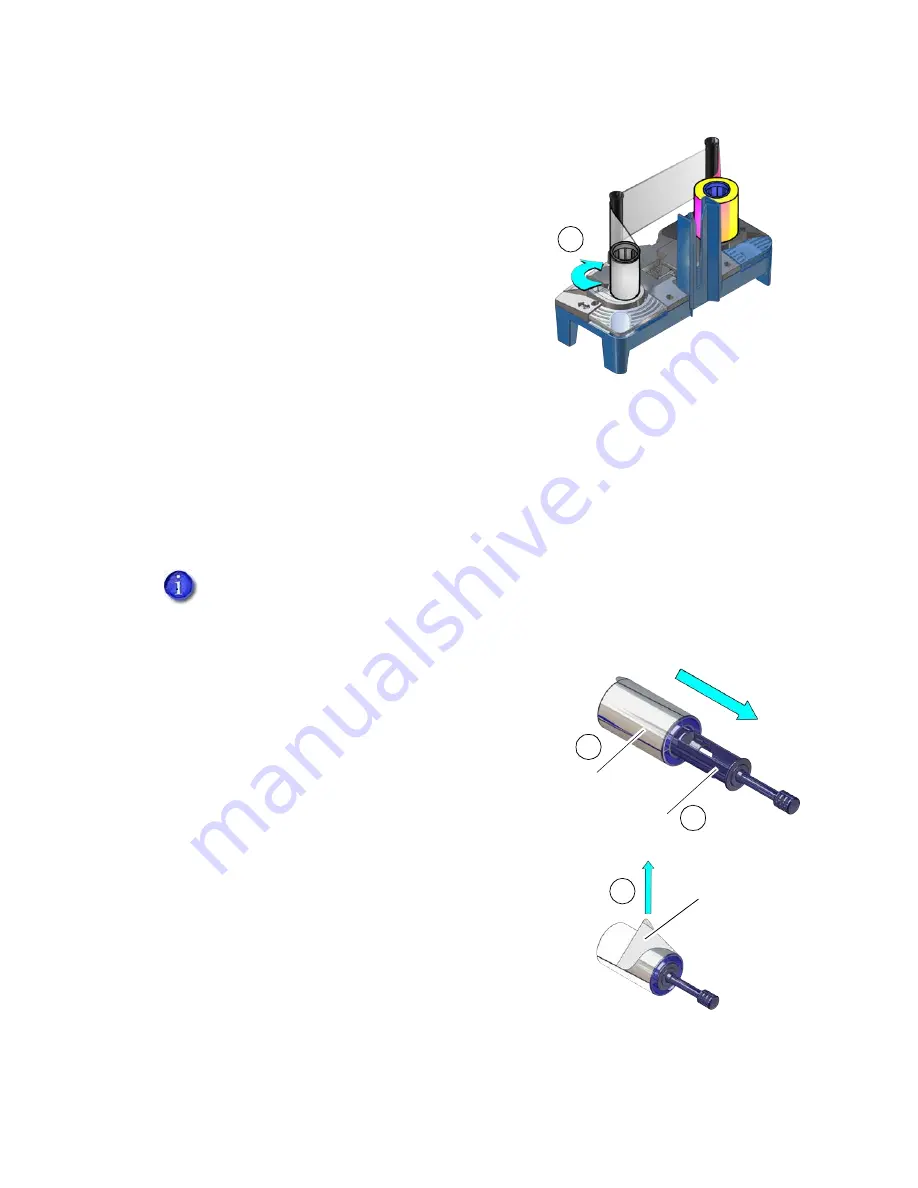
Install the Cleaning Sleeve
The cleaning sleeve helps maintain print quality by removing dust and other particles from cards
before they travel into the printer. The cleaning sleeve fits on a spindle that is inserted into the
printer. The printer ships with the cleaning spindle in the accessories box.
1.
Load the cleaning sleeve.
a.
Remove the cleaning spindle from the accessories
box.
b.
Remove the cleaning sleeve from the ribbon
package and slide the cleaning sleeve onto the
cleaning spindle.
c.
Remove the protective wrapper from the cleaning
sleeve.
Replace the cleaning sleeve each time you install a new ink ribbon. You also should
replace the cleaning sleeve if you notice debris on the printed cards or if the cleaning
sleeve is no longer sticky.
d
a
Cleaning
Spindle
Cleaning
Sleeve
b
c
Protective
Wrapper
Summary of Contents for Artista CR875
Page 4: ...iv...
Page 10: ...x...
Page 14: ...4 Printer Installation Multi Hopper Printer 13 4 in 340 mm 16 2 in 411 mm 25 6 in 651 mm...
Page 50: ...40 Printer Installation...
Page 67: ...CR825 and CE875 Instant Issuance System Installation and Administrator s Guide 57...
Page 68: ...58 Elements of Card Design...
Page 120: ...110 Printer Manager...
Page 130: ...120 Supplies and Parts...
Page 139: ...CR825 and CE875 Instant Issuance System Installation and Administrator s Guide A 9...
Page 150: ...A 20 CE875 Instant Issuance System...


