55
Creating a movie
You can perform more detailed settings, including editing the length of the clip,
setting the loop mode, configuring the effect style, etc.
1
Click to select the created background clip, and then click [INFO...].
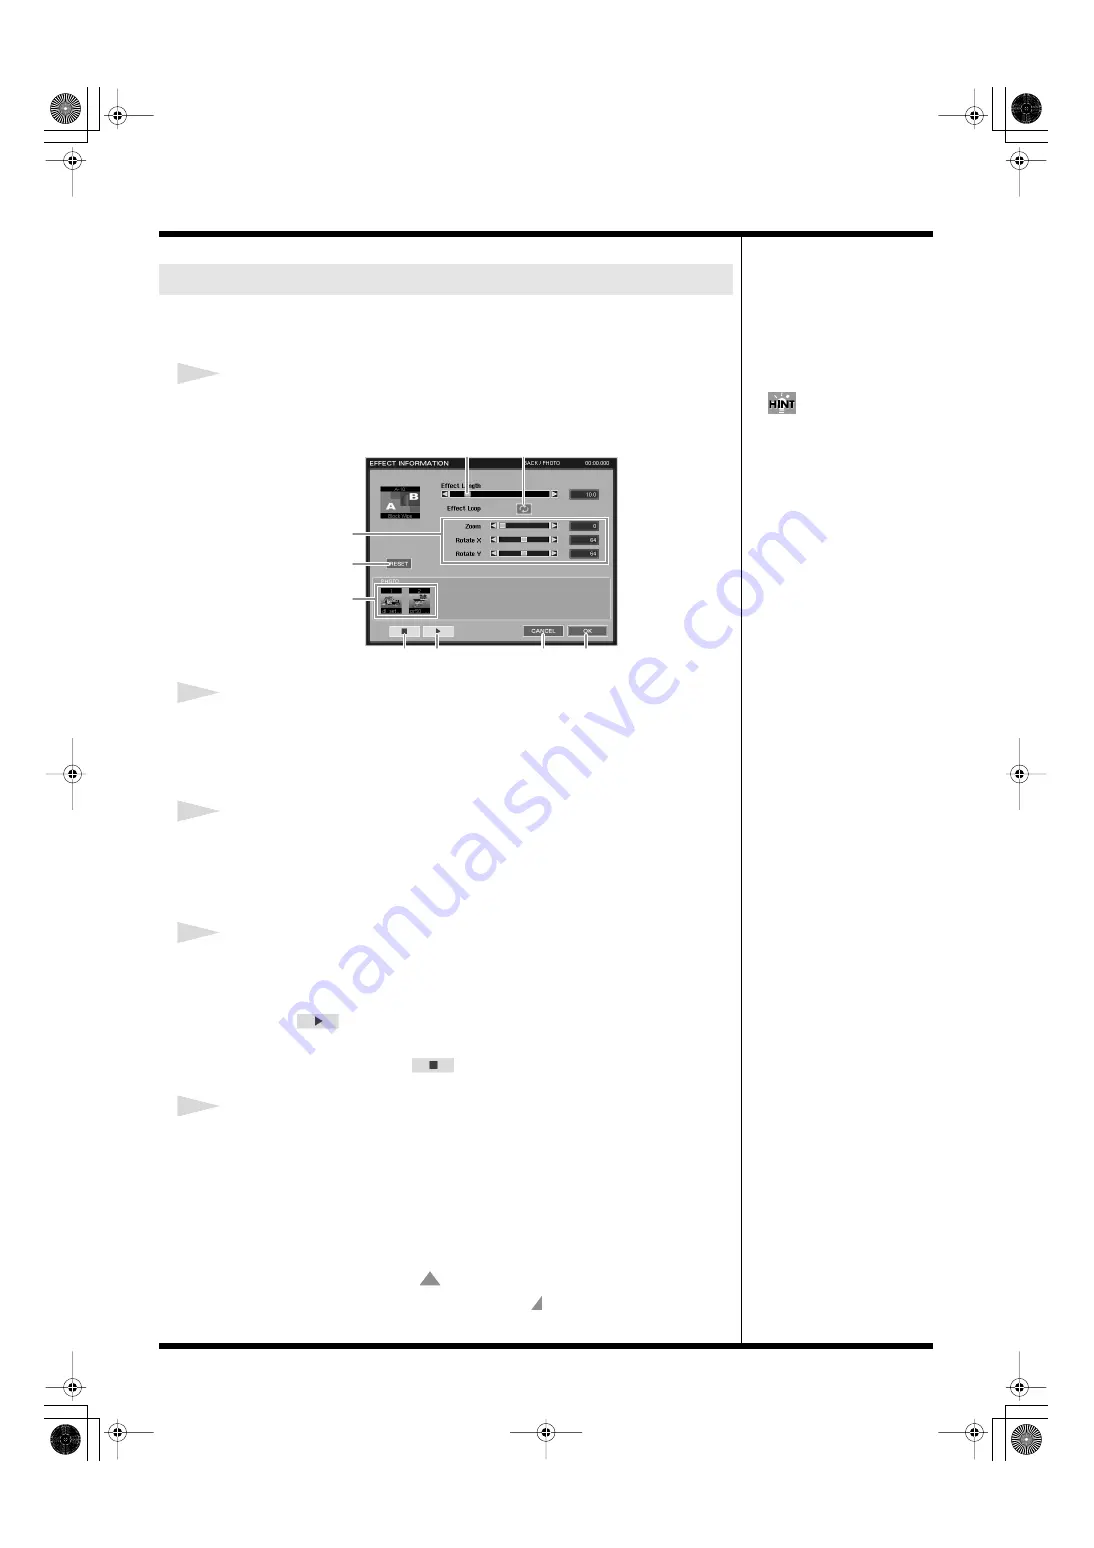
The EFFECT INFORMATION window appears.
fig.effect info01.eps
2
Click on either end of the “Effect Length” slide bar to change the length of the
clip.
Click on the right end to lengthen the clip, and click on the left end to shorten it. The
length of the clip is indicated in seconds at the right side of the slide bar.
3
Turn on/off the Effect Loop.
Click the icon next to “Effect Loop” to turn on the loop setting, and the clip loop
plays throughout the entire movie (p. 51).
When loop is off, the clip plays just once.
4
Configure the effect settings.
The configurations differ according to the effect types.
You can zoom in/out the material, shift the position, adjust the angles, etc.
By clicking
in the EFFECT INFORMATION window, you can view the
current state of effects, so you can do the adjusting while monitoring the change of
effects. To stop playback, click
.
5
Click [OK].
The settings are saved, and the window disappears.
To reset the effect to its default state, click [RESET].
To cancel this operation, click [CANCEL]. Your settings won’t be implemented, and
you return to the previous screen.
At the ending point of the background clip, a red triangle is marked in the “BACK”
track.
When loop is set to on, it shows
, and the movie loop plays the clip during the
entire length of the movie. When set to off, it shows , and the movie plays the clip
only once.
Detailed settings for the background clip
You can also double-click on
the clip to access the EFFECT
INFORMATION window.
Effect configuration area
Photo material
Effect Length
Effect Loop
[OK]
[CANCEL]
Play
Stop
[RESET]
000RG-100.book 55 ページ 2004年8月6日 金曜日 午後5時37分


