14
Panel Descriptions
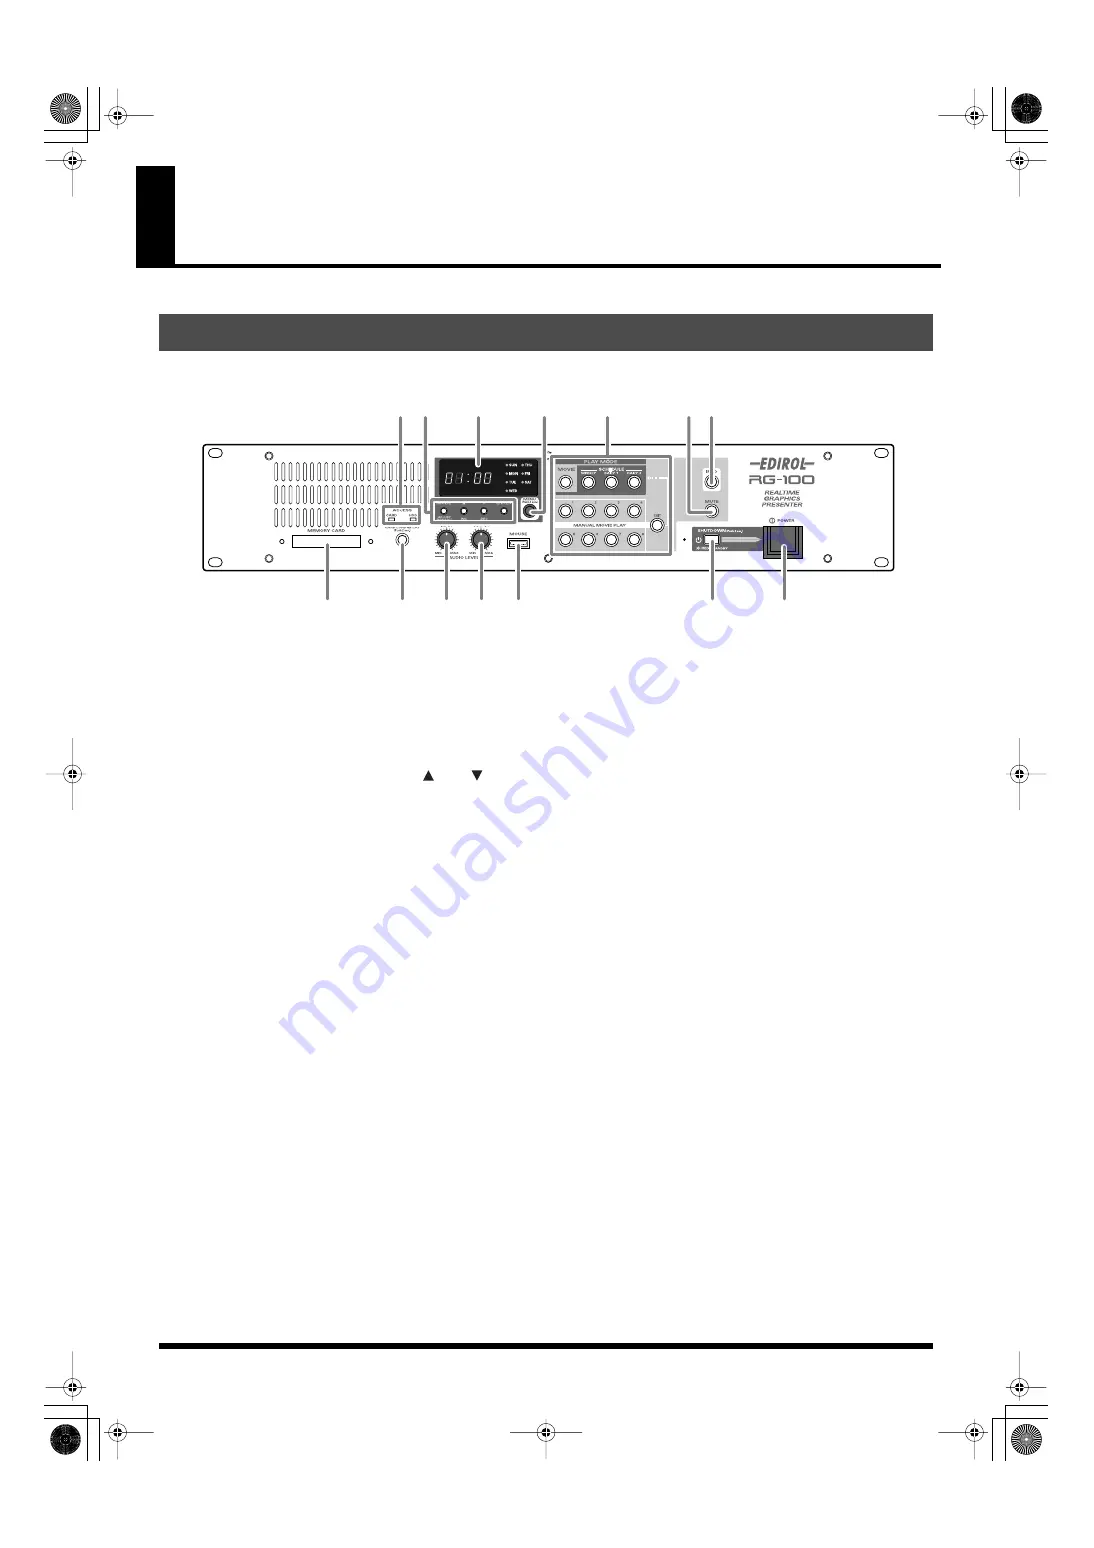
fig.frontpanel.eps
1.
ACCESS Indicator
CARD: Lights up during access to a card (data copy or
load).
HDD: Lights up during access to the installed hard disk
drive.
2.
MODE Set Buttons (MODE/ADJUST,
/INC,
/DEC,
ENTER)
Press to adjust the time. Also used to select palettes in
Play Mode.
3.
Display
Indicates the time or state of unit.
4.
MENU Button
Press and hold for more than 2 seconds to access the
MAIN MENU screen.
5.
PLAY MODE Buttons (MOVIE, SCHEDULE [WEEKLY,
DAILY 1, DAILY 2], MANUAL MOVIE PLAY 1 – 8,
EXIT)
Press to select the Play Mode and movies.
6.
MUTE Button
Press to temporarily turn off the image and sound output.
Press again to restore to normal.
7.
INFO Button
Press to show the information of the current movie in Play
Mode.
Do nothing for a while or press again to hide the
information.
8.
MEMORY CARD Slot
Insert card here.
9.
CARD LOAD & PLAY Button
Press to instantly load and play a project from a card
inserted to the MEMORY CARD slot.
10.
AUDIO LEVEL/INPUT Knob
Turn to adjust the level of audio input to this unit.
11.
AUDIO LEVEL/OUTPUT Knob
Turn to adjust the level of audio output from this unit.
12.
MOUSE Connector
Connect the supplied mouse to this connector.
13.
SHUTDOWN Button
Press and hold for more than 2 seconds when the unit is
powered on to turn it to standby mode. When you press
it in standby mode, the unit powers on again.
STANDBY Indicator
Green light: The unit is powered on.
Red light: The unit is in standby mode.
Off: The unit is powered off.
14.
POWER Button
Press to power on the unit.
Press again to power off. Be sure that the STANDBY
indicator lights in red before turning off the unit.
Front Panel
1
3
6
2
7
5
4
14
13
12
10
9
8
11
000RG-100.book 14 ページ 2004年8月6日 金曜日 午後5時37分


