


20
Lenco Marine
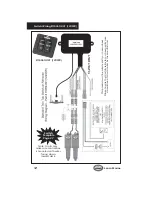
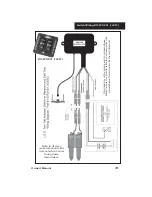
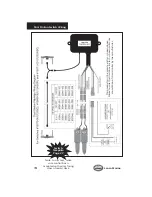
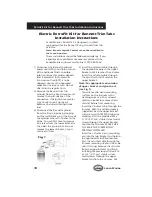
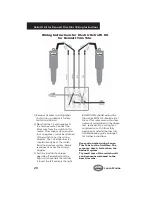
Wiring Instructions for Electric RetroFit Kit
for Bennett Trim Tabs
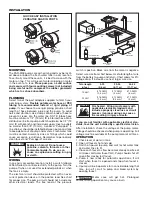
RetroFit Kit for Bennett Trim Tabs Wiring Instructions
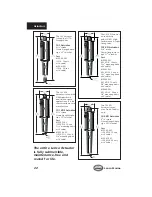
1) Remove all wires and all jumpers
(brass strips) on Bennett factory
switch and discard.
2) Now find the 12-volt negative at
the helm/console. Connect the
black wire from the switch to this
source. The Lenco system requires
that a negative (-) wire be attached
at the switch as per the wiring
diagram. The 12-volt positive (+)
should already be at the switch
from the previous system. Simply
reconnect it as per the wiring
diagram.
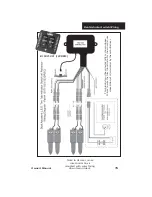
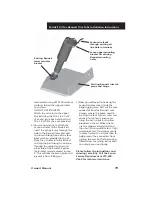
3) Test the trim tabs for proper
operation. Remember that the
right switch controls the left trim
tab and the left controls the right.
BOW DOWN should extend the
tabs while BOW UP should retract
them. If for some reason this does
not work as described in the above
text, recheck all the wiring for a
misplaced wire. If still not fully
operational, refer to the trim tab
troubleshooting guide on page 7
for further instructions.
Use caution when using Lenco
Trim Tabs for the first time. The
response time is faster than the
Bennett system.
Try small taps of the switch until
you become accustomed to the
new trim tabs.
Summary of Contents for 268 Center Console
Page 1: ...268CC 268 Center Console OWNER ASSISTANCE MANUAL Revised 2014...
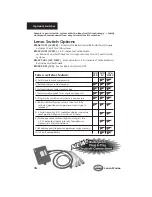
Page 32: ...31 Appendix 268CC...
Page 33: ...34...
Page 34: ...35 Hydraulic Steering System...
Page 35: ...36...
Page 36: ...37...
Page 37: ...38...
Page 38: ...39...
Page 39: ...40...
Page 40: ...41...
Page 112: ......
Page 129: ......
Page 146: ...8 Rotation of Ports 1 2 3 4 5 6 7 1 Rotation of Pump Head 2 3 4 5...
Page 186: ...38 A B 50 mm C 20 mm...


