Most models have built-in lights which will require routing the wire or wires to your power source. To assure a clean
installation you may want to wait and drill the routing holes after you are satisfied with the compass alignment.
Specific model installation instructions are as follows
:
Note for all flush and bulkhead mount compasses:
It is important that you use the mounting gasket included with each model. We do NOT recommend the use of
bedding compound since some brands contain chemicals that could damage the plastic dome.
HF-72, HF-72W, HF-73, HF-73W, HF-79, HF-79G, HF-79W, SS-1000& SS-1000W Flush Mount
Using the mounting template supplied with the compass, make the cutout in your chosen location and mount as
instructed above (Mounting the Compass). For all HF-79 models, loosen but do NOT remove the single screw in the
rear of the dress-bezel. Lift the rear of the dress-bezel and slide it forward to remove it from the compass. When
mounting and compensation are completed, replace the dress-bezel. Note: If you cannot access the compensation
rods from below you need to allow for easy removal of the compass during compensation. (See Compensation
instructions below).
HV-76 & HV-77 Bulkhead Mount
Before making the cut, make sure the bulkhead surface at the mounting location is at a ninety-degree (90°)
angle to the centerline of the boat and is in a vertical position. If such is not the case, a fairing block must
be used between the compass and the bulkhead. Use the mounting template supplied with the compass
for cutting the necessary opening in the vertical bulkhead. If the compass is not mounted in a vertical
position, serious errors can develop when the boat heels over and pitching occurs simultaneously. There
is also potential error from the built-in compensator magnets if the compass is not mounted vertically.
HD-74, HD-75 & SS-1100 Deck Mount
Follow the instructions above (Mounting the Compass). After mounting, remove the black plastic inserts and
begin compensation (see Compensation instructions below).
HB-70, HB-71 & HB-85 Bracket Mount
Remove the bracket from the compass and mount it as instructed above (Mounting the Compass). If you mounted
the bracket to a gunwale simply rotate the compass 90 degrees in it’s housing by removing the four Phillips head
screws located in the bottom of the housing. After re-installing the compass in the bracket remove the black plastic
inserts, which cover the compensators and begin compensation (see Compensation instructions below).
IMPORTANT NOTE REGARDING HB-85
This model is designed to be mounted on STEEL HULL Vessels. Special compensation is required and you will need
to hire a professional compass adjuster.
Night Light Wiring (all Models)
All models are supplied with a 12-volt night lighting system. To connect lights to a 24 or 32-volt system, dropping
resistors are available.
Lights should be wired to an appropriately fused 12-volt circuit in your electrical system (i.e. running light circuit).
Connect the red wire (white on some models) to positive and black to ground. Some models have a second light
assembly, which should be connected to the same circuit.
Compensation
A built-in correcting magnet system consists of two sets of magnets fixed to two adjusting rods with slotted ends. The
slots should be horizontal before starting the adjusting procedure. A small non-magnetic screwdriver is provided for
this purpose.
Before starting compensation, make sure you have a suitable location (see Testing Your Chosen Location).
Summary of Contents for 268 Center Console
Page 1: ...268CC 268 Center Console OWNER ASSISTANCE MANUAL Revised 2014...
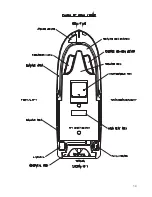
Page 32: ...31 Appendix 268CC...
Page 33: ...34...
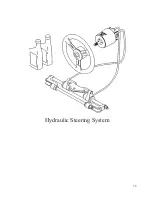
Page 34: ...35 Hydraulic Steering System...
Page 35: ...36...
Page 36: ...37...
Page 37: ...38...
Page 38: ...39...
Page 39: ...40...
Page 40: ...41...
Page 112: ......
Page 129: ......
Page 146: ...8 Rotation of Ports 1 2 3 4 5 6 7 1 Rotation of Pump Head 2 3 4 5...
Page 186: ...38 A B 50 mm C 20 mm...


