


Page 15 of 33
J-MINI PRO MANUAL
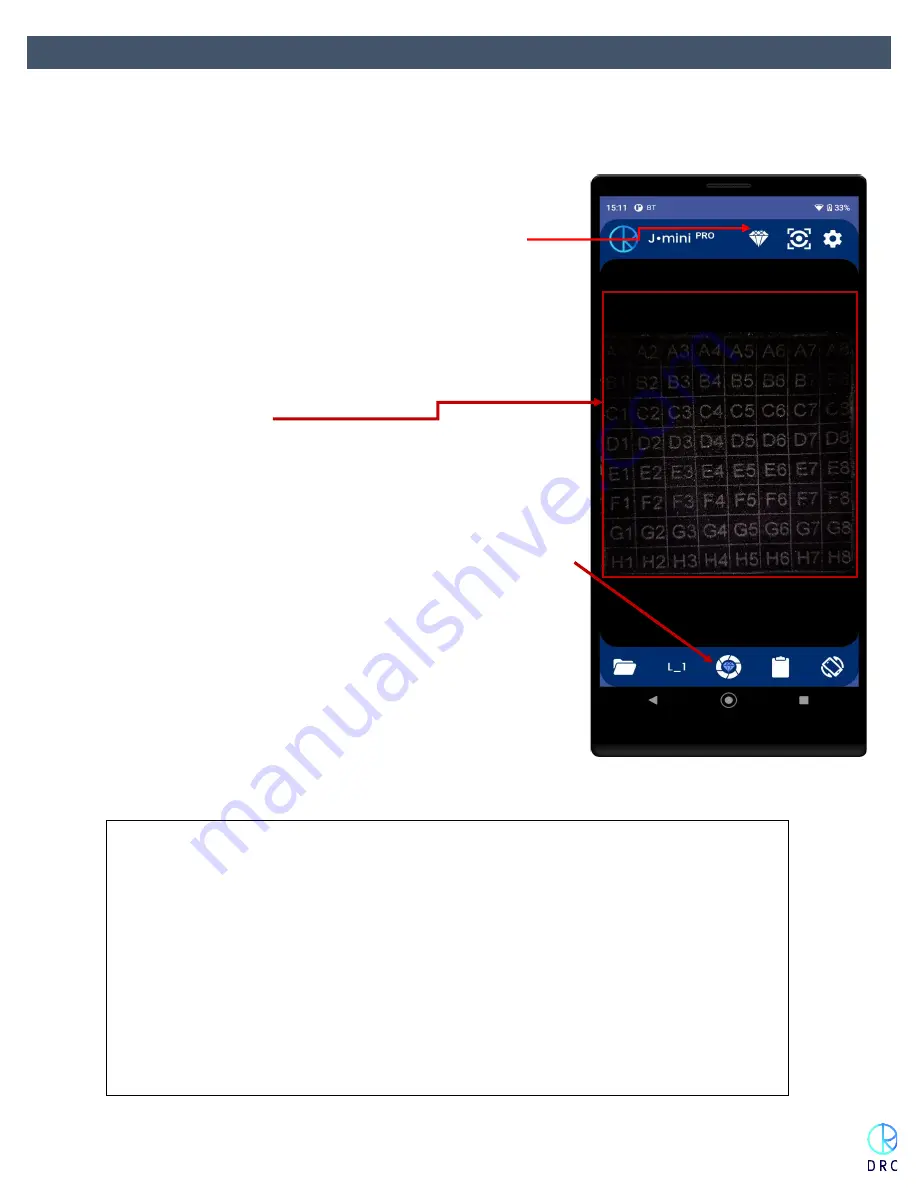
5.4
Scanning
From the top menu bar, select the correct scanning mode on the screen. One mode is for loose diamonds and
one mode is for diamonds set into mounted jewelry.
•
The home scanning screen is set for loose diamonds as it is
indicated with the diamond icon in the Mode position.
•
To toggle the mode to mounted jewelry, tap on the diamond
icon. It will allow you to see the jewelry mode setting. Tap
on this icon and the J-Mini will then be ready to scan
mounted jewelry. (as pictured)
•
Scanning Area
5.4.1
Load the merchandise that you want to test on your selected
tray and push the Slide in Tray into the J-Mini
Pro
. Ensure the
scanning drive is closed properly before initiating the scanning
process.
5.4.2
Tap the Camera Lense Icon on the bottom menu bar. This will
begin the scanning process.
5.4.3
The scanning process, regardless of the quantity of pieces on
the Scanning Platform, will take less than one minute.
5.4.4
Note that the most accurate scanning results are achieved with
merchandise that is clean.
CAUTION. When scanning jewelry, it is best to conceal any tags that are
attached. J-Mini
Pro
uses light to perform its analysis. Jewelry tags are highly
fluorescent which disrupts and slows the scanning process.
Do your best to conceal these tags or turn them on edge so that are not scannable by the
instrument.
Any use of other displays or jewelry box inserts to scan diamond set jewelry will generally
be unsuccessful. Most of these inserts are made of highly fluorescent materials which will
disrupt the scanning process.
When there are large tags or display boxes showing on the tray the length of the scan time
will increase as the machine tries to scan them because of their fluorescence.


