


Inspection, Maintenance and Adjustment
4-56
5.
Drain hydraulic oil from tank into a container capable of
holding 280 liters (74 U.S. gal.). After draining tank, install
drain plug.
NOTE:
Used filter and used oil should always be
disposed of according to local regulations.
6.
Carefully remove bolts and cover (2, Figure 104) from top
of hydraulic oil tank. There is a spring (3) under the cover
that will force the cover up.
7.
Remove spring (3, Figure 104) and strainer (5), by pulling
on rod (4).
8.
Clean inside and outside of strainer. Replace strainer if it is
broken.
9.
Position strainer (5, Figure 104) on boss portion of suction
pipe (6).
NOTE:
Measurement "A" is 787 mm (30.98 in).
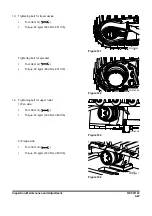
10. Fill the hydraulic oil tank. Check level using sight gauge on
side of tank.
11. Place spring (3, Figure 104) on rod (4) and assemble cover
(2).
12. After replacing and cleaning the hydraulic oil, filter and
strainer, vent the system. See “Venting and Priming
Hydraulic System” on page 4-89.
13. Check level of hydraulic oil tank. (See page 4-15)
FG015797
Figure 102
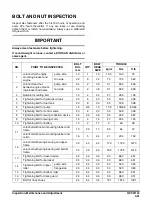
IMPORTANT
Be careful of squirting oil when removing drain plug.
HAOC411L
A
Figure 103
1
2
3
4
5
6
ARO1720L
Figure 104
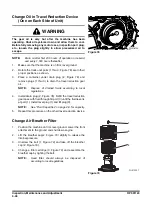
IMPORTANT
When the hydraulic breaker is being used, due to the
higher heat generated by this unit, use replacement
intervals recommended under the “Hydraulic Oil and
Filter Service Intervals” on page 3-36.
Summary of Contents for DX700LC
Page 2: ......
Page 72: ...OP001120 Safety 1 66 ...
Page 142: ...OP001121 Operating Controls 2 70 ...
Page 188: ...OP001122 Operation 3 46 ...
Page 197: ...OP001123 4 9 Inspection Maintenance and Adjustment ...
Page 282: ...OP001123 Inspection Maintenance and Adjustment 4 94 ...
Page 298: ...OP000030 Troubleshooting 6 6 ...
Page 301: ...OP001125 7 3 Specification ...
Page 308: ...OP001125 Specification 7 10 ...
Page 314: ...950106 00012E Index 8 6 ...


