Page 106
Chapter 5
Reference
C
HANNEL
C
HANGES
D
ISH
DVR F
EATURES
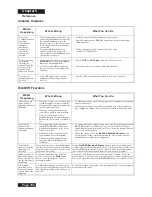
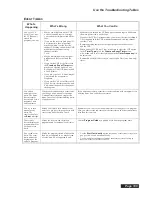
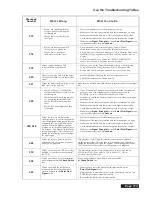
What’s
Happening
What’s Wrong
What You Can Do
You enter
a channel number
you want.
The channel
changes,
but the new
channel isn’t
exactly the
channel you
entered.
•
Maybe you made a mistake when you
entered the channel number, or maybe
the channel number you entered
doesn’t work. If so, the receiver tunes
to the channel closest to the channel
you entered.
If you entered the number for a
channel you haven’t bought, the
receiver tunes to the channel and gives
you the choice to buy it.
•
Carefully enter the channel number you want again.
•
Press the remote control
RECALL
button to go back to the previous
channel number.
•
To buy a channel, call the Customer Service Center
at 1-800-333-DISH (3474).
You’re scanning
up or down
through the
channels, and the
receiver skips
channels you
know you bought.
•
If you apply a Favorites List that’s not
All Chan
, the receiver skips channels
that aren’t on the applied list.
•
If you hide adult channels and lock
the receiver, the receiver skips adult
channels.
•
Press
GUIDE
until
All Chan
is the active Favorites List.
•
Unlock the receiver so it doesn’t skip adult channels.
The receiver
changes channels
by itself.
•
Stray UHF signals from a nearby
neighbor are interfering with your
receiver.
•
Install a 10 dB attenuator as described in
Attach an Attenuator
.
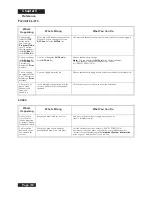
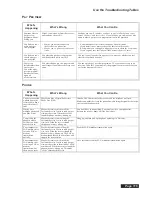
What’s
Happening
What’s Wrong
What You Can Do
You find you can’t
watch part of a
program you’re auto
recording.
•
If the receiver runs out of room to auto
record a program, it starts to erase the
oldest part of the program to make room
for new audio and video.
•
When you change the channel, you
erase what’s stored in auto recording.
•
You
can’t
watch part of a “live”
program that hasn’t been broadcast yet,
because the receiver hasn’t recorded it
yet.
•
To make sure you can watch all of a program, on-demand record it instead
of auto recording it.
•
If you want to be able to watch all of a program you’re auto recording,
don’t change the channel. You can only auto record for about one hour.
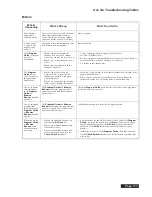
You find the
receiver didn’t
on-demand record
a program.
•
Maybe you didn’t press the remote
control
RECORD
button while you
watched the program or set an
Event
Timer
to record it.
•
Maybe the receiver ran out of room
to on-demand record the program.
•
You may have had a signal outage
caused by bad weather during the
recording.
•
To on-demand record a program, you
must
either press the remote control
RECORD
button
or
set an
Event Timer
. If you set an
Event Timer
to
record the program, maybe the
Event Timer
was not set up right. See the
Event Timers
table for help.
•
Check the “time Left” on the
DishDVR Recorded Events
menu.
If you “protect” many recorded programs, the receiver may not have
enough room to record any new programs.
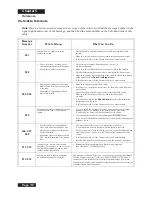
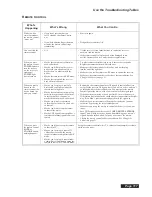
You find the
receiver is missing
programs you
recorded.
If you don’t “protect” a recorded program,
and the receiver needs room to record a new
program, it may record over that recorded
program to have room.
Use the
DishDVR Recorded Events
menu to “protect” an on-demand
recorded program. This means the receiver will ask you before it records over
that recorded program. But note, if you “protect” many recorded programs,
the receiver may not have enough room to record any new programs.
When you open a
recorded program’s
info menu, some of
the options seem to
be missing.
You see menu options
only
when they
work.
For example
, the
Start
option
doesn’t show up unless you select a
recorded program.
You can use
only
the options you see on the menu. You won’t see all the
options at once. You’ll never see a “Record” option; to record a program you
must either
press the remote control
RECORD
button or set an
Event Timer
.
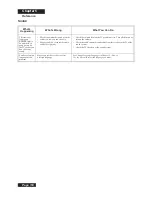
On-demand
recording stores
only one program,
or only part of one
program.
On-demand recording works by program
unless you set a manual event timer to start
and stop the recording at the times you set
yourself.
To record more than one program, or to record parts of one or more programs,
set a manual event timer.
Summary of Contents for Platinum DishPVR 501
Page 1: ...ATTENTION Be sure to review the Read Me First information on the first page ...
Page 36: ...Chapter 2 Page 30 Parts of the System Notes ...
Page 88: ...Chapter 3 Page 82 Using the System Notes ...
Page 110: ...Page 104 Chapter 4 Installation Instructions Notes ...
Page 130: ...Page 124 Chapter 5 Reference Notes ...
Page 148: ......

