1 Getting Started
AIM User’s Manual
8
Display
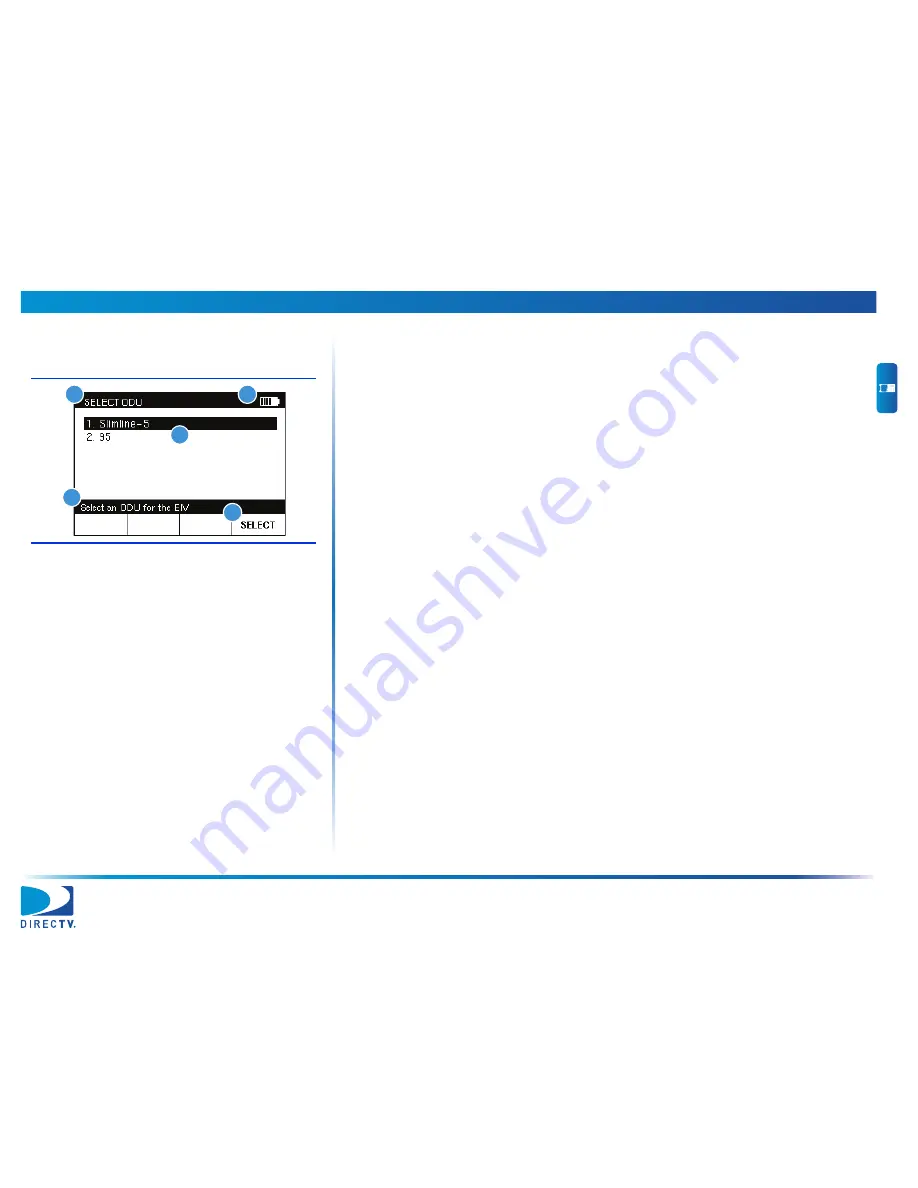
The AIM has a large LCD display with a backlight for easy readability. Each screen
that appears on the display has the following:
1 Title bar:
Indicates the screen that is displayed.
2 Battery icon:
Indicates the power level of the battery.
3 Main area:
Shows information about the task being performed.
4 Message bar:
Provides: (a) instructions to guide you through the task being
performed; or, (b) status messages.
5 Softkey labels:
Indicate options that vary based on the screen shown. To select
an option, press the button below that option.
Buttons
The following buttons let you interact with the meter:
4 softkeys:
Select options that correspond to the on-screen labels above the
buttons.
4 arrows:
Let you navigate up and down to select an option in a list, as well as
right or left when entering information.
OK:
Selects the option highlighted on the screen.
10 alphanumeric buttons:
Let you enter information or select an option in a
list.
Back:
Lets you go back to the previous screen.
Fn:
Lets you quickly change the display contrast, display brightness, and volume.
CONFIG:
Lets you view, delete and transfer records, change meter settings, and
upgrade the meter’s firmware. (For more, see
page
21
,
page
65
, and
page
77
.)
HOME:
Displays the HOME screen. (For more, see
page
10
.)
HELP:
Displays instructions to help you complete the task being performed.
MUTE:
Turns on and off the sound on the meter.
Figure 4 Meter Display
2
1
3
5
4


