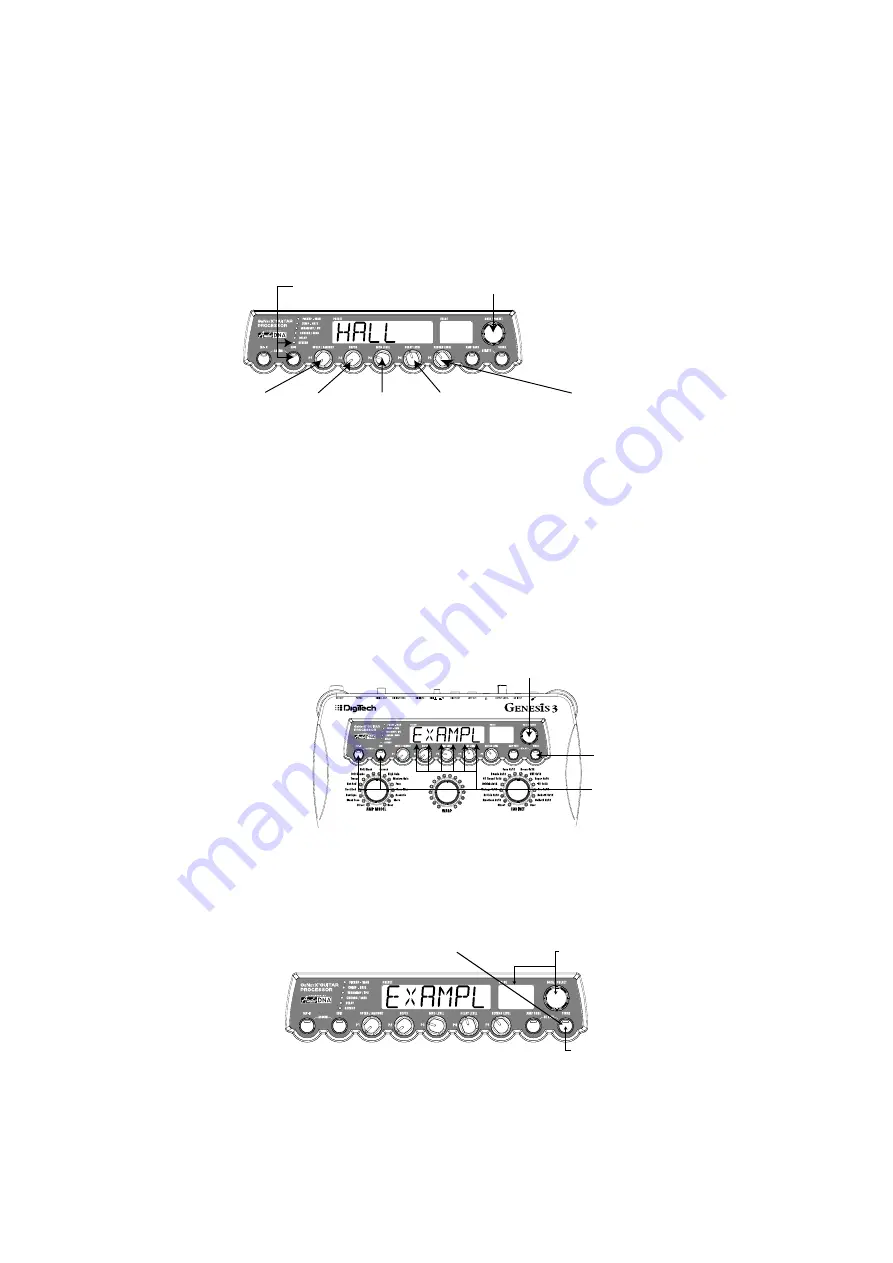
Select and Adjust the Reverb
In our example Preset we also wanted a little bit of Hall Reverb to provide some
ambience. Press the
EDIT
button again and the Reverb LED will light. If the
Display indicates that the Reverb is off (
ReVeRB
OF
), rotate the
DATA
knob until
the Display reads
REVERB
On
(Reverb On). Rotate the
P1
knob to select
HALL
(Hall) as the Reverb Type. Rotate the
P2
knob to set the Reverb Predelay to a
value of 2. Rotate the
P3
knob to set the Reverb Decay to a value of 15. Rotate
the
P4
knob to set the Reverb Damping to a value of 40. Rotate the
P5
knob to
set the Reverb Level to a value of 30.
Store the Preset
The last step that we need to do is to store our changes to a User Preset. If we
changed Presets or turned the Genesis3 off without storing these settings, it
would forget what we had done and revert back to the original Preset. Press the
STORE
button once.The first letter in the Display begins to flash which is asking
us to rename the Preset. Since this is an example Preset, let’s name the Preset
exampl
. Rotate the
DATA
knob until the flashing character in the Display is an
E
. Press the
EDIT
button and the second character begins to flash. Use the
DATA
knob again until the flashing character is an
X
. Press the
EDIT
button
again to Select the third character and change it to an
A
using the
DATA
knob.
Continue using the
EDIT
button to select the characters and the
DATA
knob
to change the characters.
Once the Display reads
exampL
, press the
STORE
button again. Now the
numbers in the red numeric display are flashing, which is asking where to store
this new preset. Rotate the
DATA
knob to select 48 as the destination. Press the
STORE
button one more time to execute the Store function.
Congratulations! You have successfully created a preset.
Elección y ajuste de la Reverb
En nuestro Preset queremos tener un pequeño toque de reverb de salón para dar algo de
ambientación acústica. Pulse otra vez el botón
EDIT
para hacer que se encienda el piloto
del efecto Reverb. Si la pantalla le indica que la reverb está desactivada (
ReVeRB
OF
), gire el
mando
DATA
hasta que vea en la pantalla
REVERB
On
(Reverb activada). Gire el mando
P1
para elegir
HALL
(salón) como tipo de reverb. Gire el mando
P2
para ajustar el pre-
retardo de la reverb a un valor de 2. Gire el mando
P3
para ajustar el decaimiento de la
reverb a un valor de 15.Gire el mando
P4
para ajustar la amortiguación de la reverberación
a un valor de 40. Gire el mando P5 para ajustar el nivel de la Reverb a un valor de 30.
Almacenamiento del Preset
El último paso que tenemos que hacer es guardar nuestros cambios en un Preset de
usuario. Si cambiamos a otro Preset o apagamos el Genesis3 sin guardar estos ajustes,
perderíamos todo lo que habíamos hecho y volveríamos al preset original. Pulse una
vez el botón
STORE
. La primera letra de la pantalla comenzará a parpadear para
indicarnos que le demos un nuevo nombre al Preset. Dado que esto es un Preset de
ejemplo, vamos a llamarle
exampl
. Gire el mando
DATA
hasta que el carácter que
parpadea en la pantalla sea una
E
. Pulse una vez el botón
EDIT
para que comience a
parpadear el segundo carácter de la pantalla. Gire de nuevo el mando
DATA
hasta que
el carácter parpadeante sea una X. Pulse nuevamente el botón
EDIT
para elegir el
tercer carácter y cambiarlo a una A usando el dial
DATA.
Continúe usando el botón
EDIT
para elegir los caracteres y el mando DATA para cambiar los caracteres.
Una vez que en pantalla tenga el nombre
exampL
, pulse de nuevo el botón
STORE
.
Ahora parpadearán los números de la pantalla numérica roja, lo que le estará pidiendo
que elija en qué lugar guardar su nuevo Preset.Gire el mando
DATA
para elegir 48 como
destino. Pulse el botón
STORE
una vez más para ejecutar la función de almacenamiento.
¡Felicidades! Acaba de crear un Preset con éxito.
Tutorial/Tutorial
27
Pulse el botón Edit hasta que
se ilumine el piloto Reverb
Press Edit Button Until
Reverb LED Lights
Gire el mando Data
para activar la reverb
Rotate Data Knob
to Turn Reverb On
Select Hall
Elija Hall
Set Predelay
Value to 2
Ajuste el valor
de pre-retardo a 2
Set Decay
Value to 15
Ajuste el
valor de
decaimiento a 15
Set Damping
Value to 40
Ajuste el valor
de amortiguación a 40
Set Reverb
Level to 30
Ajuste el nivel
de reverb a 30
2. Rotate Data Knob to Change
Alpha-numeric Characters
2. Gire el mando Data para cambiar
los caracteres alfanuméricos
1. Press Store
1. Pulse Store
3. Use Tap-It and Edit buttons
to navigate Display
3. Use los botones Tap-it y Edit
para desplazarse por las pantallas
Press Store
Pulse Store
Select Destination
Preset Using Data Knob
Elija el preset de destino
usando el mando Data
Press Store Again
Pulse de nuevo Store


