background image

Page 6.8 

Rev D  July 2014

6. Appendix 

Digital Projection 

HIGHlite Cine 260, 1080p 330


User Manual

Lens Data

Optical

110-022 ~ 110-808

110-023 ~ 110-809

110-017 ~ 110-803

110-018 ~ 110-804

throw ratio

0.77 : 1 fixed

1.16 : 1 fixed

1.45 - 1.74 :1 zoom 1.74 - 2.17 : 1 zoom

full DMD image width

0.77 : 1 

1.69 - 3.25m
(5.5 - 10.7ft)

1.16 : 1

1.21 - 5.34m
(4 - 17.5ft)

1.45 : 1

1.24 - 5.24m
(4.1 - 17.2ft)

1.74 : 1

1.26 - 5.34m
(4.1 - 17.5ft)

1.74 : 1

1.26 - 5.46m
(4.1 - 17.9ft)

2.17

 : 1

1.24 - 5.44m
(4.1 - 17.8ft)

throw distance

0.77 : 1 

1.3 - 2.5m
(4.3 - 8.2ft)

1.16 : 1

1.4 - 6.2m
(4.6 - 20.3ft)

1.45 : 1

1.8 - 7.6m
(5.9 - 24.9ft)

1.74 : 1

2.2 - 9.3m
(7.2 - 30.5ft)

1.74

 : 1

2.2 - 9.5m
(7.2 - 31.2ft)

2.17

 : 1

2.7 - 11.8m
(8.9 - 38.7ft)

lens shift vertical *
pixels (vs DMD height)) (%)

± 216
(±  0.2H) (40%)

± 216
(±  0.2H) (40%)

± 648
(±  0.6H) (120%)

± 648
(±  0.6H) (120%)

lens shift horizontal *
pixels (vs DMD width) (%)

± 96
(±  0.05W) (10%)

± 96
(±  0.05W) (10%)

± 288
(±  0.15W) (30%)

± 288
(±  0.15W) (30%)

Aperture

F/2.5

F/2.5

F/2.5

F/2.5

Max object field size

20.1mm
(0.79”)

20.1mm
(0.79”)

26.4 mm
(1.04”)

26.4 mm
(1.04”)

Effective focal length

11.6mm
(0.46in)

17.1mm
(0.67in)

21.2 - 25.8mm
(0.83 - 1.02in)

25.5 - 32.0mm
(1.0 - 1.26in)

Distortion

<035%

<0.3%

<0.5%

<0.5%

Transmission

>85%

>85%

>85%

>85%

Mechanical

Lens extension** 
(±2%)

80 mm
(3.2 in)

54 mm
(2.1 in)

24 mm
(1.0 in)

0

Weight
±0.05 kg (±0.1lb)

2.42 kg
(5.3 lb)

1.86 kg
(4.1 lb)

1.90 kg
(4.2 lb)

1.47 kg
(3.2 lb)

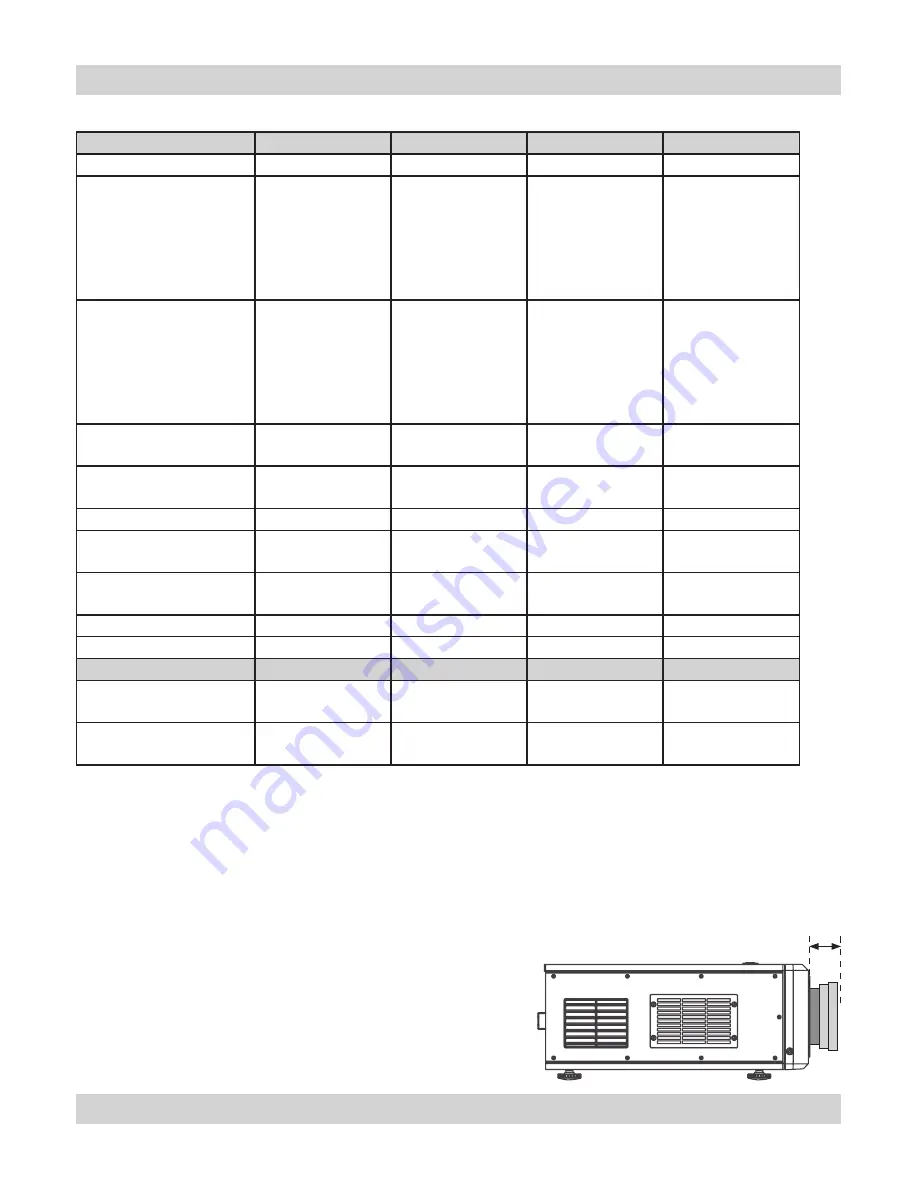
lens extension, measured 

from front of projector

*  Actual available lens shift is reduced when the lens is to be shifted 

in two directions combined (see 

Shifting the image

, in 

section 

2. Installation

).

**  Lens extension is the distance from the outer end of the lens to the 

front of the projector. It is important for calculating throw distance 

accurately (see Useful lens calculations, in section 2. Installation).

Summary of Contents for HIGHlite 1080p 330

Page 1: ...Rev D July 2014 HIGHlite Cine 260 HB HC HIGHlite 1080p 330 High Brightness Digital Video Projector 16 9 widescreen display User Manual 111 367D...

Page 2: ...Digital Projection HIGHlite Cine 260 1080p 330 User Manual...

Page 3: ...ead Trademarks IBM is a registered trademark of International Business Machines Corporation Macintosh and PowerBook are registered trademarks of Apple Computer Inc Other product and company names ment...

Page 4: ...d for this projector should be used Fitting any other lamp could damage both projector and lamp and will invalidate the warranty Take care when removing the lamp module NEVER touch the lamp or reflect...

Page 5: ...g projectors the stack MUST be vertical to ensure that the stresses are distributed to all four chassis corners Before installation make sure that the surface ceiling or rigging that is to support the...

Page 6: ...mits for a Class B digital device pursuant with Part 15 of the FCC Rules These limits are designed to provide reasonable protection against harmful interference when the equipment is operated in a res...

Page 7: ...UK Registered in England No 2207264 Registered Office as above Tel 44 0 161 947 3300 Fax 44 0 161 684 7674 Email enquiries digitalprojection co uk service digitalprojection co uk Web Site www digital...

Page 8: ...Page viii Rev D July 2014 Important Information Digital Projection HIGHlite Cine 260 1080p 330 User Manual...

Page 9: ...lectrical and Electronic Equipment WEEE Directive vi Digital Projection Contact details vii 1 Introduction What s in the box 1 2 Key features of the projector 1 3 Getting to know the projector 1 4 Fro...

Page 10: ...ing an input signal or test pattern 3 3 Input 3 3 Test pattern 3 3 Adjusting the lens 3 3 Adjusting the projected image 3 4 Aspect ratio 3 4 Image quality settings 3 4 Switching the projector off 3 4...

Page 11: ...r Temperature 4 16 Colour Gamut 4 17 Dynamic Black 4 17 Adaptive Contrast 4 17 Fine Sync 4 18 RGB Adjust 4 19 System menu 4 20 Language 4 20 Source Enable 4 21 Menu Position 4 22 Blank Screen 4 22 Aut...

Page 12: ...6 Part numbers 6 6 Optical 6 6 Electrical 6 7 Physical 6 7 Video formats supported 6 10 Input connections 6 12 HDMI 1 2 inputs 6 12 Composite video input 6 12 S Video input 6 12 RGB input 6 13 Compon...

Page 13: ...Rev D July 2014 Page 1 1 1 Introduction Contents What s in the box 1 2 Key features of the projector 1 3 Getting to know the projector 1 4 Front view 1 4 Rear view 1 4...

Page 14: ...e detailed information about lenses see Screen size vs throw distance in section 2 Installation Only one power cable dependent on the destination territory will be supplied with the projector Importan...

Page 15: ...to 120 vertical Multiple lens options provide further flexibility with a throw range from 77 to 6 76 1 Connectivity includes two HDMI inputs as well as RGB via D 15 component composite and S Video inp...

Page 16: ...mation about how to change the lamp or the filter see section 5 Maintenance For information about controls and indicators see section 4 Controlling the projector Getting to know the projector Front vi...

Page 17: ...imum viewing position 2 6 Screen size vs throw distance 2 7 Calculating screen width and throw distance 2 7 Choosing a lens 2 8 Choosing a lens using the lens charts 2 9 Full width images including 2...

Page 18: ...tted with an anamorphic lens Thus an image with an aspect ratio of 2 35 1 can be displayed using the full 16 9 resolution of the DMD 4 3 the image is scaled to fit a 4 3 screen using the full height o...

Page 19: ...same scale as other images from the same source If you have an anamorphic lens the Theaterscope setting would be a much better option Because it uses the whole of the DMD it will be a much brighter im...

Page 20: ...and height H The example calculations below show how to convert diagonal sizes in inches into width and height at various aspect ratios 2 35 1 Scope W D x 0 92in D x 023m H D x 0 39in D x 01m 1 85 1 W...

Page 21: ...you are able to display the full image on your screen If you have insufficient height or width you will have to reduce the overall image size in order to display the full image on your screen Notes 2...

Page 22: ...ange from the face of the screen Notes The projector should be installed as close to the power outlet as possible The power connection should be easily accessible so that it can be disconnected in an...

Page 23: ...Screen Width Throw Distance Lens Throw Ratio The following lens calculations may be useful Throw ratio Throw distance Screen width Throw ratio factor TRF DMD width in pixels 1920 image width in pixel...

Page 24: ...High Contrast 0 77 1 fixed lens 110 808 110 022 1 16 1 fixed lens 110 809 110 023 1 45 1 74 1 zoom lens 110 803 110 017 1 74 2 17 1 zoom lens 110 804 110 018 2 17 2 9 1 zoom lens 110 805 110 019 2 9 4...

Page 25: ...the 2 9 4 34 1 zoom lens would be best suited For the same screen size at a distance of 20m the 4 34 6 76 1 zoom lens would be best suited if you need to be more precise then use the calculations on...

Page 26: ...s your application if you need to be more precise then use the calculations on the page immediately following the lens charts 1 16 1 fixed lens 110 023 110 809 1 74 2 17 1 zoom lens 110 018 110 804 2...

Page 27: ...tension values given below Calculate the throw ratio required Throw ratio Throw distance Screen width x TRF Choose a lens with the required throw ratio from the list at the bottom of the page Check fr...

Page 28: ...en clean the surface using a lens paper Fitting the lens Remove the two screws securing the front cover to the body of the projector Push the front cover downwards then pull it away from the projector...

Page 29: ...cratch the lens surfaces If you do accidentally touch a lens then clean the surface using a lens paper Still holding down the tab push the lens in firmly as far as it will go Rotate the lens clockwise...

Page 30: ...For images which do not use the full height or width extra shift may be possible up to the limit of the lens mount movement fixed lenses vertical pixels horizontal pixels vertical vs DMD height horizo...

Page 31: ...r level should be made by turning the four feet under the chassis Ideally the projector should be positioned perpendicular to the screen and the lens shift controls used to align the image with the sc...

Page 32: ...tallations Stacking projectors The projector is capable of supporting the weight of up to three other projectors safely The stack should be positioned vertically and perpendicular to the screen and th...

Page 33: ...he projector Signal Inputs The following inputs are available HDMI 1 2 HDCP compliant digital video inputs from HDMI or DVI sources RGB 15 pin D type VGA style input from personal computer Component 1...

Page 34: ...Page 2 18 Rev D July 2014 2 Installation Digital Projection HIGHlite Cine 260 1080p 330 User Manual Input connection examples continued...

Page 35: ...or obstructions such as walls or cabinet doors you can connect an external IR repeater to the Remote control input and position its IR sensor within range of the operator RS232 and LAN connections Al...

Page 36: ...mains connector in firmly then push the lock back to secure the cable Switch on at the switch next to the power connector Notes Use only the power cable provided Ensure that the power outlet includes...

Page 37: ...d projector 3 2 Switching the projector on 3 2 Inserting batteries into the remote control 3 2 Selecting an input signal or test pattern 3 3 Input 3 3 Test pattern 3 3 Adjusting the projected image 3...

Page 38: ...tion 2 of the User Manual Installation For more detailed information about using the control keys on the remote control or the projector control panel using the menus see section 4 of the User Manual...

Page 39: ...layed Test pattern If you have no video source connected to the projector then you can display a test pattern as follows Press on the remote control until the desired test pattern is displayed Notes F...

Page 40: ...l go out and the adjustment key must be pressed again to end the adjustment before 5 seconds has elapsed press a different adjustment key or press the key again Always allow the lamp to cool for 5 min...

Page 41: ...6 Source 4 6 Aspect ratio 4 6 User memory 4 6 Image quality settings 4 7 Example Brightness screen control 4 7 Test pattern 4 7 Lens 4 7 Example Lens Shift control 4 7 Using the menus 4 8 Navigating...

Page 42: ...sets 4 19 Gains 4 19 System menu 4 20 Language 4 20 Source Enable 4 21 Menu Position 4 22 Blank Screen 4 22 Auto Power On 4 22 Auto Power Off 4 22 Lamp Power 4 23 Rear Projection 4 23 Ceiling Mode 4 2...

Page 43: ...rotocol in section 6 Appendix For information about how to connect the projector see Connecting the projector in section 2 Installation and Connections in section 6 Appendix Many features are controll...

Page 44: ...ust to the parameters of the signal and display it If you select a source that is NOT connected or active the projector will continue searching through the input sources until it finds a valid signal...

Page 45: ...features are controlled from the menus using the menu navigation keys on the remote control or the projector control panel For more information about using the menus see later in this section Using th...

Page 46: ...a second time to confirm your intention to switch to STANDBY mode The lamp will switch off and the power indicator on the control panel will flash blue for approximately 30 seconds until the lamp has...

Page 47: ...Press the key repeatedly to cycle through the Test patterns in the following order White Black Red Green Blue Cyan Magenta Yellow Chequerboard Greyscale Alignment grid White Lens Press the key repeate...

Page 48: ...us Navigating menus and submenus The menus are organised into five pages When the menus are in use the menu page headings are always visible at the top of the menu panel Most menu items can be adjuste...

Page 49: ...e projector control panel Use the and keys to select the Main menu page To select a menu item use the and keys until the item is highlighted Aspect Ratio Use the and keys to select from 16 9 the image...

Page 50: ...ved Brightness Contrast Saturation Hue Sharpness Noise Reduction Color Space Video Standard Gamma Colour Temperature Color Gamut Brilliant Color Adaptive Contrast RGB Offsets RGB Gains Lamp Power To r...

Page 51: ...on from 0 to 200 To return to the Main menu press once Hue Hue is the ratio of red to green in the image Decrease this setting to shift the hue toward red increase it to shift the hue toward green Pre...

Page 52: ...200 To return to the Main menu press once Noise Reduction Press or once After the first press the Noise reduction adjustment bar will appear Use the and keys to adjust the Noise reduction from 0 to 2...

Page 53: ...different menu press MENU once or twice so that no items are highlighted then use the and keys to select a different page To exit from the menus completely you may need to press up to three times Imag...

Page 54: ...vailable due to the effect of settings made in other menus or due to the type of input signal To determine what is the correct colour space to use consult the user manual for the video source Advanced...

Page 55: ...cent level of contrast whilst maintaining good detail in the darkest and lightest areas of the image Use the and keys to select from CRT gamma of 2 5 Film gamma of 2 2 Video similar to Film but improv...

Page 56: ...0K 7500K 9300K Native ColorMAX User 1 Applies the Colour Temperature settings made externally using the DP Userware on a personal computer ColorMAX User 2 Applies the Colour Temperature settings made...

Page 57: ...ed green and blue and secondary yellow cyan and magenta color component used to generate the image Press ENTER or SELECT to see the Color Gamut submenu similar to the Color Temperature menu shown on t...

Page 58: ...Position fine tunes the vertical position of the image H Position fine tunes the horizontal position of the image Tracking adjusts the frequency of the pixel sampling clock so that all pixels generate...

Page 59: ...om 0 to 200 Gains Use the and keys to adjust the Gain from 0 to 200 To return to the Advanced menu press once Advanced menu continued Notes To select a different menu press MENU once or twice so that...

Page 60: ...ol panel Use the and keys to select the System menu page To select a menu item use the and keys until the item is highlighted Language This product is available only in English at present Notes To sel...

Page 61: ...ach source use the and keys to select from On the selected source will be included in an automatic input source search Off the selected source will not be included in an automatic input source search...

Page 62: ...p imediately Off When power is connected the projector goes into Standy mode and does not start until POWER ON on the remote control or POWER on the projector control panel is pressed Auto Power Off W...

Page 63: ...image is reversed left to right Off Ceiling Mode Use the and keys to select from On Projected image is reversed top to bottom Off Logo Display Use the and keys to select from On The Digital Projectio...

Page 64: ...RS232 or LAN For more information about remote commands see Remote communications protocol in section 6 Appendix Control menu To display the menus press MENU on the remote control or the projector co...

Page 65: ...o that no items are highlighted then use the and keys to select a different page To exit from the menus completely you may need to press up to three times Lens Control Press ENTER or SELECT The Lens s...

Page 66: ...a source has been disabled in the System menu then a key programmed with that source will have no effect Keys 1 to 5 The to keys on the remote control can each be programmed to switch to one of the s...

Page 67: ...3 trigger occurs when 4 3 aspect ratio is selected 4 3 Narrow trigger occurs when 4 3 Narrow aspect ratio is selected RS232 trigger output follows the On or Off setting specified in a trig 1 or trig...

Page 68: ...ou want to do then either make a record of all settings first or select No then press ENTER or SELECT Service menu To display the menus press MENU on the remote control or the projector control panel...

Page 69: ...To turn the test pattern Off press any other key Altitude For use at high altitudes where the air is thinner the fan speed can be increased Use the and keys to select from Low normal speed fan High hi...

Page 70: ...Page 4 30 Rev D July 2014 4 Controlling the projector Digital Projection HIGHlite Cine 260 1080p 330 User Manual...

Page 71: ...Rev D July 2014 Page 5 1 5 Maintenance Contents Changing the lamp module 5 2 Cleaning the fans 5 3 Cleaning or replacing the air filter 5 4...

Page 72: ...here are no user serviceable parts inside the lamp module The whole module should be replaced Only lamps supplied by Digital Projection and intended for this projector should be used Fitting any other...

Page 73: ...as shown below Notes Always switch the projector OFF before cleaning the fans Always allow the lamp to cool for 5 minutes before disconnecting the power moving the projector changing the lamp cleaning...

Page 74: ...ilter to dry before reuse Replace the filter pushing it firmly into place Refit the filter cover Notes Always switch the projector OFF before cleaning the filter Always allow the lamp to cool for 5 mi...

Page 75: ...video input 6 12 S Video input 6 12 RGB input 6 13 Component 1 input 6 13 Component 2 input 6 13 Control connections 6 14 Wired Remote control connection 6 14 Trigger 1 2 output 6 14 Serial control i...

Page 76: ...any obstruction See section 5 Maintenance It is possible to increase the speed of the fans for use in a high altitude environment See section 4 Controlling the projector System menu No image is displa...

Page 77: ...from a computer Check that the LAN or serial cable is connected correctly Check that the baud rate is set correctly if using a serial cable See this section 6 Appendix Connections Check the Projector...

Page 78: ...Manual Error codes If the projector detects an error the red Issue indicator will flash as shown in the chart below For example if the lamp door is left open the red indicator will flash twice followe...

Page 79: ...Rev D July 2014 Page 6 5 Digital Projection HIGHlite Cine 260 1080p 330 User Manual 6 Appendix Dimensions All dimensions in mm unless otherwise stated...

Page 80: ...rightness High Contrast 0 77 1 fixed lens 110 808 110 022 1 16 1 fixed lens 110 809 110 023 1 45 1 74 1 zoom lens 110 803 110 017 1 74 2 17 1 zoom lens 110 804 110 018 2 17 2 9 1 zoom lens 110 805 110...

Page 81: ...Power consumption 260 HB HC 450W max 2W in Standby LAN off 1080p 330 500W max 2W in Standby LAN off International Regulations Meets FCC Class B requirements Meets EMC Directives EN 55022 EN 55024 Mee...

Page 82: ...6H 120 lens shift horizontal pixels vs DMD width 96 0 05W 10 96 0 05W 10 288 0 15W 30 288 0 15W 30 Aperture F 2 5 F 2 5 F 2 5 F 2 5 Max object field size 20 1mm 0 79 20 1mm 0 79 26 4 mm 1 04 26 4 mm 1...

Page 83: ...648 0 6H 120 648 0 6H 120 lens shift horizontal pixels vs DMD width 288 0 15W 30 288 0 15W 30 288 0 15W 30 Aperture F 2 5 F 2 5 F 2 5 Max object field size 26 4 mm 1 04 26 4 mm 1 04 26 4 mm 1 04 Effec...

Page 84: ...68 85 03 x x x VESA DMT 1024x768 70 1 x x x VESA DMT 1280x720 47 95 x x x VESA GTF 1280 x 768 60 x x x VESA DMT 1280 x 768 60 x x x VESA DMT Reduced Blanking 1280 x 768 75 x x x VESA DMT 1280 x 768 85...

Page 85: ...x x SMPTE 293M CEA 861 D 576p 50 x x x x x ITU R BT 1358 CEA 861 D HDTV 1035i 60 x x x x x SMPTE 260M 1080i 50 x x x x x SMPTE 274M CEA 861 D 1080i Aus 50 x x x x x SMPTE 295M 1080i 59 94 x x x x x S...

Page 86: ...ta 1 Shield 6 TMDS Data 1 7 TMDS Data 0 8 TMDS Data 0 Shield 9 TMDS Data 0 10 TMDS Clock 11 TMDS Clock Shield 12 TMDS Clock 13 CEC 14 not connected 15 SCL DDC Clock 16 SCA DDC Data 17 DDC CEC Ground 1...

Page 87: ...4 V Sync 15 SCL Component 1 input 3 x RCA phono connectors RGsB YPbPr YCbCr Green Sync Y Y Blue Pb Cb Red Pr Cr RGBS connect Sync to Video input Component 2 input 5 x 75 ohm BNC RGBHV RGsB YPbPr YCbCr...

Page 88: ...rate 38400 bps Data length 8 bits Stop bits one Parity none Flow control none Notes Trigger outputs are normally at 0V and rise to 12V when triggered All of the projector s features can be controlled...

Page 89: ...ny one time Use a straight cable to connect to a hub or network or a crossed cable as shown here to connect ONLY to a computer directly LAN connection TCP Port number 7000 Default IP address 192 168 0...

Page 90: ...ations commands All commands end with an ascii Carriage Return character Key Commands Key commands are used to simulate remote control key presses and use the following format ky keyname CR Example ky...

Page 91: ...o source 2 0x8D src 3 Switch the active source to source 3 0x8E src 4 Switch the active source to source 4 0x8F src 5 Switch the active source to source 5 0x93 osc sw Switch to the next Overscan mode...

Page 92: ...t Subtracts 1 from the current value Execute none Performs an action Example op aspect 1 CR sets the aspect ratio to Theaterscope op aspect CR asks what is the current aspect ratio op bright CR increm...

Page 93: ...4 RGB Video video stand 0 Auto 1 NTSC 2 PAL 3 SECAM gamma 0 CRT 1 Film 2 Video 3 Punch 4 Graphics color temp 0 5500K 1 6500K 2 7500K 3 9300K dlp frame 0 Auto 2 48 Hz 3 50 Hz 4 60 Hz color gamut 0 Auto...

Page 94: ...l mode 0 Off 1 On logo disp 0 Off 1 On 1 key 0 HDMI 1 1 HDMI 2 2 RGB 3 YPrPb 1 4 YPrPb 2 5 S video 6 Video 2 key 0 HDMI 1 1 HDMI 2 2 RGB 3 YPrPb 1 4 YPrPb 2 5 S video 6 Video 3 key 0 HDMI 1 1 HDMI 2 2...

Page 95: ...ring act source 0 HDMI 1 1 HDMI 2 2 RGB 3 YPrPb 1 4 YPrPb 2 5 S video 6 Video Source Enable h refresh number KHz v refresh number Hz pixel clock number MHz signal string lamp hours number total hours...

Page 96: ...vert offset Shift Up Shift Down horiz offset Shift Right Shift Left ir sw 0 Off 1 On IR Remote Control enable eco net pow 0 RS232 1 LAN Serial LAN switch op net ipaddr LAN IP address Default address...

Page 97: ...our browser at the projector by typing the LAN IP Address into the address bar then press the Enter key The embedded IP Configuration webpage should appear Set the addresses as required then click on...

Page 98: ...Digital Projection HIGHlite Cine 260 1080p 330 User Manual...

Reviews: