background image

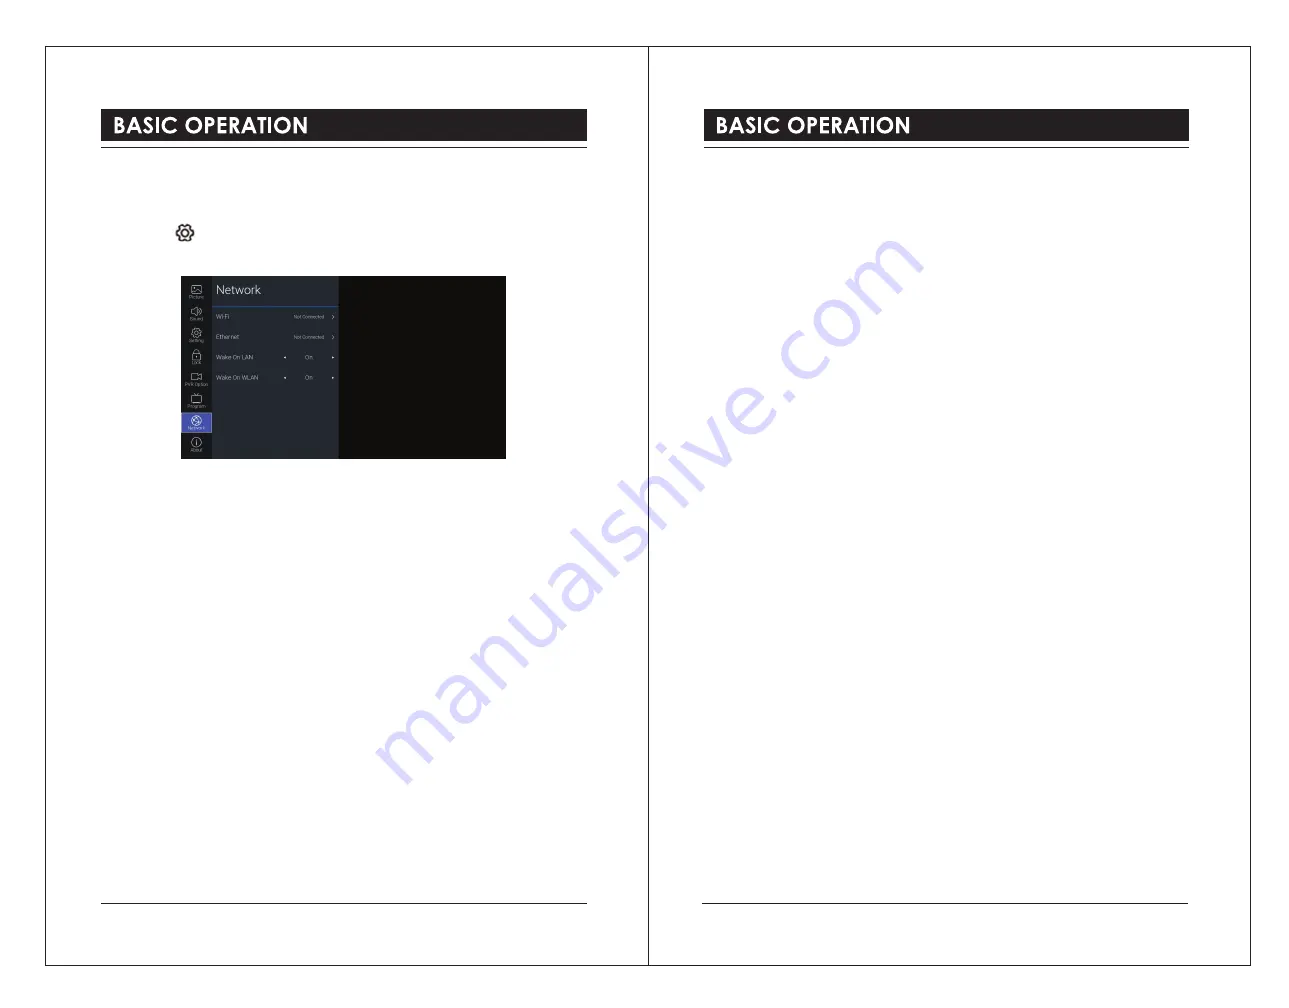
Network 

Adjust all your network setting and check your connection if you are having connection 
problems.

1). Press the         button to display the main menu.

2). Press the 

▲▼

buttons to select 

Network

 and then press the 

OK

 button.

3). Press the 

▲▼

buttons to select following setting options. Press the 

OK

 button and then 

press the 

◄►

buttons to adjust each option’s setting.

Wi-Fi

The built-in wireless LAN device allows you to access the Internet and enjoy the benefits of 
Networking in a cable-free environment.

Auto Scan

The TV will automatically scan and show all available wireless networks in the area. Choose 
the desired network and press the 

OK

 button, then enter Network Security Key.

Manual Input

Choose to manually setup Static IP information.
Manual Setup is only for advanced users and network where the network client devices need 
specific setting to access the network.

IP

Display the connected wireless network IP address.

Netmask

Display the connected wireless network subnet mask.

Gateway

Display the connected wireless network gateway.

DNS

Display the connected wireless DNS.

Ethernet

Connect your TV to your network by connecting the LAN port on the back of your TV to an 
external modem or router using a LAN (Ethernet/Cat 5) cable.

Protocol

Select wired network protocol:

 IPv4 / IPv6.

Configuration

Select wired network IP acquisition method: 

DHCP / Static.

IP

Set the wired network IP address. (Configuration is set to Static)

Prefix

Set the number of bits in the wired network subnet mask. (Configuration is set to Static)

Gateway

Set the wired network gateway. (Configuration is set to Static optional)

DNS

Set the wired network DNS. (Configuration is set to Static optional)

Connect

Connect to a wired network.

Wake On LAN

Turn on / off the TV wake-on-LAN.

Wake on WLAN

Turn on / off the TV wake-on-WLAN.

30

31

Summary of Contents for LDS-3276

Page 1: ...Model LDS 3276 To obtain the best performance and safety please read this manual carefully Please keep this manual for future reference ENGLISH User Manual...

Page 2: ...ection 4 REMOTE CONTROLLER 5 SOURCE 6 BASIC OPERATION 6 Initial Setup 6 HOME Menu 11 Setting 11 Picture 14 Sound 16 Programme 17 Lock 26 PVR Option DTV Mode 28 Network 30 Other Information 32 Using th...

Page 3: ...e this TV near water Only clean the device with a damp cloth Do not block any ventilation openings Set up the television in accordance with the supplied quick guide and these operating instructions La...

Page 4: ...a input of this unit for best reception b If the antenna cable in your home is other than the above two or you have problems in installing the antenna please contact your dealer Notes a Current outdoo...

Page 5: ...firmware software network download update instructions will display Initially the default focus will be on the text description section Press the buttons will drop the text to the bottom Press the bu...

Page 6: ...e Netflix setting press the EXIT button to leave and press the button and select Programme then select Auto Tuning for TV tuning Tuning in Your TV If you select Skip option in Netflix setting page the...

Page 7: ...on the TV use the buttons to select TV Then press the OK button 2 In DVB Tuning Type page use the buttons to select DVBC 3 Your TV will now start scanning for all the available TV channels This opera...

Page 8: ...trolling a TV set set top box and DVD player using only the remote control of the TV CEC also allows individual CEC enabled devices to command and control each other without user intervention Make sur...

Page 9: ...ture mode 1 Press the button to display the main menu 2 Press the buttons to select Picture menu and then press the OK button 3 Press the buttons to select following picture options Press the OK butto...

Page 10: ...eam for the AD Audio Description when it is sent along with the main audio from the broadcaster Set to Off for normal broadcasting sound coming out from speakers Set to On to activate the description...

Page 11: ...ill show the progress of the tuning and the number of channels found 9 If you select DTV ATV mode and want to skip the DTV tuning press the OK button to interrupt the tuning half way A pop up screen w...

Page 12: ...ng channel type Free Scramble Free Scramble Service Type Selects the channel service type DTV Radio Radio DTV Search Start searching 5 When the signal has been tuned the picture and signal strength wi...

Page 13: ...s to start the manual tuning Fine Tune Press to make manual fine tuning adjustments Save Save the setting Sound System Selects the sound system BG I DK L M Color System Selects the color system PAL SE...

Page 14: ...atellite antennas through the combined single antenna cable Use the buttons to advance settings 5 Press the BACK button to return to the previous menu Press the EXIT button to exit the menu Signal Inf...

Page 15: ...entered when you access Auto Tuning Manual Tuning LNB Setting Reset 6 Press the BACK button to return to the previous menu Press the EXIT button to exit the menu Set Password 1 Press the button to di...

Page 16: ...main menu 2 Press the buttons to select PVR Option menu and then press the OK button 3 Press the buttons to select following setting options Press the OK button and then press the buttons to adjust ea...

Page 17: ...es need specific setting to access the network IP Display the connected wireless network IP address Netmask Display the connected wireless network subnet mask Gateway Display the connected wireless ne...

Page 18: ...pdate USB This function is only for servicing purposes Internet Update Check Check and automatically update the software of NetReady Using the Features EPG Electronic Programme Guide DTV or Radio Mode...

Page 19: ...utton 2 If you have more the one devices connected press the buttons to select your storage device and then press the OK button 3 Press the buttons to navigate in the movie files and then press the OK...

Page 20: ...teries should not be disposed of with other household waste but should be disposed of separately As the end user it is important that you submit your used batteries to the appropriate and designated f...

Reviews: