2
1.1 Reading 2D Codes and Bar Codes
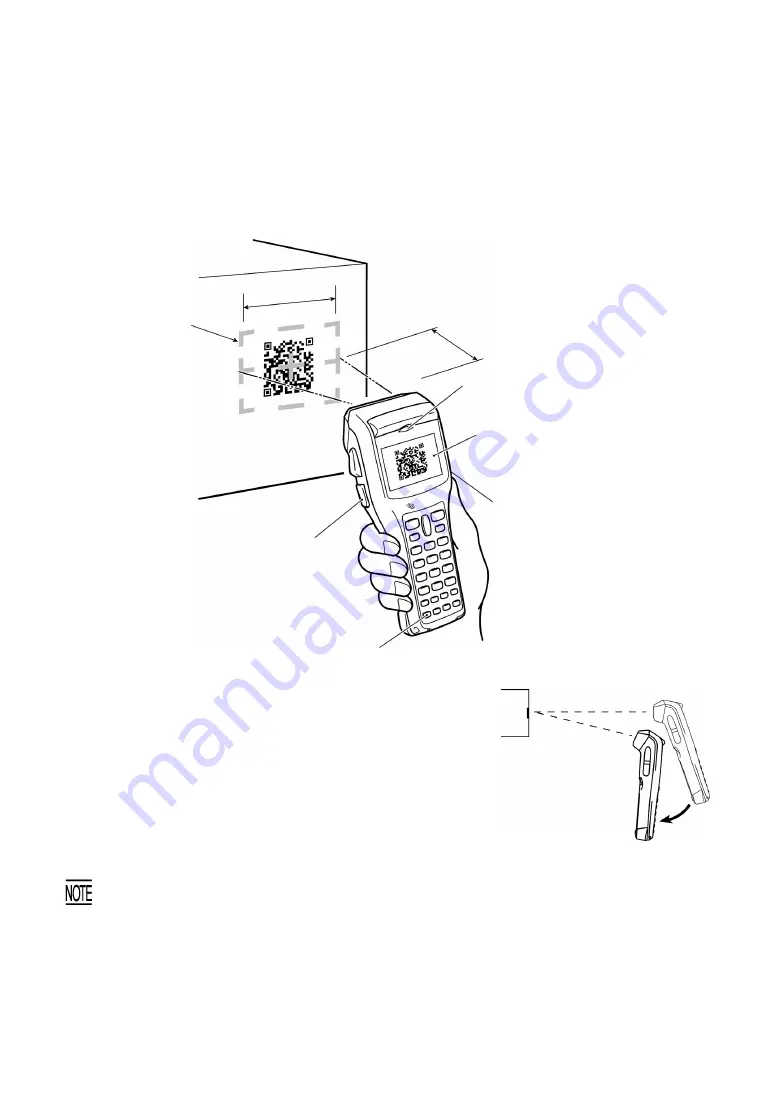
Turn the BHT on, bring the reading window to a target 2D code or bar code to be scanned, and press the
trigger switch. The BHT turns the marker beam (laser) and illumination LED on to indicate the scanning
range and scan the target code, respectively.
When the BHT has read the code successfully, the indicator LED illuminates in green and the marker
beam goes off.
• If the BHT fails to read due to specular effects or other factors,
change the scanning angle of the reading window or the distance
from codes as shown at right, and try it again. (Specular effects
occur when the reflection of the light from the code becomes
excessively strong. This can easily happen when the reflecting
surface is polished or covered with vinyl.)
• The actual scanning range is narrower than the marker beam
range. The scanning range is 2.4" (6 cm) wide by 1.6" (4 cm) high
when the scanning distance is approx. 4.3" (11 cm).
• The code reading procedure may differ depending upon the
application used, so follow the application’s manual.
• Before reading labels, clean them if stained.
• Avoid using the BHT in direct sunlight. The BHT might fail to read correctly.
• To read 2D codes or bar codes on curved surfaces, apply the BHT to the target code so that the code
comes to the center of the scanning range indicated by the marker beam.
• Depending upon the code size or cell pitch, the proper scanning distance from codes differs.
• The marker beam range should only be used as a guide. It does not assure that a code within the
marker beam range can be read.
Power key
Trigger switch (M4 key)*
Indicator LED
(Illuminates in green when the BHT has
read the code successfully.)
Trigger switch
(M3 key)*
* The trigger switch function is assigned to
both of the
M3
and
M4
keys by default.
Liquid crystal display (LCD)
Shows the scanned image of a code
lying inside the scanner's view if the
view finder is set to ON.
Scanning distance
Scanning
range
Code scanning
range indicated
by the marker
beam


