Back to Contents Page
Setting Up and Using Your Computer
Dell™ XPS™ 720 Owner's Manual
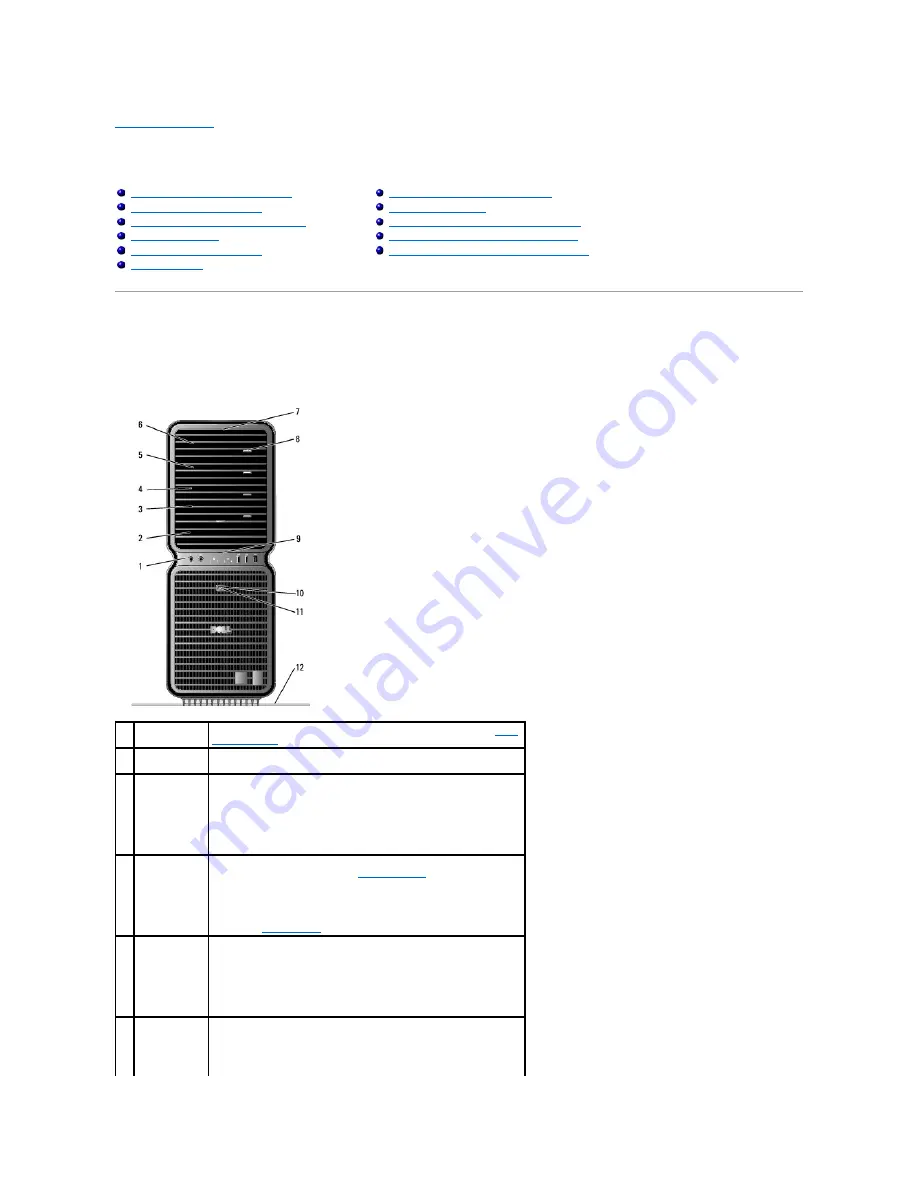
Front and Back View of the Computer
Front View
Front and Back View of the Computer
Attaching the Computer Stand
Installing Your Computer in an Enclosure
Connecting Monitors
About Your RAID Configuration
Using Multimedia
Using a Media Card Reader (Optional)
Network Setup Wizard
Transferring Information to a New Computer
Power Management Options in Windows XP
Power Management Options in Windows Vista
1
front I/O
connectors
Plug USB and other devices into the appropriate connectors (see
Front
I/O Connectors
).
2
3.5-inch drive
bays (2)
Can hold an optional Media Card Reader or floppy drive.
3-
6
5.25-inch drive
bays (4)
Can hold an optical or SATA hard drive in a 5.25-inch drive bay carrier.
NOTE:
The hard drive carrier is only for use in the 5.25-inch drive bays.
The floppy-drive/Media Card Reader and hard drive carriers are not
interchangeable.
7
front panel
LEDs (4)
Use the sequence of these diagnostics lights to help troubleshoot a
problem with your computer (see
Dell Diagnostics
).
NOTE:
The color of the front panel LEDs can be adjusted in system
setup (see
System Setup
).
8
optical drive
tray eject
button (4)
Use to eject the drive tray of an optical drive.
NOTE:
The optical drive tray eject button is not a handle. The self-
tending doors open automatically when the eject button is pressed
and the drive tray is ejected.
9
front panel
LEDs (4)
Multi-colored lights provide illumination for the front of the computer.
NOTE:
The color of the front panel LEDs can be adjusted in system


