Installing System Components
59
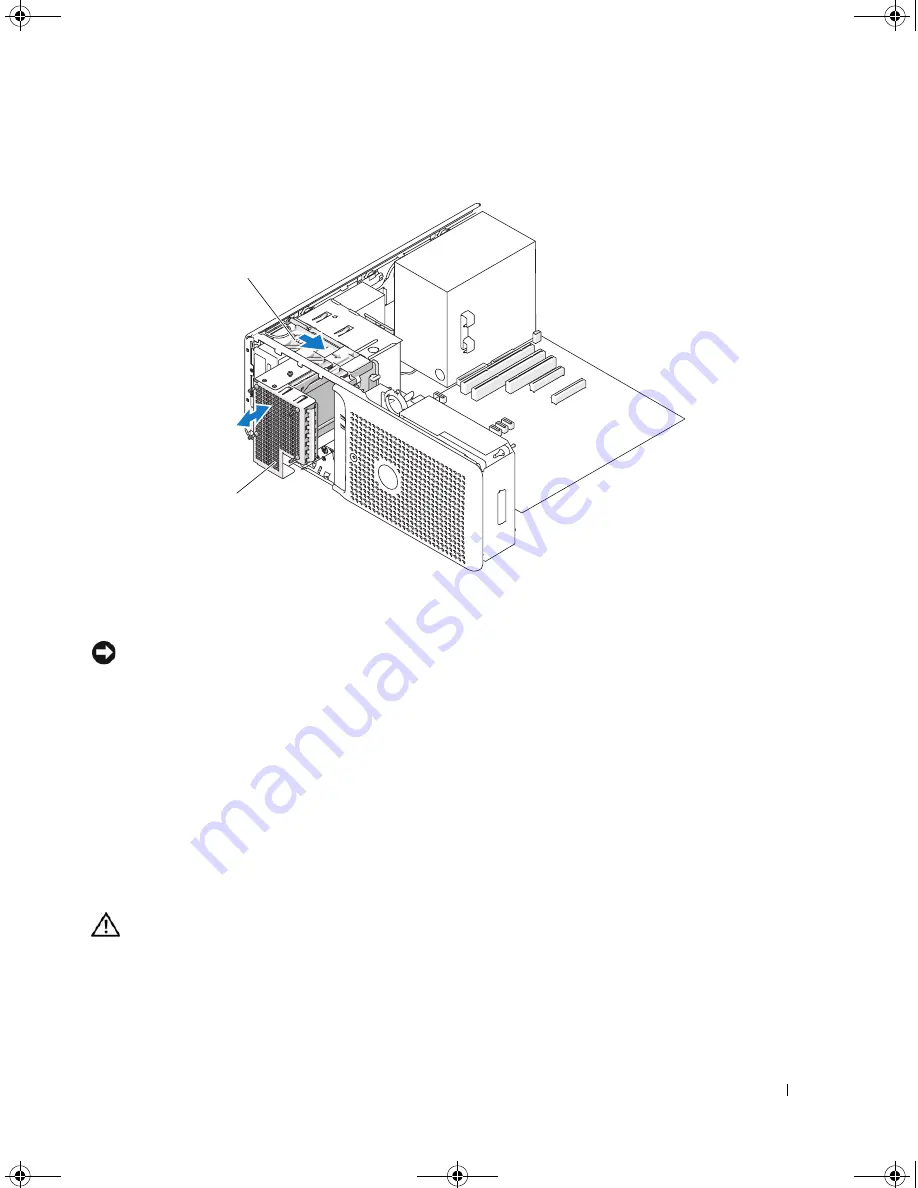
Figure 3-13.
Removing and Installing a Fourth Hard Drive
NOTICE:
If metal shields are present, they must be installed at all times while your system is in use or your system
may not function properly.
9
If you are not installing another drive in the bay, install the 5.25-inch metal shield in its place; align its
screws in the metal rails and push the shield back until it clicks into place.
10
If you are installing another drive in the bay, see "Installing an Optional Fourth Hard Drive" on page 59
or "Installing an Optical or Tape Drive" on page 68.
11
Replace the front drive bezel. See "Removing and Replacing the Front Drive Bezel" on page 46.
12
Close the system. See "Closing the System" on page 43.
13
Reconnect the system to the electrical outlet, and turn on the system and attached peripherals.
Installing an Optional Fourth Hard Drive
CAUTION:
Only trained service technicians are authorized to remove the system cover and access any of the
components inside the system. Before performing any procedure, see your
Product Information Guide
for
complete information about safety precautions, working inside the computer and protecting against electrostatic
discharge.
1
drive bay sliding plate
2
optional hard-drive carrier in
lower 5.25-inch drive bay
2
1
book.book Page 59 Monday, June 5, 2006 1:51 PM
Summary of Contents for POWER EDGE SC1430
Page 8: ...8 Contents book book Page 8 Monday June 5 2006 1 51 PM ...
Page 26: ...26 About Your System book book Page 26 Monday June 5 2006 1 51 PM ...
Page 40: ...40 Using the System Setup Program book book Page 40 Monday June 5 2006 1 51 PM ...
Page 112: ...112 Troubleshooting Your System book book Page 112 Monday June 5 2006 1 51 PM ...
Page 116: ...116 Running the System Diagnostics book book Page 116 Monday June 5 2006 1 51 PM ...
Page 156: ...156 Glossary book book Page 156 Monday June 5 2006 1 51 PM ...


