


Steps
1. Place the display assembly on the system. Align the screw holes on the display hinges with screw holes on the palm-rest
assembly.
2. Replace the six (M2.5x5) screws that secure the display hinges to the palm-rest assembly.
3. Close the display.
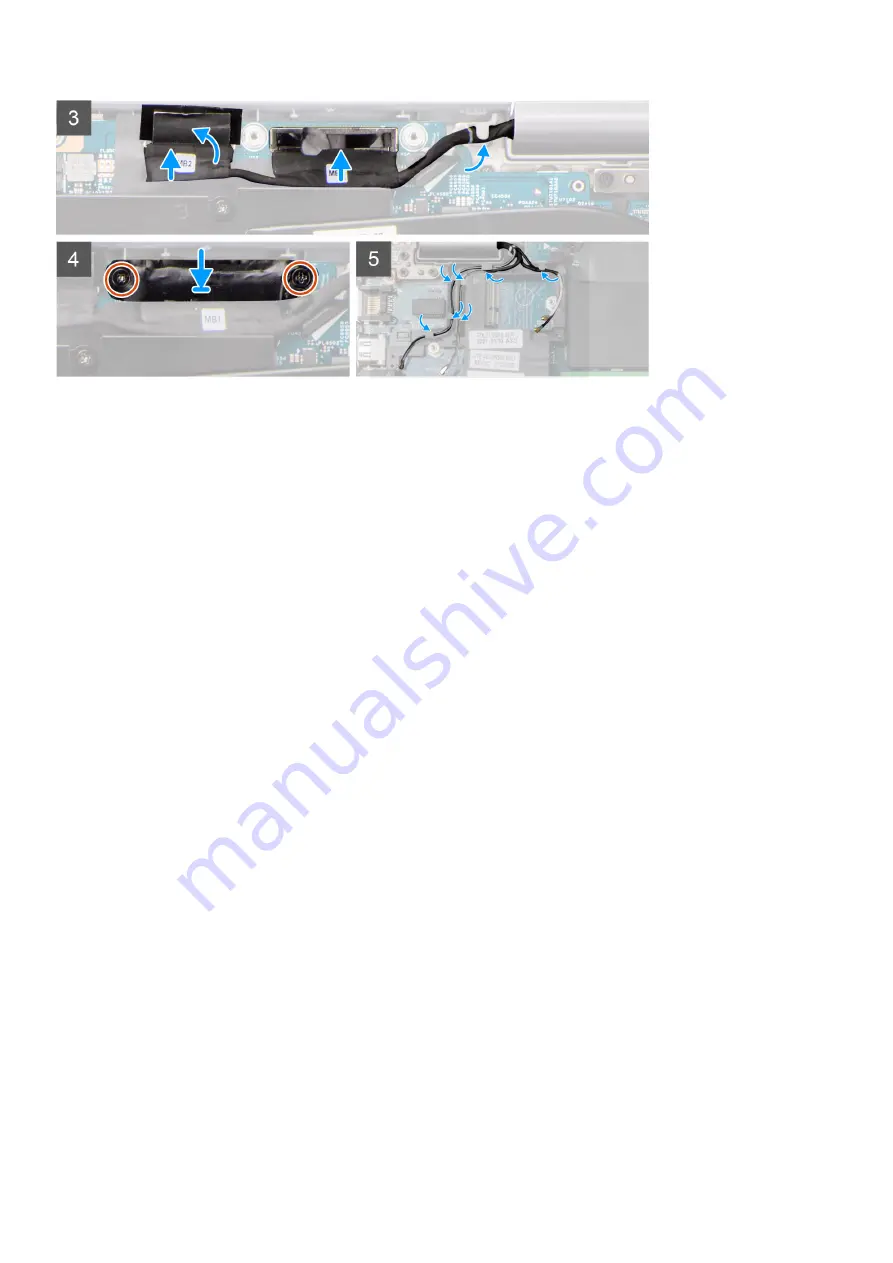
4. Route the display and eDP cable through the routing guide on the system board.
5. Connect the eDP cable to the connector on the system board.
6. Connect the display cable to the connector on the system board.
7. Adhere the tape that secures the display cable to the system board.
8. Connect the IR camera cable from its connector on the system board (for models shipped with an IR camera).
9. Connect the touchscreen cable from its connector on the system board (for models shipped with a touchscreen).
10. Align the screw holes on the eDP cable bracket with the screw holes on the system board.
11. Replace the two screws (M2x3) that secure the eDP cable bracket to the system board.
12. Route the WLAN and WWAN antenna cables through the routing guide and adhere the tape to secure the cables to the
system board.
Next steps
1. Install the
2. Install the
.
3. Install the
.
4. Install the
5. Install the
.
6. Exit
.
After working inside your computer
.
Display bezel
Removing the display bezel
Prerequisites
Before working inside your computer
.
2. Enter
.
3. Remove the
4. Remove the
.
5. Remove the
.
6. Remove the
.
Removing and installing components
75
Summary of Contents for Inspiron 5521
Page 6: ...Chapter 6 Getting help 118 Contacting Dell 118 6 Contents ...
Page 14: ...Major components of your system 1 Base cover 14 Removing and installing components ...
Page 21: ...Removing and installing components 21 ...
Page 58: ...58 Removing and installing components ...
Page 72: ...72 Removing and installing components ...
Page 74: ...74 Removing and installing components ...
Page 79: ...Removing and installing components 79 ...


