background image

Hardware Installation Guide

Dell EMC Integrated Data Protection Appliance
DP4400

Version 2.4

302-005-680
REV. 02
June 2019

l

Installation overview

............................................................................................... 2

l

Prepare the site and unpack the system

................................................................. 3

l

Install Network Validation Tool

............................................................................... 6

l

Install the rails

.........................................................................................................6

l

Secure the rails to the cabinet

................................................................................ 7

l

Install the system in the cabinet

............................................................................. 8

l

Install the bezel

..................................................................................................... 10

l

Connect the system to the network

.......................................................................11

l

Connect the power cables and power on

...............................................................12

l

Configure iDRAC

................................................................................................... 13

l

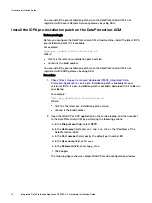
Installing the DataProtection-ACM pre-installation patch

..................................... 13

l

Launch the Appliance Configuration Manager

....................................................... 16

l

Additional resources

.............................................................................................. 16
Summary of Contents for EMC Integrated Data Protection Appliance DP4400

Page 1: ...l Install Network Validation Tool 6 l Install the rails 6 l Secure the rails to the cabinet 7 l Install the system in the cabinet 8 l Install the bezel 10 l Connect the system to the network 11 l Connect the power cables and power on 12 l Configure iDRAC 13 l Installing the DataProtection ACM pre installation patch 13 l Launch the Appliance Configuration Manager 16 l Additional resources 16 ...

Page 2: ...Use the following sequence of actions as a guide to install the system Procedure 1 Install and secure the rails 2 Install the system in the cabinet and attach the bezel 3 Connect the system to the network 4 Connect the power cables and power on Results The system is ready for initial configuration To continue setup refer to the Integrated Data Protection Appliance DP4400 Getting Started Guide For ...

Page 3: ...5 Cat6a or Cat7 l Anti static wrist strap and conductive foam pad You must have a computer at the install location with l A power adapter C13 to NEMA 5 15 if based in North America or country specific cord in other geographical locations or a power cord for your laptop power adapter with a C13 plug to power your laptop from a rack PDU l An Ethernet port l Latest version of Google Chrome or Mozilla...

Page 4: ...itial activation the license keys are automatically downloaded from the ELMS server if the appliance is connected to the internet The contact person mentioned on your sales order should have received the License Authorization Code LAC letter through an email during the order fulfillment process The LAC letter includes the license authorization code associated with your order instructions for downl...

Page 5: ...red using a range of 11 IP addresses If a range of IPs is not available you can also set random IPs of the same subnet to the components The IP Range Allocation first column in the table is the value you should add to the first IP address in the range Table 1 IP address range assignments IP Range Allocation Example Component Assigned Field 0 192 0 2 1 vCenter VMware vCenter Server VM 1 192 0 2 2 T...

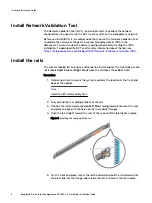
Page 6: ...ged The front side of each rail is labeled Left Front or Right Front when the rail faces the cabinet front Procedure 1 Determine where to mount the system and mark the location at the front and back of the cabinet Note Install the left rail assembly first 2 Fully extend the rear sliding bracket of the rail 3 Position the rail end piece labeled Left Front facing inward and orient the rear end piece...

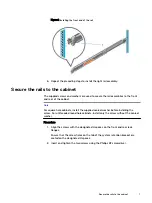
Page 7: ...hole cabinets install the supplied conical washer before installing the screw For unthreaded round hole cabinets install only the screw without the conical washer Procedure 1 Align the screws with the designated U spaces on the front and rear rack flanges Ensure that the screw holes on the tab of the system retention bracket are seated on the designated U spaces 2 Insert and tighten the two screws...

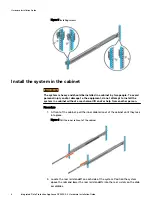
Page 8: ...t and or help from another person Procedure 1 At front of the cabinet pull the inner slide rails out of the cabinet until they lock into place Figure 4 Pull the inner rails out of the cabinet 2 Locate the rear rail standoff on each side of the system Position the system above the rails and lower the rear rail standoffs into the rear J slots on the slide assemblies Hardware Installation Guide 8 Int...

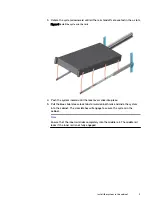
Page 9: ...lock levers click into place 5 Pull the blue slide release lock tabs forward on both rails and slide the system into the cabinet The slam latches will engage to secure the system in the cabinet Note Ensure that the inner rail slides completely into the middle rail The middle rail locks if the inner rail is not fully engaged Install the system in the cabinet 9 ...

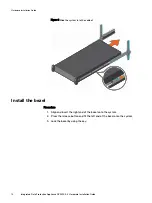
Page 10: ...lign and insert the right end of the bezel onto the system 2 Press the release button and fit the left end of the bezel onto the system 3 Lock the bezel by using the key Hardware Installation Guide 10 Integrated Data Protection Appliance DP4400 2 4 Hardware Installation Guide ...

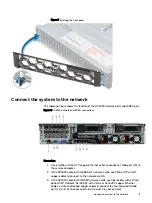
Page 11: ...bE port 10 to the service computer 2 If the DP4400 contains 10Gb BASE T network cards use Cat6a UTP or Cat7 copper cables to connect to the network switch 3 If the DP4400 contains 10GB SFP network cards use fiber cables with a 10 Gb optical SFP 1GBaseT RJ 45 SFP with Cat5e or Cat6 UTP copper Ethernet cables or direct attached copper cables to connect the four required 10 GbE ports 2 3 8 9 to acces...

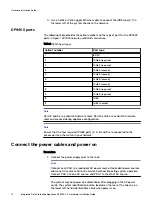
Page 12: ... are used during appliance configuration Note Ensure that the four required 10 GbE ports 2 3 8 and 9 are connected to the access ports on the switch in your network Connect the power cables and power on Procedure 1 Connect the power supply units to the rack Note Connect each PSU to a redundant AC power source Redundant power sources allow one AC source to fail or be serviced without impacting syst...

Page 13: ... as making changes to these will impact the system functionality Contact Support if changes are required in any of these areas Procedure 1 During the system boot process press F2 to access the BIOS menu 2 In the System Setup Main Menu page click iDRAC Settings The iDRAC Settings page is displayed 3 Click Network The Network page is displayed 4 Under IPv4 Settings specify static IP address details ...

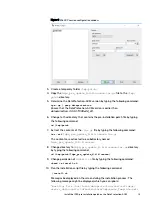
Page 14: ...ance to see if a pre installation patch is available for your version of IDPA If a pre installation patch is available download it to a folder on your laptop For example Idpa_pre_update_N N N nnnnnn tar gz Where l N N N is the latest pre installation patch version l nnnnnn is the build number 2 Open the WinSCP or SCP application on the service laptop and then connect to the DataProtection ACM by p...

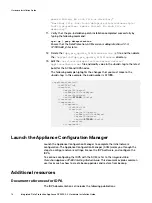
Page 15: ...and tar xvf Idpa_pre_update_N N N nnnnnn tar gz The contents are extracted to a subdirectory named Idpa_pre_update_N N N nnnnnn 8 Change directory to Idpa_pre_update_N N N nnnnnn tar gz directory by typing the following command cd tmp patch Idpa_pre_update_N N N nnnnnn 9 Change permission of install sh file by typing the following command chmod x install sh 10 Run the installation script file by t...

Page 16: ...r is 571095 applianceVersion id IDPA id version major 2 major subMajor 0 subMajor minor 0 minor build 571095 build version components component id ACM id version major 1 major subMajor 0 subMajor minor 0 minor build 571095 build version component Launch the Appliance Configuration Manager Launch the Appliance Configuration Manager to complete the initial network configuration The Appliance Configu...

Page 17: ...egrated Data Protection Appliance DP4400 Service Procedure Guide Procedures for replacing or upgrading hardware components of the IDPA l Integrated Data Protection Appliance Security Configuration Guide Information about the security features that are used to control user and network access monitor system access and use and support the transmission of storage data l Integrated Data Protection Appl...

Page 18: ...TH RESPECT TO THE INFORMATION IN THIS PUBLICATION AND SPECIFICALLY DISCLAIMS IMPLIED WARRANTIES OF MERCHANTABILITY OR FITNESS FOR A PARTICULAR PURPOSE USE COPYING AND DISTRIBUTION OF ANY DELL SOFTWARE DESCRIBED IN THIS PUBLICATION REQUIRES AN APPLICABLE SOFTWARE LICENSE Dell EMC and other trademarks are trademarks of Dell Inc or its subsidiaries Other trademarks may be the property of their respec...

Reviews: