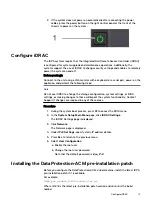
2. If the system does not power on automatically after connecting the power
cables, press the power button on the right control panel at the front of the
chassis to power on the system .
Configure iDRAC
The IDPA systems require that the Integrated Dell Remote Access Controller (iDRAC)
is configured for system upgrade and maintenance operations. Additionally, the
systems support the use of iDRAC to change security settings and enables to remotely
power the system on and off.
Before you begin
Connect to the unit using a VGA monitor with a keyboard or a serial port, power on the
appliance, and perform the following steps:
Note
Do not use iDRAC to change the storage configuration, system settings, or BIOS
settings, as making changes to these will impact the system functionality. Contact
Support if changes are required in any of these areas.
Procedure
1. During the system boot process, press F2 to access the BIOS menu.
2. In the System Setup Main Menu page, click iDRAC Settings.
The iDRAC Settings page is displayed.
3. Click Network.
The Network page is displayed.
4. Under IPv4 Settings, specify static IP address details.
5. Press Esc to return to the previous menu.
6. Select User Configuration.
a. Enable the root user.
b. Change the root user password.
Note that the default password is
Idpa_1234
.
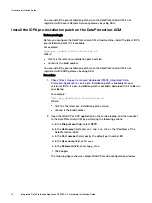
Installing the DataProtection-ACM pre-installation patch
Before you configure the DataProtection-ACM virtual machine, install the latest IDPA
pre-installation patch if it is available.
For example:
Idpa_pre_update_
N.N.N
-
nnnnnn
.tar.gz
Where
N.N.N is the latest pre-installation patch version and nnnnnn is the build
number.
Configure iDRAC
13

