support.dell.com
Installing Drives
3-3
Removing and Replacing a 3.5-Inch
Front-Panel Insert
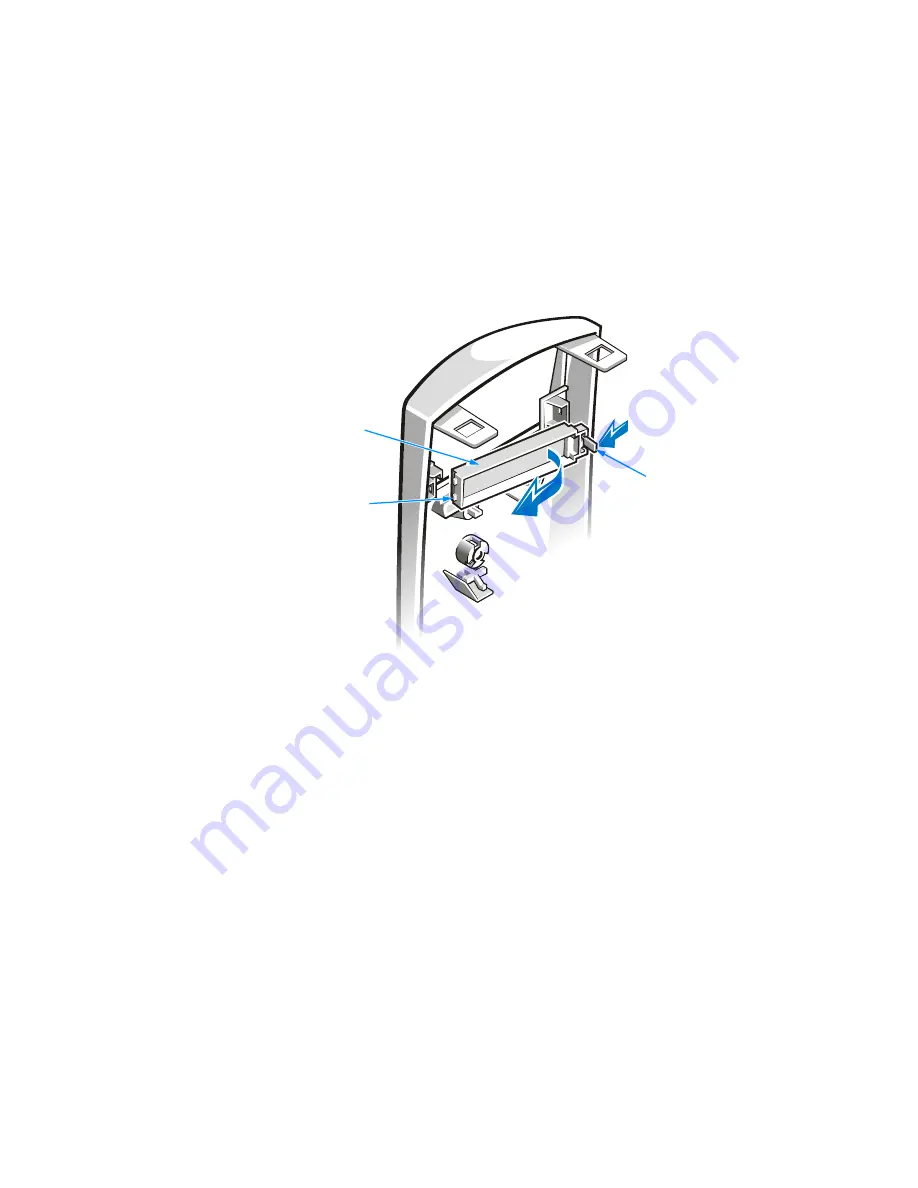
Empty drive bays in the drive cage are covered by a front-panel insert. The insert for a
3.5-inch drive bay is mounted to the inside of the bezel.
After you have removed the bezel, remove the front-panel insert for the bay you plan
to use. From the back of the bezel, as shown
From the back of the bezel, as shown in Figure 3-2, press the release tab to
the side. Then rotate the insert toward you, and remove it from the bezel.
Figure 3-2. Removing a 3.5-Inch Insert
If you permanently remove a drive from the drive cage, replace the front-panel insert
by inserting its two tabs into the slot in the bezel and rotating the insert forward until
it snaps into place.
insert
release tab
tabs (2)
Summary of Contents for Dimension L Series
Page 1: ...www dell com support dell com Dell Dimension L Series Systems ...
Page 10: ...xii ...
Page 24: ...1 8 Dell Dimension L Series Systems Reference and Troubleshooting Guide ...
Page 42: ...2 18 Dell Dimension L Series Systems Reference and Troubleshooting Guide Guide ...
Page 108: ...7 20 0 Dell Dimension L Series Systems Reference and Troubleshooting Guide ...
Page 114: ...A 6 6 Dell Dimension L Series Systems Reference and Troubleshooting Guide ...
Page 140: ...C 8 Dell Dimension L Series Systems Reference and Troubleshooting Guide ...
Page 156: ...E 8 8 Dell Dimension L Series Systems Reference and Troubleshooting Guide ...
Page 162: ...6 Dell Dimension L Series Systems Reference and Troubleshooting Guide ...


