22
Optical Drive
7
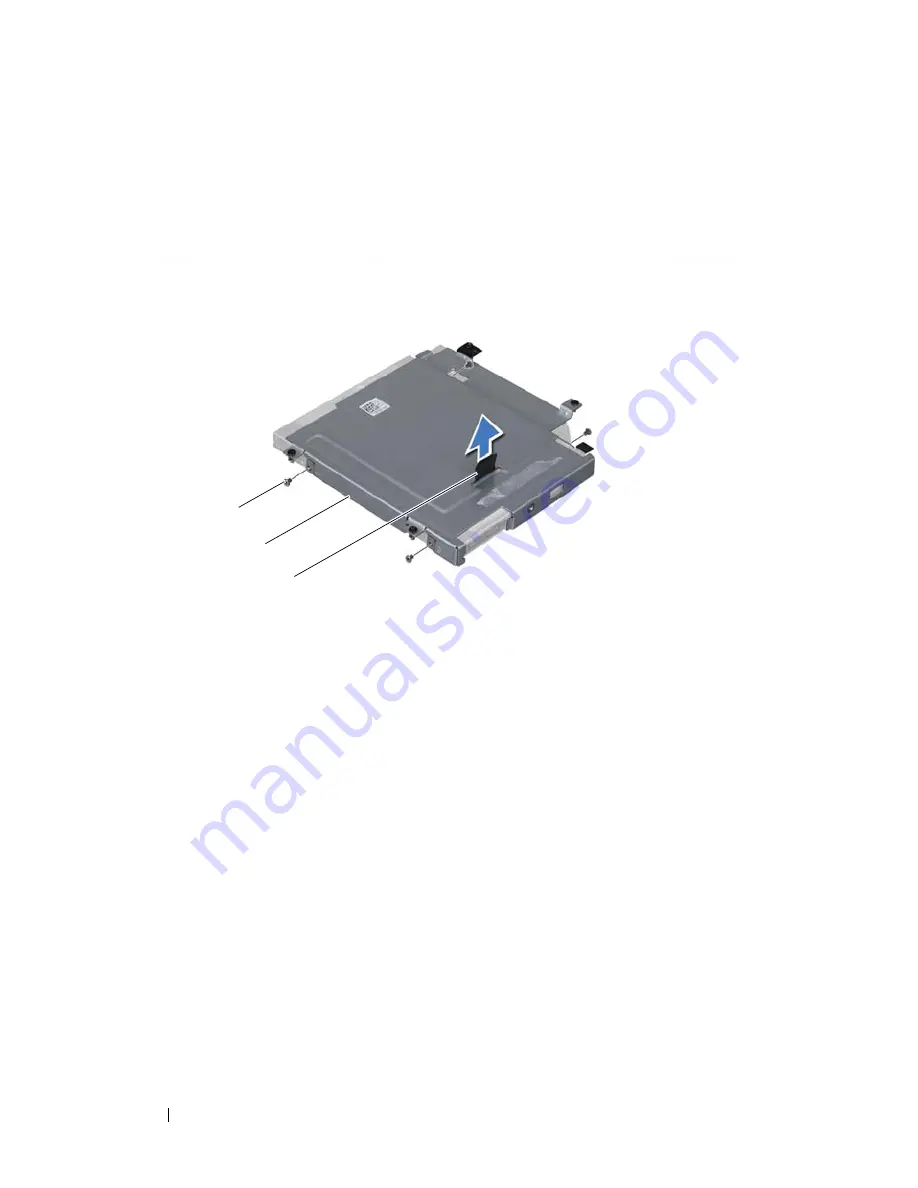
Remove the screws that secure the optical-drive bracket to
the optical drive.
8
Using the pull-tab, lift the optical-drive bracket off the optical drive.
Replacing the Optical Drive
Procedure
1
Place the optical-drive bracket on the optical drive and then align the
screw holes on the optical-drive bracket with the screw holes on
the optical drive.
2
Replace the screws that secure the optical-drive bracket to
the optical drive.
3
Connect the optical-drive cable connector to the connector on
the optical drive.
1
screws (4)
2
optical-drive bracket
3
pull tab
1
2
3
Summary of Contents for Alienware M14x R2
Page 1: ...Alienware M14xR2 Owner s Manual Regulatory model P18G Regulatory type P18G002 ...
Page 8: ...8 Contents ...
Page 12: ...14 After Working Inside Your Computer ...
Page 22: ...24 Optical Drive ...
Page 50: ...52 Power Button Board ...
Page 52: ...54 Status Lights Board 3 Turn the palm rest assembly over 1 status light board cable 1 ...
Page 58: ...60 Speakers ...
Page 62: ...64 Subwoofer ...
Page 66: ...68 Internal Card with Bluetooth Wireless Technology ...
Page 70: ...72 Coin Cell Battery ...
Page 78: ...80 Mini Card Board ...
Page 84: ...86 System Board ...
Page 90: ...92 Thermal Cooling Assembly ...
Page 94: ...96 Processor Module ...


