DFDVR2
53
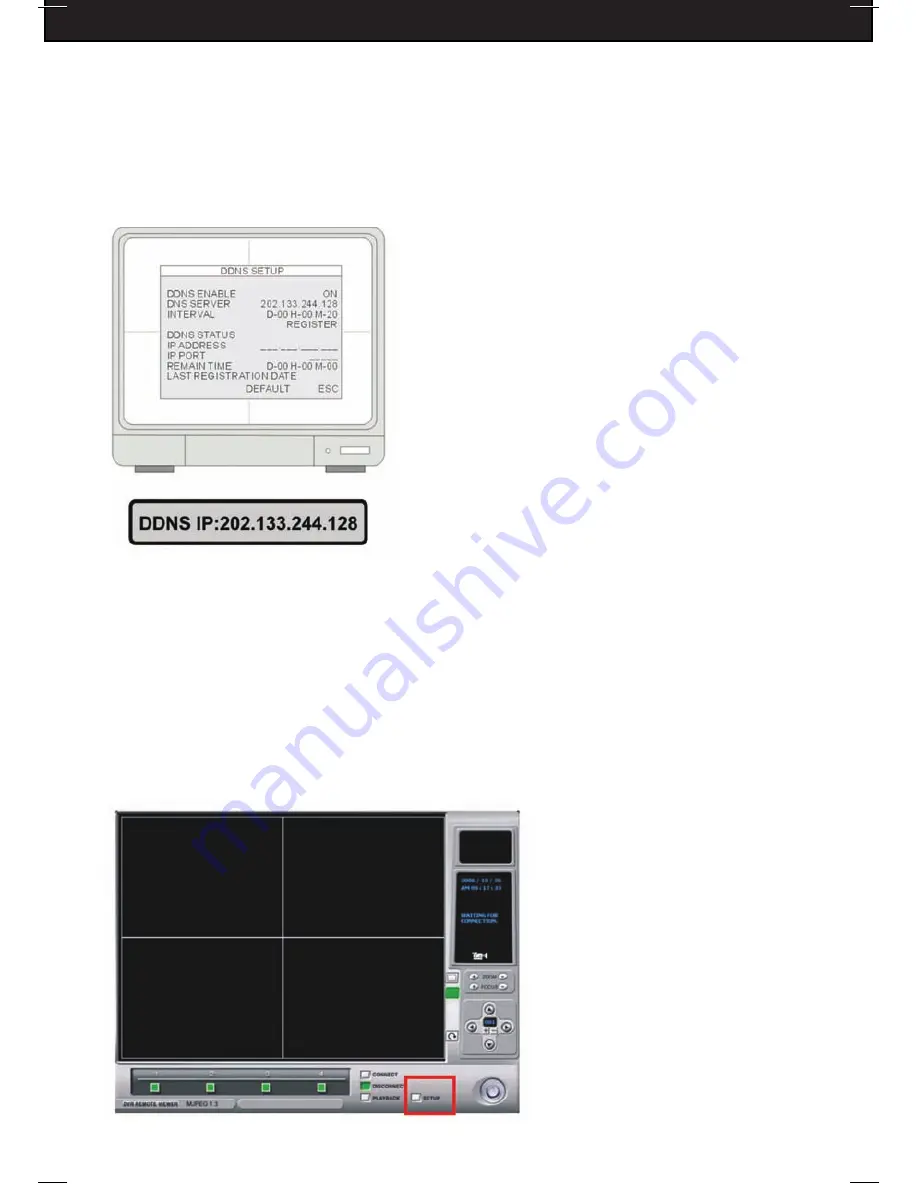
6-4-3: DVR DDNS INTERNET SETUP
This section explains how to set up DDNS on your DVR to make it accessible over the Internet.
1. You only have to configure the DDNS settings once. First, make sure your DVR can be
accessed over the Internet. Please refer to Section 6: Network Installation and Setup
for details.
2. Go to [SYSTEM MENU]►[ [EXTERNAL DEVICE]►[TCP/IP SETUP] ►[DDNS SETUP]
DDNS ON/OFF:
Press ENTER to turn ON the
DDNS service.
DNS SERVER:
Enter the DDNS Server IP address.
Do NOT change the DNS server IP address
unless you plan to use a different DDNS
server. Only advanced users should change
this address.
INTERVAL:
Set an interval for the DVR to auto
update its IP address to DDNS server.
(D-day / H- hour / M- minute)
REGISTER:
Connect to DDNS server and register
the DVR information to DDNS database
DNS STATUS:
Displays the current status of the
DDNS connection
IP ADDRESS:
Displays the current IP address in
the DDNS server
IP PORT:
Displays the current IP port in the
DDNS server
REMAIN TIME:
Displays the remaining time to
update the IP address
LAST REGISTRATION DATE:
Displays the last
date of registration
6-4-4: CLIENT SOFTWARE SETUP
Use these instructions to access your DVR from the Internet (not inside your network)
using the Client software. However, in most cases, it is easier and more useful to access
your DVR from Internet Explorer, as outlined in Section 6-4.
1. Run the client software and
enter SETUP


