CBT36K Assembly Manual
Page
61
of 89
Press [RECALL] [PARAM] rotate [KNOB] if
necessary to select [CARD: 1 CBT36FLT] [OK].
Other choices may also be selected if you prefer
a warmer or less-bright sound. Or wish to add a
subwoofer, etc.
Now proceed to section 12.2 “Connect the
Behringer DCX2496 Crossover to the System”
and also refer to section 13.2 “System
Connections: Example…...” to connect the
crossover to the amplifiers.
12.1.9. Load Settings Via a RS-232 Serial
Connection to PC Computer:
RS232 is not commonly included on modern
PC’s, especially laptops but you can purchase a
USB adapter that provides a standard RS232
port (not a NULL modem port) that will work with
the DCX2496. The connector on the rear of the
DCX2496 is a female therefore you will need a
male connector on the RS232 cable.
12.1.9.1. Download DCX2496 Editor Software:
Download the Editor Software for the DCX2496
(
v 1.16a or greater)
from the Behringer web site
(link shown below) and install it on the PC you
intend to use to setup your crossover, also
install the RS232 interface and any drivers
needed for the USB adapter.
http://www.behringer.com/EN/Products/DCX249
6.aspx
12.1.9.2. Configure RS232 Serial Communications
Channel:
Navigate to setup page 5 of 5 on the DCX2496
and make sure that port is set to PC (RS232).
Press [SETUP] [<PAGE] and use the [PARAM>]
to highlight the PORT: field. Rotate the knob till
the field is set to PC (RS232).
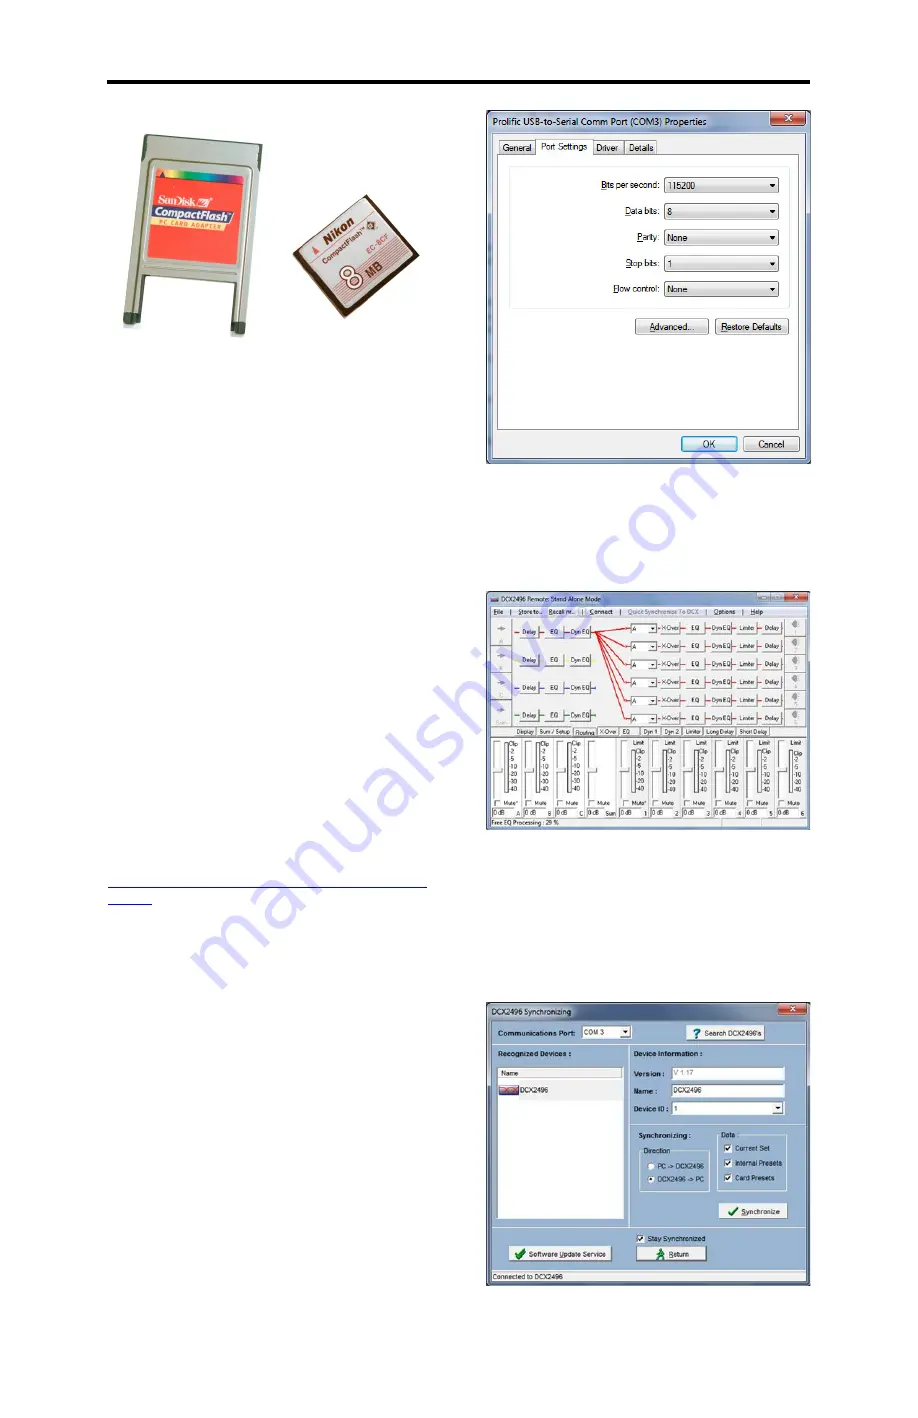
The RS232 specification does not have
provisions for automatically setting up the
communication channel so you will need to
manually set the data rate and handshaking of
the PC’s COMx (were x will be 1, 2, or 3) port.
Navigate to the Windows device manager and
set all the fields so they match the ones shown
in the following figure. This example is for
Windows 7 but the screen looks very similar in
Vista and Windows XP.
12.1.9.3. Connect RS232 Cable and Test
Connection:
Connect the RS232 cable to the crossover and
start the editor software. Select the [Connect
Tab] near the top of the DCX2496 editor
software window (which follows).
If you connect successfully you should see a
window like the one in the following figure. If it
fails to connect select retry, if it still does not
connect you will need to troubleshoot the RS232
connection. Sometimes this means a trial and
error approach till you get it working. This is
what we meant when we mentioned that setting
up RS232 can be tricky! Set the direction to PC -
> DCX2496 and data to current set.


