background image

Datalogic Applications

User’s Manual

111

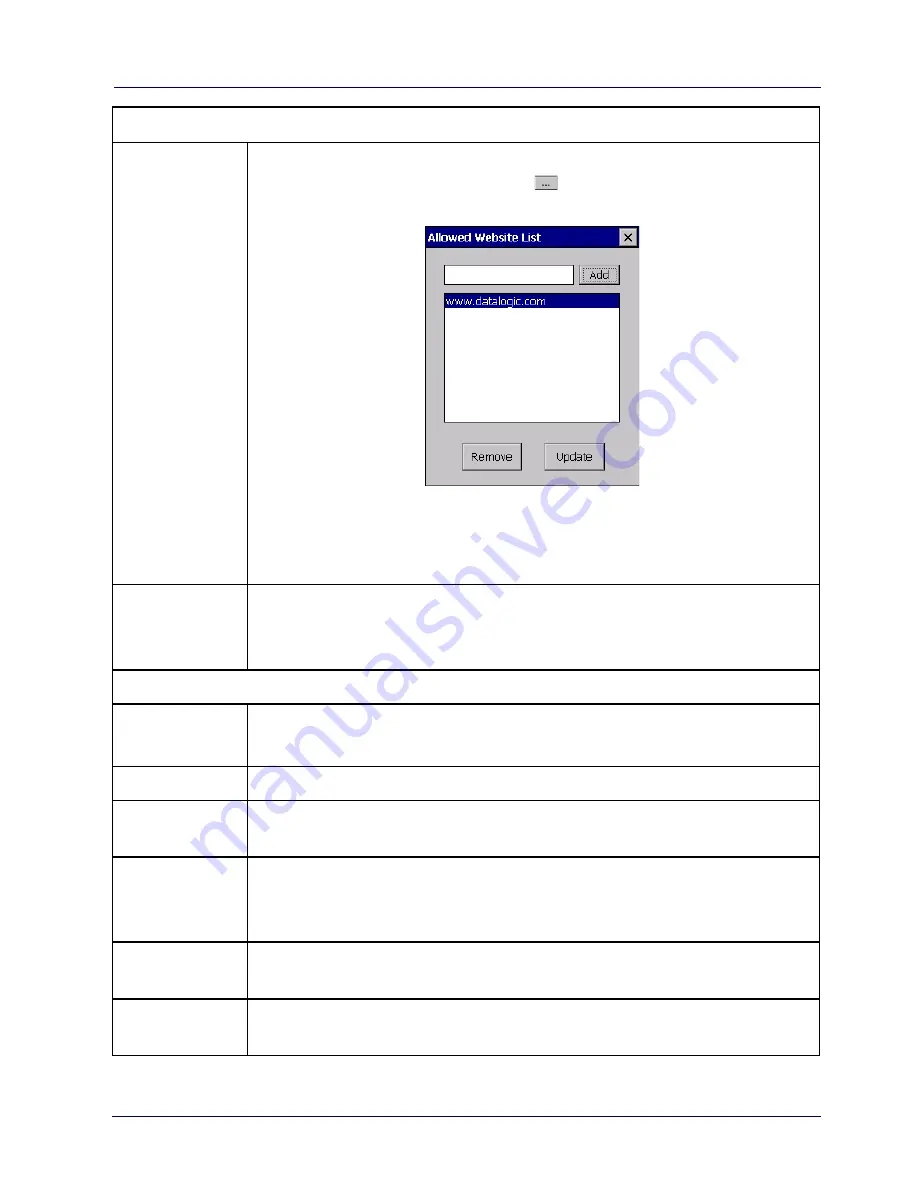
Allowed 
Website List

Restricts browsing only to files and URLs in the 

Allowed

Website List

 (accessed by the 

 button). The following dialog

box appears:

Tap 

Add

 to add allowed URLs to the white list. Other sites will

be restricted when the option is enabled. Domain names must
be exactly specified.

Change Exit 
Password

Allows to change the password required to exit the Locked Web
Browser (when the 

Exit password 

option is selected on the

LockedWeb

 tab in DDU).

Context Menu

Enable Context 
Menu

Enables the context menu accessed by a touch screen tap in the
Locked Web Browser.

Refresh

Adds a 

Refresh

 item to the Locked Web Browser context menu.

Stop

Adds a 

Stop

 item to the Locked Web Browser context menu.

Selecting during navigation stops the downloading of a page.

Current URL

Adds a

 Current URL

 item to the Locked Web Browser context

menu. Selecting the item pops up a dialog displaying the URL for
the current web page.

About

Adds an 

About

 item to the Locked Web Browser context menu.

Selecting the item pops up the 

About

 dialog. 

Back

Adds a 

Back

 item to the Locked Web Browser context menu.

Selecting the item allows to navigate to the previous page.

Advanced Locked Web Browser Options

Summary of Contents for Rhino II

Page 1: ...Rhino II Rugged Vehicle Mount Computer User s Manual ...

Page 2: ...ions may either be downloadable from the Datalogic website www datalogic com or provided on appropriate media If you visit our website and would like to make comments or suggestions about this or other Datalogic publications please let us know via the Contact Datalogic page Disclaimer Datalogic has taken reasonable measures to provide information in this manual that is complete and accurate howeve...

Page 3: ... 7 Accessories 8 Getting Started 9 Power On 9 Desktop Window 10 Adjusting the Screen Brightness 12 Adjusting the Volume 12 Using the Accessories 13 Using an External Keyboard 13 Using a Barcode Scanner 13 Resetting the Terminal 15 Warm Boot 15 Clean Boot WEC7 Only 15 LED Indicators WES7 Win10IoT 16 LED Indicators WEC7 16 Rhino II Configuration 17 Startup Shutdown Modes 17 ...

Page 4: ...pecial Function Codes 44 General Keyboard Codes 46 Upgrading the Rhino II WEC7 Firmware 49 Datalogic Applications 51 Desktop Configuration Utility DXU 51 How DXU Works 52 Installation 53 Controls 55 Simplified Deploy 61 Tasks 73 Configuring SureLock and SureFox 99 Command Line DXU Execution 102 Datalogic Desktop Utility 103 Administrative Options Admin tab 104 Locked Web Browser Options LockedWeb ...

Page 5: ...chnical Features 135 Technical Data 135 Troubleshooting the Rhino II 139 Problems While Operating the Rhino II 139 Problems with Wireless Connectivity 140 Maintenance 143 Cleaning the Device 143 Ergonomic Recommendations 143 Safety and Regulatory Information 145 General Safety Rules 145 Power Supply 146 Marking and European Economic Area EEA 147 Simplified EU Declaration of Conformity 147 Statemen...

Page 6: ...iv Rhino II Support Through the Website 155 Technical Support through email or phone 155 Warranty Terms and Conditions 155 Glossary 157 ...

Page 7: ...Rhino II refer to Rhino II vehicle mount computer WEC7 refers to the Windows Embedded Compact 7 operating system WES7 refers to the Windows Embedded Standard 7 Pro operatingy system Win10 IoT refers to the Windows 10 IoT operating system The label artworks may be only a draft Refer to the product labels for more precise information ...

Page 8: ...ino vehicle computer is equipped with an internal isolated power supply ignition sense to automatically control the power and an optional battery backup for the ultimate protection against data loss The Rhino vehicle computer fits different mounting and space constraints Mounting options include various brackets and RAM mounts for the vehicle computer along with ABCD or QWERTY external keyboards A...

Page 9: ...els refer to the web site http www datalogic com The currently available models are 943200008 10 Rhino II Win10 IoT 12VDC 943200006 10 Rhino II WES7 12VDC 943200004 10 Rhino II WEC7 12VDC 943200007 10 Rhino II Win10 IoT 24 48VDC 943200005 10 Rhino II WES7 24 48VDC 943200003 10 Rhino II WEC7 24 48VDC 943200002 10 Freezer Rhino II WEC7 12VDC 943200001 10 Freezer Rhino II WEC7 24 48VDC 943200022 12 R...

Page 10: ...for WES7 and Win10 IoT models Safety Regulatory Addendum Wavelink Avalanche Insert WEC7 models only Wavelink Terminal Emulation insert WEC7 models only End User License Agreement EULA Sheet Remove all the components from their packaging check their integrity and compare them with all the packing documents CAUTION Keep the original packaging for use when sending products to the technical assistance...

Page 11: ...Introduction User s Manual 5 General View Front View ...

Page 12: ...Introduction 6 Rhino II Back View ...

Page 13: ...Introduction User s Manual 7 Bottom View ...

Page 14: ...130 degree 94ACC0155 Keyboard External Mounting Bracket 94ACC0175 Quick Change V Mount 94ACC0035 RAM Mount 4 rail base 94ACC0034 RAM Mount with round base 94ACC0156 Scanner holder 94ACC0154 Vehicle Mounting Bracket 10 degree Power Supplies 94ACC1061 AC DC Power Brick 94ACC0165 DC Power Cable 2 9M 94ACC0041 External 72 80 VDC Voltage Converter CAUTION Use only a Datalogic approved power supply and ...

Page 15: ...ee Startup Shutdown Modes on page 17 As soon as the VMC is on the desktop will appear on the screen Wait a few seconds before starting any activity so that the mobile computer completes its startup procedure The VMC shuts down based on its current shutdown mode settings see Startup Shutdown Modes on page 17 ...

Page 16: ...p Window As soon as the mobile computer is on the WEC7 Win10 IoT or WES7 desktop appears on the screen Wait a few seconds before starting any activity so that the mobile computer completes its startup procedure WEC7 Desktop WES7 Desktop ...

Page 17: ...Getting Started User s Manual 11 Win10 IoT Desktop ...

Page 18: ...htness Press the button to decrease the brightness Adjusting the Volume To adjust the volume press the FN button first Press button to increases the volume The computer will play the Default Sound at the new volume setting Press the button to decreases the volume The computer will play the Default Sound at the new volume setting ...

Page 19: ...the Rhino II Installation manual Using a Barcode Scanner Your can use either a USB or serial scanner with the Rhino II computer Be sure to order your scanner with the ap propriate cable Connecting a USB Scanner 1 Remove the cable compartment cover plate 2 Plug the cable into one of the USB ports Depending on the scanner you are attaching you may hear a series of beeps and the Good Read light may f...

Page 20: ...canner you are attaching you may hear a series of beeps and the Good Read light may flash 3 Choose a rubber plug for the scanner cable with the appropriate sized hole Run the cable through the hole then insert the plug into a slot on the terminal 4 If desired use a nylon tie wrap to secure the cable to the post inside the cable compartment Replace the cable compartment cover 5 Configure the serial...

Page 21: ...rned to factory default A clean boot restores the Rhino II to a clean configuration both the Registry and the file system returns to a clean status that conforms to factory default WEC7 only Warm Boot To perform a warm boot power down the terminal Clean Boot WEC7 Only To perform a clean boot do the following steps 1 Launch a DOS prompt in Administrator mode 2 Change directory to Windows 3 Run Clea...

Page 22: ... following tables list these indications LED Indicators WEC7 LED Status Description Top Blue Top Solid Wi Fi connected Blue Center Not used Blue Bottom Solid FN toggled on Red Solid High Temperature Warning Yellow Solid HD Access LED Status Description Blue Solid FN toggled on Red Solid High Temperature Warning Yellow Solid HD Access ...

Page 23: ...PWR button either must be for a specified time to shutdown The other common mode mode 0 allows IGN or PWR to control the Startup Shutdown In this mode connecting IGN to positive voltage will power up the VMC and disconnecting it will power down Similarly powering up via PWR then pressing PWR again will power back down If using PWR to control the VMC in this mode IGN should NOT be switched or tied ...

Page 24: ...1 Display the shutdown timer window when IGN is turned off 0 Do not display the window 1 Display the shutdown timer window IgnOffDlgType 2 Size of the shutdown timer window if enabled 0 Full screen display no user interaction is allowed not recommended 1 Medium size display user may move the window and interact with the system 2 Small size display user may move the window and interact with the sys...

Page 25: ...ff and turn off function mode By default the buttons have the following functions PWR Starts shutdowns the terminal depending on the current Startup Shutdown mode 1 Up arrow 2 Down arrow 3 Escape key 4 Return key KEY Display remove the soft keyboard from the screen Normally the PWR and KEY buttons should not be reprogrammed but they are available if required Configuration in Utilities UtilConfig c...

Page 26: ... to lock the individual front panel keys There are two keywords to control the state of the keys when the function mode is off HWKeyLockFNOff and when the function mode is on HWKeyLockFNOn Each of the keywords is an 8 bit mask using one bit each to control the individual keys Bits 0 7 are PWR 1 BL 2 8 16 S1 32 S2 64 FN 128 KEY 256 Setting the specific bit to a 1 will lock the respective key For ex...

Page 27: ...21 NOTE Be aware that if you are attempting to control the PWR button you can lock the Rhino II Disabling the PWR button at the same time you have the startup mode set to IGN and PWR will block the Rhino II from being able to be powered up ...

Page 28: ...ing a relay then the positive voltage from pin 9 of the selected COM port should be wired as input to the relay The output from the sensor or relay should be wired to pin 1 DCD or pin 6 DSR of the selected COM port The screen blanking cable from Datalogic p n 94ACC0157 is wired to pin 9 pink and pin 6 grey Configuration in Utilities UtilConfig cfg Locate or add the line ScreenBlankBits X in the Ge...

Page 29: ...r Info ImagePath Directory name for all used Bitmaps within this Cfg The specified directory is always searched in the list of the specified CFG file A complete path specification is not supported KBShowOnStart X With this parameter a fixed specified Keyboard will be shown automatically after the start X stands for the Keyboard Number from the Keyboard Config For example KBShowOnStart 1 always sho...

Page 30: ...defined For example RotateScreen 0 1 is defined it will be toggled between these two angles If the Key isn t existing or empty all 4 values will be set one after another Keyname Parameter Info FrameImage BitmapName bmp FrameSizeX FrameSizeY Bitmap for the Keyboard Frame and to set the background FrameSizeX defines the left and right distance to the keys FrameSizeY defines the upper and lower dista...

Page 31: ...ommas The values are always specified as a percentage e g 200 twice as large as normal The starting size of a keyboard is always 100 in accordance with the key sizes specified in the keyboard definition etc The value 100 must not be specified separately in the Zoom list it is automatically inserted at the beginning RepeatKeys 0 Off 1 On Default on default the Repeat function is activated For speci...

Page 32: ...gger the automatic snapping with a short wipe the keyboard must be moved to the right direction Only at short wiping movements 500 ms the Snap function is activated If the movement of the keyboard takes longer you can move it to any position without snapping The screen sizes are not supported for snapping Background The bitmap displayed as the background of the volume control Pointer Bitmap used t...

Page 33: ...Font name Name of the desired and installed Windows system font Width Width 0 will be used as default so the font is displayed in its natural width For special cases the character width will be stretched or compressed Height The height of the font in pixels Text R G B In these 3 fields the red green blue values for the font colors are defined For all RGB fields values from 0 255 allowed Shadow R G...

Page 34: ...e corresponding defined KeyName must be specified FontName The Fontname from the Fonts section to be used BMPNormal Bitmap for normal key display not pressed BMPActive Bitmap for active key display pressed TxtMode Here the orientation for the text output can be determined per default the text will be displayed always horizontal and vertical centered in the key L left aligned R right aligned T top ...

Page 35: ...that the text will not be written over the 3D Frame of a key by left aligned output FrmTxtActL T R B Position frame for the text output at active pressed keys The frame for the active Display will be specified in 1 3 Pixel depends on key size In this case the effect of a pressed key will appear FrmIconNormL T R B Position frame for the Icon output of normal keys FrmIconActL T R B Position frame fo...

Page 36: ...ined in the Portrait Section at least L01_Norm or the section doesn t exist the default landscape will be used General Settings Keyname Parameter Info Name Individual Name for the Keyboard This name can be shown optional in the Title bar or can be eventually be used later to control the keyboards DefaultKeyName Here the KeyName layout from the Keys section will be specified which will be used for ...

Page 37: ...n a row is not explicity limited but no more than 300 keys per keyboard can be defined Overlapping keys will not be checked the definition must be correct at any time CloseToggle 0 Off Default 1 On an open keyboard with this mode by a repeated call e g carry out by a key or a HW Key can be closed again CloseOnTimer 0 Off Value 1000 specifies a timeout value in milliseconds for this keyboard If the...

Page 38: ...re optional so that a minimum definition can look like A The generated Key code as well as the label of the key is defined with A This works with single characters only For other special keys special Virtual Keycodes VK are defined See table below If in a text for a key the combination 0x0A is used it will enforce a word wrap in the label of this key Example Row 1 0x0A Row 2 However the possibilit...

Page 39: ...luated as a floating point number and returns the size relative to DefaultKeySize Example 1 corresponds exactly to DefaultKeySize 1 5 150 of the size and 2 200 of the default size KYL Size Change the height of the actual key to Size YADD Size Change the general Y Position for the key positioning When setting the first key for example all following lines keys can be deducted from the upper keys SP ...

Page 40: ...done by means of EXT definition within a key definition Using EXT only the symbolic name of the definition is indicated The actual definition of each key code will be executed in the section Extended Keys DefName1 Key1 Key2 Key3 DefName2 Key1 Key2 Key3 In the section a maximum of 20 different strings can be defined with multiple key codes The maximum length of the symbolic name DefName is 50 chara...

Page 41: ...This was ESC and F1 Keyboard_XX L01_Norm EXT MyTestString 1 2 3 4 5 6 7 8 9 L01_AltGr EXT Special Like in the above example TestExt 2 shown Keys can be generated through different definitions If you have problems with specific combinations try explicitly the respective left and right code definitions of Special Keys e g VK_LCONTROL VK_RSHIFT etc Status keys as VK_SHIFT VK_CONTROL etc always affect...

Page 42: ...a possible mixing or problems with the KB definition the following settings allow defining a separate logon keyboard The Section Keyboard also includes other general settings and is described in SorediService documentary File SoftConfig cfg Section Keyboard Settings LogonKeyboardCfg Path LogonKeyboardConfig cfg The format of the definitions in the Execute section looks like this ExecName ProgramNa...

Page 43: ... be exit all normal open Keyboards will be closed automatically Both keyboards in the Common section of the Keyboard Config be activated as follows SysAdminPwdKB Num SysAdminMenKB Num For Num the Number of the corresponding Keyboard configuration will be specified These Special Keyboards always should be specified after the normal Keyboards If the Password Keyboard for example is defined in the Se...

Page 44: ... the KEY Button if the SysAdmin Menu is not open Another push on the KEY Button deletes the password keyboard from the screen When configuring the password keyboards 2 Key codes are of particular importance VK_ESCAPE Escape deletes the KB from Screen VK_RETURN input entry ready After receiving VK_RETURN the Password will be proved If the password is wrong a error message appears If the password is...

Page 45: ...ext Text Password Input For Text any text can be entered which will prompt the PID input via the input line KeyDlgFont FontDef Here a Font definition from the Section Fonts can be given The Text from KeyDlgText is then output with this KeyDlgColor R G B Here the Color value of a typical Keyboard Background Color should be specified In this case the displayed Pwd Dialog will be output in the same c...

Page 46: ...es the Password Dialog cannot be called up for the duration of the specified waiting period If a 0 is specified it will not be blocked ExcludeChain 1 0 With 1 this Keyboard will not be considered at fading in out of the normal Input Keyboards StartupHide 1 0 With 1 this keyboard is prevented from displaying at startup regardless of the previous state Key Default Info ...

Page 47: ...ollowing section This Menu Keyboard contains always a special Key to Exit This Key must be defined with the Keycode VKX_KB_HIDE Example KXL 1 5 VKX_KB_HIDE ICON Cancel Cancel During this Menu Keyboard is open over the KEY Buttons of the unit all other Keyboards can fade in out normally If the Menu Keyboard will be Exit all other normal open Keyboards will exit as well and after pressing the KEY Bu...

Page 48: ... set in a way that it looks like a normal Window and for example at Start Click on a different Application moves to the background PushForeground 0 1 When 1 the Admin Menu is pevented from automatically moving back in the foreground again ShowInTaskbar 1 0 Because the Admin Menu might be behind other Apps it should be visible in the Taskbar if shown to activate it again Title Keybd Title Name of k...

Page 49: ...ino II Configuration User s Manual 43 Otherwise the keyboard can be configured as a normal keyboard with any buttons This keyboard has the opportunity to create Keys with executable programs or batch jobs ...

Page 50: ...rom the screen VKX_KB_KBOPEN kbdnum Open the dedicated keyboard The actual keyboard remains unchanged displayed unless it isn t defined with the Mode CloseOnClick VKX_KB_SCRROTATE Rotates the screen orientation by 90 The orientation actually will not be stored After restart the unit will display again the default orientation VKX_KB_UPDO Change the Keyboard Position from the upper edge downward and...

Page 51: ... 45 VKX_KB_HWKEYLOCK Blocks the HW Toolbar completely default This changing will not stored VKX_KB_HWKEYSCAN Turns the whole HW Toolbar for scanning on This changing will not stored VKX_KB_HWKEY_NORM Release the HW Toolbar for normal use ...

Page 52: ...TAB VK_F4 VK_CLEAR VK_F5 VK_RETURN VK_F6 VK_SHIFT VK_F7 VK_CONTROL VK_F8 VK_MENU VK_F9 VK_PAUSE VK_F10 VK_CAPITAL VK_F11 VK_ESCAPE VK_F12 VK_F13 VK_SPACE VK_F14 VK_PRIOR VK_F15 VK_NEXT VK_F16 VK_END VK_F17 VK_HOME VK_F18 VK_LEFT VK_F19 VK_UP VK_F20 VK_RIGHT VK_F21 VK_DOWN VK_F22 VK_SELECT VK_F23 ...

Page 53: ...VK_RSHIFT VK_LWIN VK_LCONTROL VK_RWIN VK_RCONTROL VK_APPS VK_LMENU VK_RMENU VK_NUMPAD0 VK_NUMPAD1 VK_NUMRET VK_NUMPAD2 VK_CIRCUMFLEX VK_NUMPAD3 VK_SHARP_S VK_NUMPAD4 VK_ACCENT VK_NUMPAD5 VK_PLUS VK_NUMPAD6 VK_GER_UE VK_NUMPAD7 VK_GER_OE VK_NUMPAD8 VK_GER_AE VK_NUMPAD9 VK_NUMSIGN VK_MULTIPLY VK_COMMA VK_ADD VK_POINT VK_SEPARATOR VK_SMALLER ...

Page 54: ...Rhino II Configuration 48 Rhino II VK_SUBTRACT VK_MINUS VK_DECIMAL VK_ALTGR VK_DIVIDE VK_F1 ...

Page 55: ... II computer 1 Download the upgrade cab file from the Datalogic website 2 Make the upgrade file accessible to the Rhino II computer This can be done by a Attaching a USB External storage device such as a USB Memory Drive USB External Hard Disk or USB External Card reader b Downloading the file via an Ethernet connection to put the upgrade file onto the internal disk c Using a shared drive on the n...

Page 56: ...Rhino II Configuration 50 Rhino II NOTES ...

Page 57: ...onnects either directly to a PC via USB or remotely over a network either via Ethernet or Wi Fi DXU reports information about currently connected devices DXU can configure a wide variety of device parameters including the touch screen and the keyboard interfaces such as Wi Fi Bluetooth USB and Ethernet device settings such as date time time zone and power management and security settings such as p...

Page 58: ...ring devices that operate in environments that forbid the use of networked computers DXU offers remote control capabilities for remote troubleshooting allowing a DXU administrator an opportunity to remotely operate the device to check settings configure the device using its own user interface and to see what a user sees How DXU Works DXU is really two applications working together The DXU desktop ...

Page 59: ...m prying eyes but most data which is not sensitive is transmitted in plain text that can be easily viewed and analyzed DXU can connect to devices on your network Ask your network specialists for more information Installation The DXU desktop application must be installed on a Windows PC DXU Agent is already pre installed on the Rhino II Supported Windows Versions Windows Vista family DXU is support...

Page 60: ... both 32 bit and 64 bit versions of Windows 8 1 Windows 10 family DXU is supported on both 32 bit and 64 bit versions of Windows 10 Unsupported Windows Versions DXU may run on older unsupported Windows versions but Datalogic technical support will not support users who have problems if they install DXU on Windows versions no longer supported by Microsoft ...

Page 61: ... the installer to run UAC is enabled by default on all supported Windows operating systems but it can be disabled by default If you do not see this prompt UAC may have been disabled 4 Follow on screen prompts to finish installing DXU 5 Follow on screen prompts to finish installing Datalogic Device Support drivers Controls DXU Agent Controls DXU settings on the device can be configured with the DXU...

Page 62: ...in the DXU control panel 1 Desktop Port number needs to match setting on DXU Desktop Requires warm boot for change to take effect 2 Pair Button to broad case UDP packets to automatic discovery of device by DXU Desktop Version This page displays the DXU Agent version number ...

Page 63: ... themselves to DXU either when they connect via USB or when they connect over a network Simply connecting the Rhino II to a network even on the same subnet as the PC running DXU will not automatically display as being available The device must try to connect to DXU which sends an announcement packet to DXU This can be done by scanning Scan2Deploy barcode labels However connecting a device to the P...

Page 64: ...omatic display of devices as they connect and it can remove devices from the list that are not currently connected Add Device This button opens the Add Device dialog box which allows you to type the IP address of a device This dialog box does not support DNS naming of devices You can also use a custom TCP port if you have configured your device to use one in DXU Agent For convenience this field pr...

Page 65: ...expert for more information Once connected devices that respond to DXU s query over the network will display in the Available Devices list Load Configuration Clicking the Load Configuration button opens a standard file dialog box that allows you to explore for and select a DXU configuration file Loading a configuration allows you to edit a device s configuration when the device is not connected to...

Page 66: ...cated then select any configuration file you wish You can double click it to streamline opening it 3 Click the Open button Note that the default location is your user directory on your PC but DXU remembers the last directory you opened a DXU configuration file and always starts in that directory the next time you wish to open another DXU configuration file ...

Page 67: ...rcode must be generated and printed using the Scan2Deploy button on DXU desktop Manifest File Manifest Files are text ini files indicating which firmware versions to update devices to update tag which DXU configuration file to apply config tag and which apk Android and cab WEC7 file applications to install install tag It is recommended that update tags be in separate manifest files You can specify...

Page 68: ...U Server PC name of app2 to install file with full path on DXU Server PC name of appN to install file with full path on DXU Server PC config name of DXU configuration file file with full path on DXU Server PC WEC7 Example update firmware img install install cab C Users DLUser Documents Wec7 auto_sync cab config defaultConfigWec7 dxu C Users DLUser Documents Wec7 my_user dxu ...

Page 69: ... a Scan2Deploy barcode label This button opens the Scan2Deploy dialog box streamlined to create Scan2Deploy labels that can automatically connect a device to a Wi Fi access point on your PC s subnet and to automatically connect it to DXU adding it to DXU s Available Device list Printing a Simplified Deploy Barcode By embedding the IP address of the PC where DXU desktop is installed the security in...

Page 70: ...h has DXU desktop installed and the name of the manifest file to be used You can also create a New manifest file as a template for either DXU configuration file or a firmware update file You could then edit the Manifest File ini file in a text editor like Word Pad to add applications to install 4 Click the Print Preview button enlarging the barcode view as needed And then print by clicking the upp...

Page 71: ...a device configuration to devices which don t have network access to DXU on your PC When the Include Unmodified Changes checkbox is selected all configuration items will be included in the barcode set This option results in several barcodes being generated as true Scan2Deploy labels After scanning the first label in this set DXU Agent s Scan2Deploy window on your device will display how many barco...

Page 72: ... tab which allows printing barcodes to configure the device without the need of the PC with DXU desktop being accessible from the Wi Fi network Wi Fi Configuration Tab Barcode Type Menu The Barcode Type menu allows you to choose which barcode symbology that Scan2Deploy labels will be printed in Each barcode symbology has advantages and disadvantages which may benefit your organization ...

Page 73: ...alog box s fields Save Button You may save Scan2Deploy labels as graphic files should this prove convenient for including Scan2Deploy barcodes in an e mail to a remote office for example Wi Fi Configuration Controls As with the other version of the Scan2Deploy dialog box this group of controls allows you to configure the automatic configuration of a device s Wi Fi connection Fields allow you to en...

Page 74: ...ialog box this tab allows to set the maximum size of each label by symbology For example if you know that your devices can scan larger 2D labels than DXU s default setting you can increase the size of your label so fewer labels are needed to fully deploy your configuration Settings Window The Settings window is opened by clicking the Settings button on DXU main window This view includes controls w...

Page 75: ...DXU uses to communicate several types of information with remote computers that are being configured The Desktop UDP Server Port a and the Device UDP Server Port b fields must be set to the same value as the matching ports on the remote device to ensure communication and remote configuration The Device HTTP Server Port c field must be set to the same value as the matching ports on the remote devic...

Page 76: ...e types of settings include scanner settings enterprise settings system configuration settings DXU Agent configuration settings SoftSpot settings Tap2Deploy device side settings and SureLock settings Other settings may be added in the future Additional settings may be available depending on hardware options installed on your device and may depend on software installed on your device Device Info Bu...

Page 77: ...the screen of the device you are currently connected to This window also includes buttons to remotely activate the devices external buttons and to capture a screen shot of what is visible on its screen Firmware Update Utility Button Clicking this button opens the Firmware Utility dialog box which you can use to update the firmware on your device ...

Page 78: ...e Printing Custom Configuration Barcodes on page 65 Use it to create Scan2Deploy barcode sets that can fully configure a device without network access to DXU on your PC containing all configuration settings in one set of barcodes and applying them by scanning the labels all without the need to use Simplified Deploy ...

Page 79: ...ce list if it is in the same subnet However if you want to manually add a device in DXU make sure both device and system are in the same subnet and follow these steps 1 From the DXU main window click Add Device 2 In the Add Device dialog box enter the IP address of the device and optionally its port if it is has been changed from the default NOTE You will see the IP Address and port details displa...

Page 80: ... Scan2Deploy on the DXU main window 3 Enter the SSID and Password for the Wi Fi access point that your device will use to connect to your network 4 Click Print Preview 5 Click Print in the button bar 6 Since Print dialog boxes vary by the model of your printer configure the print as you normally do Close these dialog boxes to exit 7 Click Start menu Programs Device Tools Scan2Deploy NOTE You can a...

Page 81: ...ce list of the DXU main window Click Available Device to continue configuring your device Delete a Device from the Available Device List Click the exit button X located at top right of the device NOTE Scan to Configure also under Device Tools allows you to configure a Wavelink Avalanche barcode to configure ...

Page 82: ...e name in the field or you can click the Browse button to use a standard file dialog box to explore to the folder of your choice and type the file name Unusually clicking the Save button in the Save As dialog box does not actually save the configuration file but returns you to the Save Configuration dialog box 3 Optionally you may select the Use Password check box and type a password into the fiel...

Page 83: ...l 77 Open a Configuration File To load a configuration file previously saved do this 1 Launch DXU 2 Click the Load Configuration file This will open a standard file dialog box 3 Explore to your configuration file select it and click Open ...

Page 84: ...figuration file or load the configuration from a connected device 2 Type the user name for this configuration device into the User Name field 3 Type the password for this configuration device in the Password field 4 Click OK Edit a Configuration File Off line You can edit configuration files even when the device they were drawn from are not connected to DXU Follow the steps below 1 Open your confi...

Page 85: ...pen a configuration file or load the configuration from a connected device 2 Click Configure This Device 3 Right click any tab node or parameter then select Add comment in the context sensitive menu 4 Type your comment 5 Click OK save A small text balloon will appear next to the item you commented on To edit a comment 1 Right click any item with a small comment icon 2 Select Edit comment in the co...

Page 86: ... comments add them 4 Click Show Comments in the button bar You can select and edit comments in this table by double clicking the Comment field Click the exit button X to close the dialog box Configure a Device On line Once you have added the device to Desktop Configuration Utility you can click ist name under the Available devices list and use the Configure This Device option to start configuring ...

Page 87: ...Datalogic Applications User s Manual 81 ...

Page 88: ...elects the barcode symbology used to print the Scan2Deploy labels Different symbologies have advantages and disadvantages so DXU gives you a choice 2 Include Unmodified Changes when you configure a device using the console you don t always wish to configure all the settings so by default the generated codes for configuration do not include unmodified settings However once selected the Include Unmo...

Page 89: ...ile or load the configuration from a connected device 2 Click Configure This Device 3 Configure any settings you wish 4 Optional Save your configuration 5 Click the Back button to return to the Desktop Configuration Utility window 6 Click the Scan2Deploy 7 Click the Device Configuration tab 8 Optional Select the Include Unmodified Changes check box to include all configuration settings in your Sca...

Page 90: ...our device and unlock its screen 2 Launch the DXU Agent application 3 Tap Menu and then select the Scan2Pair command 4 Scan any label in your Scan2Deploy label set 5 Continue to scan all the barcodes on the list Once the last label is scanned the configuration will be put into effect and an on screen notification will confirm that your configuration is complete 6 Tap Home to exit NOTE Some configu...

Page 91: ...efault but you can also select Italian Chinese Simplified or Chinese Traditional To change DXU s language 1 From the DXU main window click Settings 2 Select the language you prefer in the Language menu 3 Click the Back button a leftward pointing arrow in a circle to return to DXU main window Configure DXU Communication Settings You can configure the TCP IP ports used by DXU to communicate with the...

Page 92: ...er running on the console PC It is set to UDP port 3453 by default b The Device UDP Server Port configures the UDP port for the DXU Agent server running on the device It is set to UDP port 3453 by default c The Device HTTP Server Port configures the TCP port for the DXU Agent server running on the device It is set to TCP port 80 by default like common web servers d The Device VNC Server Port confi...

Page 93: ... PC DXU can log its activities and this can be very helpful for technical support to help you diagnose those unexpected problems that always seem to pop up after software is released to actual users Logging is not enabled by default Once enabled the DXU s default log file location is stored in your user directory at the following path C Users user AppData Roaming Datalogic DXU To enable logging 1 ...

Page 94: ...ick Yes to confirm 5 Click the Back button a leftward pointing arrow in a circle to return to the DXU main window Create Scan2Deploy Labels to Fully Configure Remote Devices The Scan2Deploy button in the Datalogic Configuration Utility window can automatically connect devices to Wi Fi access points and to DXU Also the Scan2Deploy window has a further tab which allows you to include configuration d...

Page 95: ...ll apply the configuration changes automatically as if you had connected to DXU to transfer the changes To create Scan2Deploy barcodes that can completely configure your device 1 Open a configuration file or load the configuration from a connected device 2 Click Configure This Device 3 Configure any settings you wish 4 Optional Save your configuration 5 Click Back to return to the Desktop Configur...

Page 96: ...nd complete using your printer s Print dialog box To apply the configuration by scanning the Scan2Deploy barcodes 1 Resume your device and unlock its screen 2 Launch the DXU Agent application 3 Tap Menu and then select the Scan2Pair command 4 Scan any label in your Scan2Deploy label set NOTE This option will increase the number of barcode labels in the Scan2Deploy label set NOTE This option will i...

Page 97: ...you are connected to 1 Load the configuration from a connected device 2 Click Device Info 3 Click the Back button a leftward pointing arrow in a circle to return to the DXU main window View Device Info Recorded in a Configuration File You can view information about the device from which a configuration file was extracted This information includes the capabilities of the device s Wi Fi radio the ty...

Page 98: ...udes buttons to remotely activate the device s external buttons and to capture a screen shot of what is visible on its screen Note that clicking a button on screen does not physically press a button or even trigger it electrically but sends an event message to the system as if you had pushed a physical key or tapped a physical button on the touch screen ...

Page 99: ...Scan2Deploy label 3 Click the device button in the Available Device list 4 Click the Remote Control 5 If the device is suspended press the Power button at the bottom of the Remote Control window 6 Click the lock icon and drag it rightward releasing it over the unlocked lock icon at the right edge of the Remote Control window Save a Screenshot of Remote Device At the bottom of the Remote Control wi...

Page 100: ...nd control your device This field is blank by default To set or edit a VNC password in DXU Agent 1 Resume your device and unlock its screen 2 Launch the DXU Agent application 3 Tap Menu to display the menu 4 Tap the Settings button 5 Clear the Enable Service check box 6 Tap the Password button in the VNC Settings section 7 Type a password in the field It can be numbers letters or some punctuation ...

Page 101: ...ssword in the field and then click OK Set or Edit the VNC Authentication Password from DXU You can change a device s VNC password from DXU It is a configuration parameter in the Device Configuration window Follow the steps below 1 Open a configuration file or load the configuration from a connected device 2 Click the Configure This Device 3 Click the DXU Configuration tab 4 Click the General Setti...

Page 102: ...hout performing an update NOTE DXU firmware update is not the only way to update the firmware on the Rhino II DXU s firmware update capability works only with connected devices If you need a method that can update firmware on many devices remotely especially if they are not connected to a network then other methods may suit your needs better Please consult your device s user reference guide for ot...

Page 103: ...re image can become corrupted in the field and this option allows a DXU administrator to perform a full firmware upgrade disregarding the version reported by the device Factory Data Reset After Installing Firmware A factory data reset is a full reset of the device intended to return it to factory defaults This reset deletes all user data settings and installed applications and resets the device s ...

Page 104: ...le dialog box to browse for and select a suitable firmware image file 6 Navigate to your firmware image file select it and click Open Optional Select the Silent Install check box if you wish to perform a firmware update that does not require user interaction on the device Optional Select the Force Update check box if you wish to force a complete reinstallation of this image on the device Optional ...

Page 105: ...hese settings when creating a DXU configuration file 1 The EULA on the device must first be accepted This can be performed by first launching SureLock or SureFox on the device and accepting the EULA Future versions of DXU Desktop will allow you to remotely accept this EULA just once for your entire installation 2 The Enable SureLock Password and or Enable SureFox Password fields must have the curr...

Page 106: ...Datalogic Applications 100 Rhino II SureFox ...

Page 107: ...Datalogic Applications User s Manual 101 Change the SureLock and or SureFox Password After completing the above steps you can enter the new password in the Change Password field SureLock SureFox ...

Page 108: ...een connected to the Wi Fi network Optionally you can perform Simplified Deploy with a manifest file without using Scan2Deploy Usage DXU command line options are DXU put filename dxu Applies configuration file to any USB connected devices DXU put filename dxu ip ipaddress Applies configuration file to device of specific IP address DXU man filename ini Applies Simplified Deploy to any USB connected...

Page 109: ...ith a selection of authorized applications Restrict user access in Internet Explorer Set up configuration and customized error recovery mechanisms Create quick access hot keys and configure trigger actions To open the DDU double tap the DDU icon on the Control Panel You can also open the DDU by pressing the appropriate key shortcut The default is Alt 6 NOTE You can change the key combination and s...

Page 110: ...ss Restrictions and Application Selector Enter password Allows to specify a password when this utility is launched Re enter password Re enter the password for confirmation Set Password Tap to enable the password Set Defaults Tap to reset the default values of all the functions on all the tabs After you select this option you will receive a prompt to verify this selection ...

Page 111: ...steps below 1 Enter a password in the Enter password text box By default the password is 1234 A password can consist of all standard keyboard characters 2 Re enter the password in the second text box 3 Tap Set Password to enable the password 4 Tap OK to close the Password Set dialog box ...

Page 112: ... a Password To remove a password 1 Enter blank in both password fields 2 Tap Set Password NOTE Be sure to record the Password for future reference NOTE Tap Set Password before exiting DDU in order to store and activate your new password It is not necessary to select Enable Datalogic Desktop CAUTION Set Defaults removes all custom settings and restore all the factory default settings except a previ...

Page 113: ...aunch the Datalogic Desktop Utility the DDU password dialog box opens 1 Type in your password using either the keypad on the unit or using the stylus on the soft input panel SIP If you enter an incorrect password the system will prompt you to input the correct one 2 Tap OK to verify the password or tap X to cancel ...

Page 114: ...mands and metatags see Locked Web Browser Options LockedWeb Tab on page 108 Error Page Redirection Use the Error redirection option to provide customized recovery from common errors When an error occurs the browser can redirect access to a specified error page with instructions on how to recover from the problem NOTE Locked Web Browser is disabled by default To enable use the Advanced Settings tab...

Page 115: ...Icons Options Status Tab on page 113 The status icons can be configured on the Status tab of DDU Trap Keys When selected all key presses will be trapped by the Locked Web Browser to prevent the user from accessing unsafe parts of the system For example pressing Ctrl O to open a file will not work safe key presses e g Alpha numeric will still get processed by the Locked Web Browser as normal For ex...

Page 116: ...owser Home Page Sets the Internet Explorer home page regardless of the enable state of the Locked Web Browser Advanced Allows to enable the Locked Web Browser and to configure advanced settings Advanced Locked Web Browser Options General Enable Locked Web Browser Enables the Locked Web Browser when Internet Explorer is launched Disable Cache Prevents the browser from loading the local intranet pag...

Page 117: ...nable Context Menu Enables the context menu accessed by a touch screen tap in the Locked Web Browser Refresh Adds a Refresh item to the Locked Web Browser context menu Stop Adds a Stop item to the Locked Web Browser context menu Selecting during navigation stops the downloading of a page Current URL Adds a Current URL item to the Locked Web Browser context menu Selecting the item pops up a dialog ...

Page 118: ...electing the item minimizes the Locked Web Browser and allows access to other programs Show SIP Adds a Show SIP item to the Locked Web Browser context menu Selecting the item toggles the show state of the SIP Exit Adds an Exit item to the Locked Web Browser context menu Selecting the item exits the Locked Web Browser with an optional password set in the Locked Web Browser Advanced options Advanced...

Page 119: ...s the Status Icons option You can configure the view of some status icons that are used in LockedWeb and in Application Selector to display the status of Wi Fi radio and battery Status Icons Options Icon size Sets the status icons size Icon locations Selects the preferred location for each status icon ...

Page 120: ...nt applications Windows Controls Show taskbar Select to display hide the Taskbar Taskbar enabled Select to display the taskbar This option is only available when Show taskbar is selected Start menu enabled Select to display the Start Menu This option is only available when Taskbar enabled is selected AutoSIP enabled Enables the AutoSIP Windows feature Scroll bars enabled Select to display horizont...

Page 121: ...Datalogic Applications User s Manual 115 NOTE Changes require a device reboot ...

Page 122: ...able Application Selector Select to enable the application selector Show status icons Select to enable the status icons view see Status Icons Options Status Tab on page 113 The status icons can be configured on the Status tab of DDU Authorized applications List of applications that the user can access Application Selector Commands New Tap to create a new application entry Edit Tap to edit the sele...

Page 123: ... up Command Description Application Title Type the name of the application in the way it should appear on screen for the end user Executable Displays the path for the executable file you want to run Browse Tap to browse for the desired executable file You can associate an executable program with the specified button The results of this search are displayed in the Executable textbox Arguments Type ...

Page 124: ... to force the application to auto start when the Application Selector starts up Applications will be started in the order listed in the authorized application list Delay Enter a delay duration in seconds in the combo box This option delays auto start of application s to allow drivers to load before starting applications OK Tap to add save changes X Tap to cancel Command Description ...

Page 125: ...list of applications By default the Application Selector comes with no applications preset The administrator can customize this list as shown in AppSelector Options AppSelect Tab on page 116 Additionally the page template can be modified to display a different background Contact your Datalogic representative for more information on this feature To run an application tap its name To exit the Applic...

Page 126: ...strator to define a restricted internet usage environment Once in the restricted environment a password is required to exit This means users can only access web applications and websites set by the administrator NOTE Configuration is set up through the DDU control panel See Locked Web Browser Options LockedWeb Tab on page 108 for more information ...

Page 127: ...eb page The Datalogic Locked Web Browser defines some special metatags that allow the web application to interact with the device In particular the special metatags allow it to enable disable scan engine triggers enable disable specific symbologies in the scan engine easily assign a key press to a javascript function Metatag settings of trigger enable symbology enable or DL_Key assignments persist...

Page 128: ... be a javascript function that receives one parameter the serial number An example would be function CustomerFunction SerialNumber Reboot Warm Boot Device Metatag DL_Reboot Warm boot device Content OnPageLoad Warm boot immediately upon page load Example meta http equiv DL_Reboot content OnPageLoad Exit Metatag DL_Exit Exit the Locked Web Browser Content OnPageLoad Exit immediately upon page load I...

Page 129: ..._S25 DL_Code_M25 DL_Code_CODABAR DL_Code_93 DL_Code_UPCA DL_Code_UPCE DL_Code_EAN13 DL_Code_EAN8 DL_Code_MSI DL_Code_MSR DL_Code_GS1_14 DL_Code_GS1_LIMIT DL_Code_GS1_EXP DL_Code_PDF417 DL_Code_DATAMATIX DL_Code_MAXICODE DL_Code_TRIOPTIC DL_Code_PHARMA39 DL_Code_RFID DL_Code_MICROPDF417 DL_Code_COMPOSITE DL_Code_QRCODE DL_Code_AZTEC DL_Code_POSTAL Examples meta http equiv DL_Code_39 content Disable...

Page 130: ...se on the page For instance when entering data in a text box a character assigned as a DL_Key would not be entered in the text box Instead the javascript action would occur Refer to the Microsoft website to find the list of all the possible Vkey codes http msdn microsoft com en us library bb431750 aspx http msdn microsoft com en us library aa243025 VS 60 aspx NOTE Because DL_Keys persist past the ...

Page 131: ...ge mode and start listening for scan events A scanned barcode tag result will be used as an argument to that javascript function which is then invoked If the content value is Wedge then the device will stop listening for scanned event and enter keyboard wedge mode If the content value is Disable then the device will stop listening for scanned events but not enter keyboard wedge mode Example meta h...

Page 132: ...is ready to use for data entry needs Pal Communicator is a PC application that allows you to manage the data transfer between a host computer and mobile devices For further information refer to the Pal Pal Communicator User s Guide downloadable from our website see Support Through the Website on page 155 ...

Page 133: ... add program to startup windows on the internet then select the instructions for Windows 7 or 10 as appropriate Wedge parameters may be changed by the user if desired using a registry edit utility such as regedit The parameters are stored as strings in the registry under the key HKEY_CURRENT_USER SOFTWARE DATALOGIC MWWEDGE To add any desired parameters use the registry editor on the PC to add or e...

Page 134: ...ned and processed as a part of the scan data or if it should be dropped from the scan If the terminator is retained note that the suffix character if any will be added after the terminator is processed CopyPaste REG_SZ Y or N used to determine if the input should be placed in the keyboard buffer default or pasted into the current screen If using CopyPaste mode KeepTerm should normally be set to no...

Page 135: ...ion The Rhino II default settings are configured to use DHCP to automatically get an IP address from a DHCP server To change these settings select Start Settings Network and Dialup Connections Then select DM9CE1 and set the parameters to work with your network NOTE Windows Embedded CE does not have native support for allowing direct Network browsing No Network Neighborhood or for allowing network ...

Page 136: ...ager Laird also has white papers on a verity of topics from security to difference in radio types See the Lairdtech com Web site for access to these white papers Setting Up Bluetooth Radio Communications The WEC7 Rhino II has an internal Bluetooth radio from Laird The Rhino II uses the Laird Connection Manager to configure the radio Go to http www lairdtech com for latest version of the Laird Mana...

Page 137: ...low the same recommendations provided by Health Industry Manufacturers Associations for mobile phones Persons with pacemakers Should ALWAYS keep this device more than twenty five 25 cm from their pacemaker and or any other medical device Should not carry this device in a breast pocket Should keep the device at the opposite side of the pacemaker and or any other medical device Should turn this devi...

Page 138: ...ng your vehicle You should also consult the manufacturer of any equipment that has been added to your vehicle An air bag inflates with great force DO NOT place objects including either installed or portable wireless equipment in the area over the air bag or in the air bag deployment area If a vehicle s wireless equipment is improperly installed and the air bag inflates serious injury could result ...

Page 139: ...mable liquids explosive gases or materials with the device or its parts or accessories Areas with a potentially explosive atmosphere are often but not always clearly marked or shown Sparks in such areas could cause an explosion or fire resulting in injury or even death ...

Page 140: ...Communications 134 Rhino II NOTES ...

Page 141: ...e Freezer Model 10 4 inch SVGA 800x600 400 NITS Capacitive Standard Models 10 4 inch XGA 1024 x 768 350 NITS 12 1 inch XGA 1024 x 768 500 NITS Function Buttons 4 programmable keys S1 S4 Mounting VESA 75 mm pattern Screen Blanking Optional Speakers Optional downward facing waterproof Touchscreen Resistive 4 Wire WEC7 Freezer model only Capacitive all OS 3 mm non reflecting hardened glass Gloves sup...

Page 142: ... Water Sealing IP65 IP67 Electrical Backup Battery Optional backup battery for up to 30 min runtime 2 500 mAh 10 8 VDC 27 Wh Battery charging 0 to 50 ºC 32 to 122 ºF Battery operating 20 to 50 ºC 4 to 122 ºF Power supply Choice of 12 VDC 24 48 VDC isolated internal power supplies Light Indicators On front bezel Wireless Communications Local Area Network WLAN Wi Fi 802 11a b g n 2 4 GHz and 5 GHz C...

Page 143: ...terprise 64 bit Processor Freescale NXP ARM Quad Core 1 GHz WEC7 Standard models 800 MHz WEC7 Freezer models Intel Atom E3826 Dual Core 1 46 GHz Win7 10 Memory WEC7 1 GB RAM Win7 10 4 GB RAM Storage WEC7 32 GB SDHC Win7 10 32 GB CFast SSD Software Configuration Maintenance WEC7 Datalogic DXU DDU SDK SureFox Locked Browser WEC7 Wavelink Avalanche pre installed and pre licensed Win7 10 Datalogic Ala...

Page 144: ...ty Regulatory Agency Approvals The product meets necessary safety and regulatory approvals for its intended use Certifications Certified for CE FCC RoHS compliant Regulatory US Canada EU countries Warranty Warranty 1 Year Factory Warranty ...

Page 145: ...ems While Operating the Rhino II Problem Solution You press Power and nothing happens Make sure you are connected to a power supply Make sure the brightness is not set all the way to the darkest or lightest setting Press the key until you reach the desired brightness level Make sure you are pressing the Power button for at least the minimum duration set in the configuration default 3 seconds If th...

Page 146: ...nger sends or receives messages over the network The host may have deactivated or lost your current terminal emulation session In a TCP IP direct connect network you need to turn off the Keep Alive message if possible from the host so that the TCP session is maintained while a Rhino II is suspended The network connection icon in the taskbar appears to be communicating but the host computer is not ...

Page 147: ... access point to reestablish communications Make sure the Rhino II is configured correctly for your network The radio parameters on the Rhino II must match the values set for all access points the Rhino II may communicate with The radio initialization process may have failed on the 802 11 radio Try rebooting the Rhino II If you have tried these possible solutions and nothing happens you may have a...

Page 148: ...Troubleshooting the Rhino II 142 Rhino II NOTES ...

Page 149: ...rty use only a cloth dampened with water Ergonomic Recommendations Reduce or eliminate repetitive motion Maintain a natural position Reduce or eliminate excessive force Keep objects that are used frequently within easy reach Perform tasks at correct heights Reduce or eliminate vibration CAUTION In order to avoid or minimize the potential risk of ergonomic injury follow the recommendations below Co...

Page 150: ...Maintenance 144 Rhino II Reduce or eliminate direct pressure Provide adjustable workstations Provide adequate clearance Provide a suitable working environment Improve work procedures ...

Page 151: ...mpering will invalidate the warranty When replacing the battery pack or at the end of the operative life of the Rhino II disposal must be performed in compliance with the laws in force in your jurisdiction Do not submerge the Rhino II in liquid products For further information or support refer to this manual and to the Datalogic web site www datalogic com NOTE Read this manual carefully before per...

Page 152: ...ate to the installed power supply 12 24VDC or 24 48VDC and or by UL Listed CSA Certified Power Unit LPS SELV power source which supplies power directly to the unit via the attached power connector Any changes or modifications to equipment not expressly approved by Datalogic could void the user s authority to operate the equipment ...

Page 153: ...logic S r l declares that the radio equipment type Rhino II is in compliance with Directive 2014 53 EU The full text of the EU declaration of conformity is available at the following internet address www datalogic com Statement of Compliance cs Česky Czech Datalogic S r l tímto prohlašuje že tento Rhino II je ve shodě se základními požadavky a dalšími příslušnými ustanoveními směrnice 2014 53 EU 2...

Page 154: ...i essenziali ed alle altre disposizioni pertinenti stabilite dalla direttiva 2014 53 EU 2011 65 EU Latviski Latvian Ar šo Datalogic S r l deklarē ka Rhino II atbilst Direktīvas 2014 53 EU 2011 65 EU būtiskajām prasībām un citiem ar to saistītajiem noteikumiem Lietuvių Lithuanian Šiuo Datalogic S r l deklaruoja kad šis Rhino II atitinka esminius reikalavimus ir kitas 2014 53 EU 2011 65 EU Direktyvo...

Page 155: ... skladu z bistvenimi zahtevami in ostalimi relevantnimi določili direktive 2014 53 EU 2011 65 EU Slovensky Slovak Datalogic S r l týmto vyhlasuje že Rhino II spĺňa základné požiadavky a všetky príslušné ustanovenia Smernice 2014 53 EU 2011 65 EU fi Suomi Finnish Datalogic S r l vakuuttaa täten että Rhino II tyyppinen laite on direktiivin 2014 53 EU 2011 65 EU oleellisten vaatimusten ja sitä koskev...

Page 156: ...the user s authority to operate the equipment This device complies with Industry Canada license exempt RSS standard s Operation is subject to the following two conditions 1 this device may not cause interference and 2 this device must accept any interference including interference that may cause undesired operation of the device Cet appareil radio est conforme au CNR d Industrie Canada L utilisati...

Page 157: ...ent complies with IC radiation exposure limits set forth for an uncontrolled environment This equipment should be installed and operated with minimum distance 20cm between the radiator your body Cet équipement est conforme aux limites d exposition aux rayonnements IC établies pour un environnement non contrôlé Cet équipement doit être installé et utilisé avec un minimum de 20 cm de distance entre ...

Page 158: ...orporates the following radio technologies and supports the corresponding Frequencies and Radio Frequency transmitted power as specified below RF Module Frequency Bands Max Transmission Power 1 BT SRD 2400 2479 MHz 10mW 2 WLAN 2412 2472 MHz 100mW 3 WLAN 5150 5350 MHz 200mW 4 WLAN 5470 5725 MHz 200mW ...

Page 159: ...bolo del bidone barrato deve essere smaltita alla fine della sua vita utile separatamente dai rifiuti urbani Per maggiori dettagli sulle modalità di smaltimento contattare il Fornitore dal quale è stata acquistata l apparecchiatura o consultare la sezione dedicata sul sito http www datalogic com Information aux utilisateurs Au terme de sa vie utile le produit qui porte le symbole d un caisson à or...

Page 160: ...r favor póngase en contacto con el proveedor donde lo compró o consultar la sección dedicada en el Web site http www datalogic com Benutzerinformation bezüglich Am Ende des Gerätelebenszyklus darf das Produkt nicht über den städtischen Hausmüll entsorgt werden Eine entsprechende Mülltrennung ist erforderlich Weitere Informationen zu dieser Richtlinie erhalten sie von ihrem Lieferanten über den sie...

Page 161: ...lecting your product model from the dropdown list in the Search by Product field for specific Data Sheets Manuals Software Utilities and Drawings Repair Program for On Line Return Material Authorizations RMAs plus Repair Center contact information Customer Service containing details about Maintenance Agreements Technical Support through email or phone Warranty Terms and Conditions The warranty per...

Page 162: ...Reference Documentation 156 Rhino II NOTES ...

Page 163: ... seamless connection to the wired network ASCII American Standard Code for Information Interchange A 7 bit plus parity code representing 128 letters numerals punctuation marks and control characters It is a standard data transmission code in the U S Barcode A pattern of variable width bars and spaces which represents numeric or alphanumeric data in binary form The general format of a barcode symbo...

Page 164: ... and configure hardware and software Character A pattern of bars and spaces which either directly represents data or indicates a control function such as a number letter punctuation mark or communications control contained in a message Density Barcode Density The number of characters represented per unit of measurement e g characters per inch Dock A dock is used for charging the terminal battery a...

Page 165: ...programming languages Laser Light Amplification by Stimulated Emission of Radiation The laser is an intense light source Light from a laser is all the same frequency unlike the output of an incandescent bulb Laser light is typically coherent and has a high energy density Light Emitting Diode LED A low power electronic light source commonly used as an indicator light It uses less power than an inca...

Page 166: ...rticular barcode type e g UPC EAN Code 39 PDF417 etc USB Universal Serial Bus Type of serial bus that allows peripheral devices disks modems printers digitizers data gloves etc to be easily connected to a computer A plug and play interface it allows a device to be added without an adapter card and without rebooting the computer the latter is known as hot plugging The USB standard developed by seve...

Page 167: ...twork WPAN A Wireless Personal Area Network is a personal area network a network for interconnecting devices centered around an individual person s workspace in which the connections are wireless Typically a wireless personal area network uses some technology that permits communication within about 10 meters in other words a very short range ...

Page 168: ...ts reserved Datalogic and the Datalogic logo are registered trademarks of Datalogic S p A in many countries including the U S and the E U Datalogic S r l Via S Vitalino 13 Calderara di Reno 40012 BO Italy Tel 39 051 3147011 Fax 39 051 3147205 822002330 Rev A January 2018 ...

Reviews: