


26.
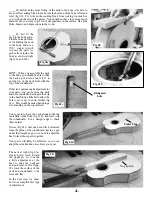
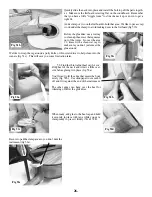
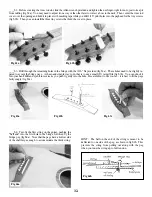
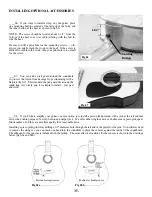
Quickly slide the neck into place and install the bolt to pull the parts togeth-
er. Make sure the fretboard is resting flat on the soundboard. Remember
that you have a little “wiggle room” to slide the neck up or down to get a
tight fit.
Add a clamp or two on the fretboard to hold that area. We like to put a scrap
wood under the clamp to avoid making dents in the fretboard (fig 51b).
Before the glue dries, use a wet rag
to clean up the excess that squeezes
out of the joints. Go over the area
2-3 times with a clean wet rag to
make sure you don’t just smear the
glue around.
We like to wrap the rag around a putty knife or thin screwdriver to help clean into the
corners (fig 51c). This will save you some frustration later.
Fig 51b
Fig 51c
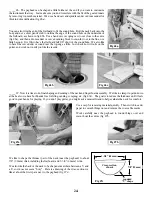
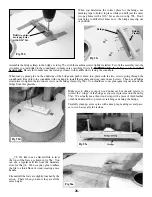
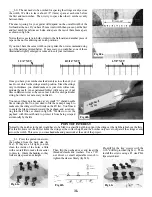
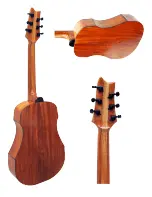
____52. Find the thin walnut heel cap for cov-
ering heel of the neck and trim it a little over-
size before gluing it in place (fig 52a).
You’ll want to fit the edge that meets the body
nicely (fig 52b). Use sandpaper to smooth it
off and fit it against the end of the instrument.
The other edges can hang over the heel for
trimming off after the glue dries.
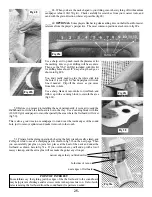
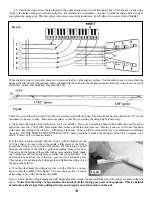
When ready, add glue to the heel cap and hold
it securely in place with tape while you get a
clamp ready to press it firmly (52c & 52d).
Fig 52a
Fig 52b
Be sure to pad the clamp area so you don’t dent the
instrument (fig 52e).
Fig 52c
Fig 52d
Fig 52e
Summary of Contents for PARLOR
Page 36: ......


