


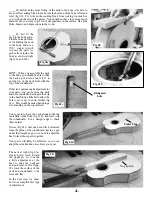


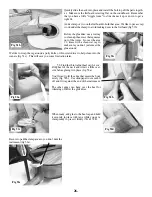

_____31. Turn the frame back-side-up and arrange it on
your work surface. Apply glue to the back edge, all the way
around the circumference, including the kerfing, heel, tail,
and corner blocks.
Carefully position the back panel on top, nicely centered at
each end, and apply clamping pressure. If using individual
clamps, we recommend placing clamps at the heel and tail
ends first to hold the back on the centerline, then work your
way around the circumference with more clamps. Check the
seams by looking under the overhang of the back to make
sure it is fully pressed down all the way around.
Fig 31a
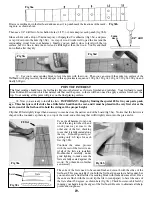
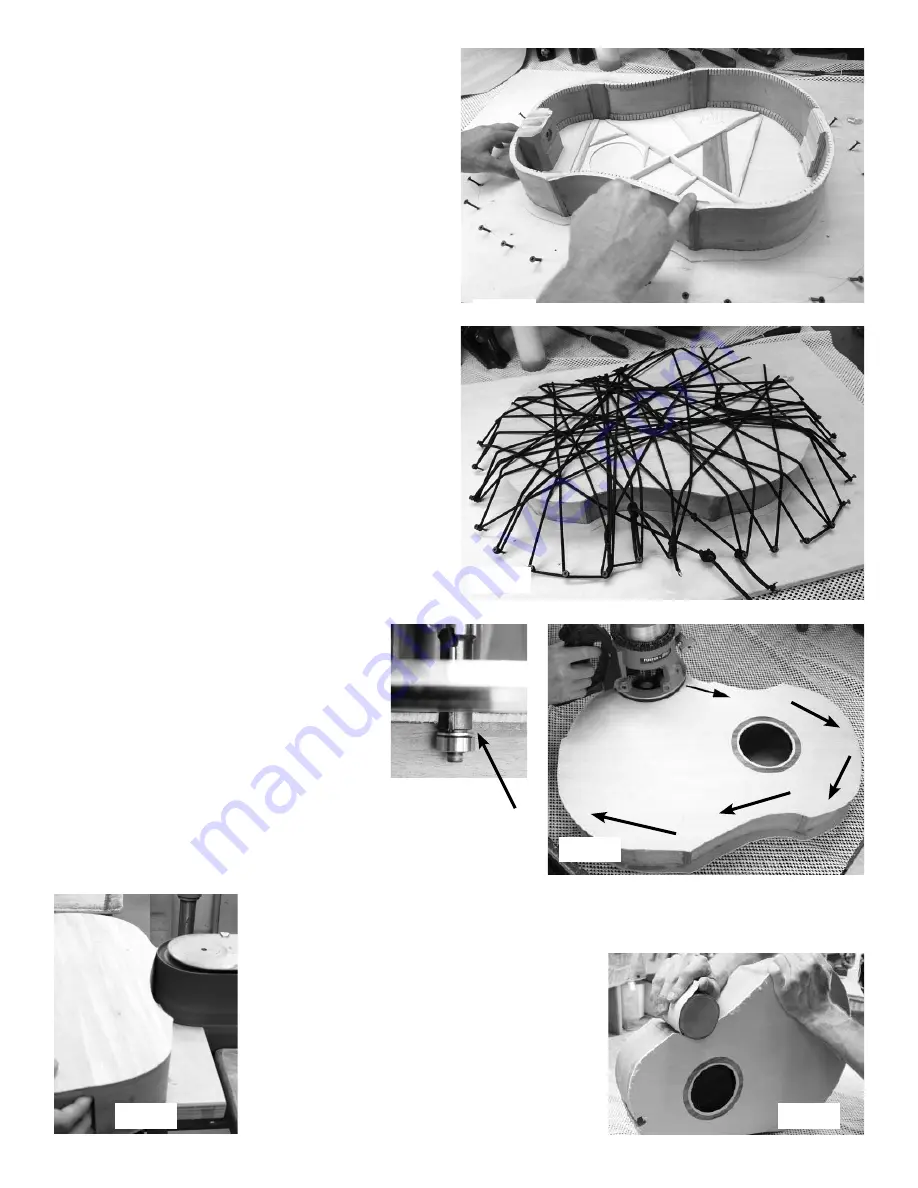
If using the Bungee cord clamping system, put screws all
around the frame, about 4” away from the body, and spaced
about 2-3 inches apart, as shown in fig 31a.
Place the back panel carefully centered on the frame and
begin pulling Bungee cording across, making sure the back
does not slide out of position as you work. We show two
20-ft lengths of Bungee cords, 40 feet (10 m) total, in the
photo at right (fig 31b).
Be sure to check around the entire glue seam, looking under
the overhang and pressing down to see if there is any sec-
tion that is not held firmly. Watch for glue squeezing out of
the joint -- that’s a good sign of sufficient pressure.
Fig 31b
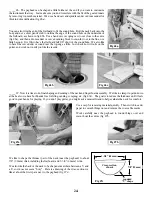
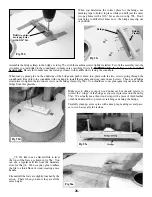
_____32. When dry, trim off the excess overhang
of the soundboard and back flush with the outside
of the body.
We like using a flush-cutting router bit (fig 32a)
for this step. Move the router clockwise around
the instrument (this is called “climb cutting”) to
minimize the chance of chipping the thin spruce
top and mahogany back panels (fig 32b).
You can achieve the same results more slowly us-
ing a coping saw to cut close to the sides, and then
a sanding block to sand it flush.
flush-cutting
router bit
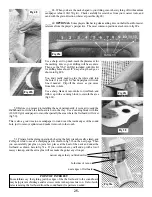
The corner blocks protrude a little beyond the sides, so you’ll want to sand those flush too.
A spindle sander or attachment to a drill press works well for this (fig 32c), but you can also
make a curved sanding block using a tin can or other round object to wrap your sandpaper
around (fig. 32d). Always watch closely to make
sure you don’t distort the shape of the corners.
This is an important step for achieving a nice-look-
ing guitar. The corner blocks and sides should meet
seamlessly and smoothly.
If you find gaps in the joints, fill them with mahoga-
ny colored wood filler, available from most hardware
stores. Or make your own paste of mahogany sand-
ing dust and Superglue.
Fig 32b
Fig 32a
Fig 32c
Fig 32d
14.
Summary of Contents for PARLOR
Page 36: ......


