


21.
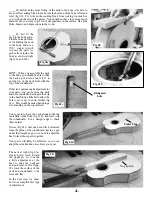
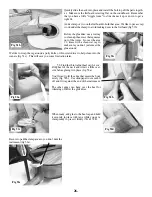
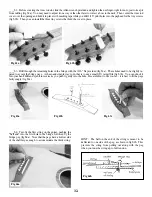
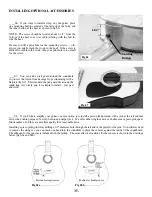
_____41. Test fit the
neck to the body again.
Find the bolt and wash-
er for holding the neck
to the body, and use a
7/16” socket wrench
to draw the parts to-
gether from inside the
body, as shown at right
(figs 41a and 41b).
Fig 41a
Fig 41b
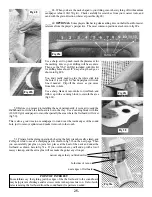
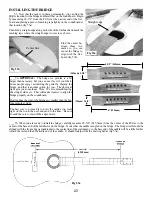
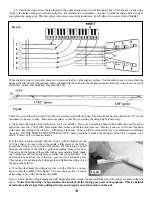
Your goal is to have the neck aligned with the
centerline of the body (fig 41d), and level with
the soundboard. Use a straight-edge to check
these details.
Notice (fig 41e) that our neck tilts downward
from the plane of the soundboard, leaving a gap
under the straight-edge, so we need to adjust the
heel to level those parts together.
Your parts will likely be different, so you can
adapt these instructions to achieve your goal.
Center Line
Fig 41d
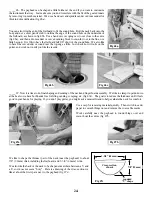
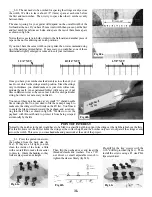
_____40. Before doing more fitting of the neck to the body, it is best to
use your flat sanding block to make sure the heel end of the body is flat and
level (fig 40). Try to keep the sanding block from rocking too much as
you work on the end of the guitar. You should not have to remove much
material, but you want to get rid of irregularities in the surface, like glue
blobs, bumps, and depressions in the wood.
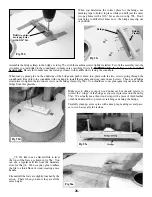
HINT: When you assemble the neck
to the body, you should be able to slide
the neck up or down about 1/16” to
get the top of the neck level with the
top of the soundboard.
If that isn’t quite enough adjustment for
your parts, you can remove the neck
and use a round file to elongate the hole
in the heel block a little bit to allow the
bolt to move up or down further (fig
41c). This would be easier than doing a
lot of sanding on the top surfaces!
Elongated
hole
Fig 40
Fig 41c
Fig 41e
No gap here!
The neck at right (fig 41e)
slopes down ward toward
the peghead, so it needs
a little adjustment at the
heel to raise the peghead
end and remove the slope.
We want the surface of the
neck and soundboard to be
level and flat.
In the next step we show
how to accomplish this type
of adjustment.
Summary of Contents for PARLOR
Page 36: ......