186
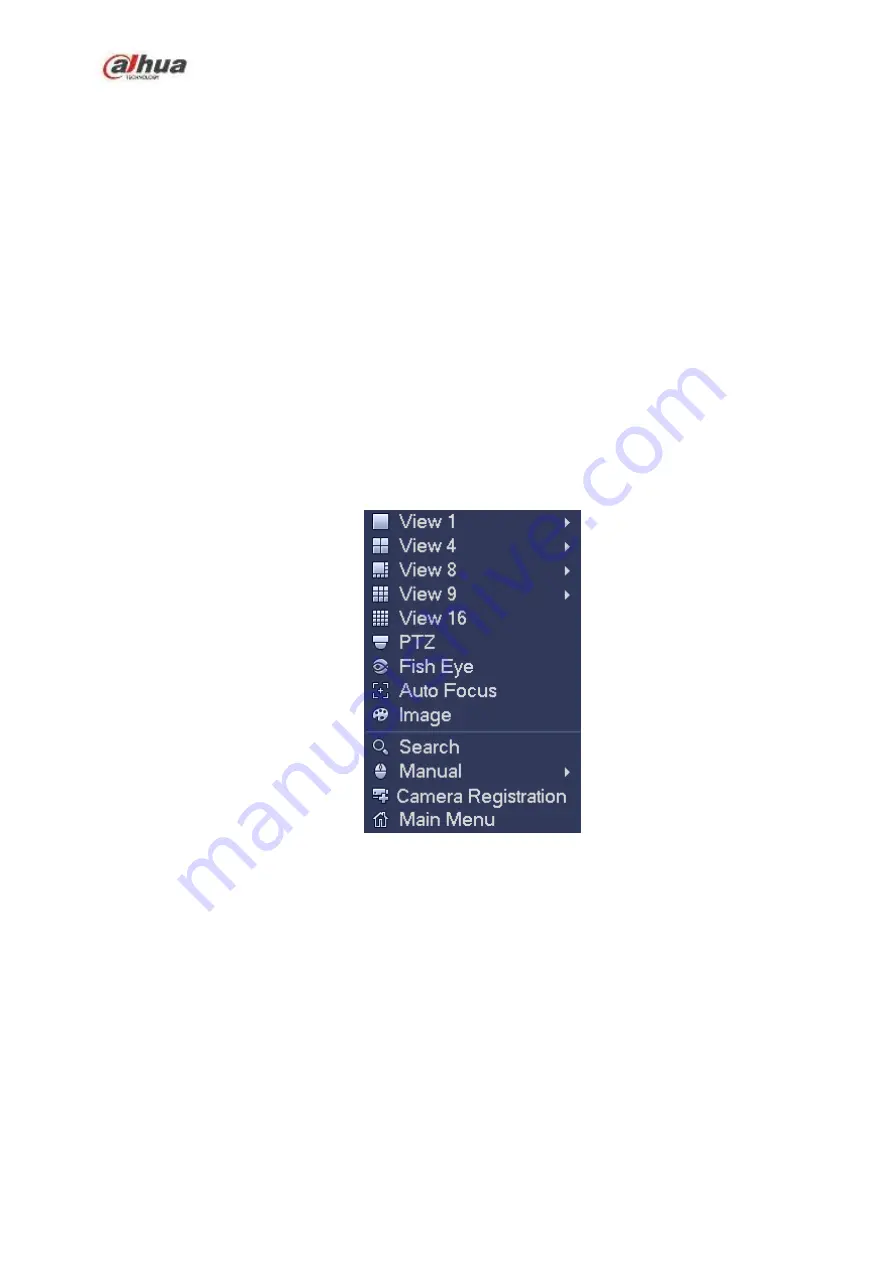
After you logged in the device, right click mouse, you can see the short cut menu. Please see Figure 4-66
Window split mode: You can select window amount and then select channels.
Edit view (Sequence): Change channel display sequence on the preview window.
Customized screen: Set customized screen split mode.
PTZ: Click it to go to PTZ interface.
Fisheye (optional): It is to realize fish eye operation.
Auto focus: It is to set auto focus function. Please make sure the connected network camera
supports this function.
Color setting: Set video corresponding information.
Search: Click it to go to Search interface to search and playback a record file.
Record control: Enable/disable record channel.
Alarm output: It is to set alarm output mode.
Camera registration: Search and add a remote device.
Alarm output: Generate alarm output signal manually.
Main menu: Go to system main menu interface.
Tips:
Right click mouse to go back to the previous interface.
Figure 4-66
Summary of Contents for NVR1A-4P Series
Page 1: ...Dahua Network Video Recorder User s Manual V 4 3 0 ...
Page 142: ...128 Figure 3 11 3 6 12 NVR42V 8P Series Please refer to Figure 3 12 for connection sample ...
Page 143: ...129 Figure 3 12 ...
Page 157: ...143 Figure 4 15 Step 2 Click device display edit interface See Figure 4 16 ...
Page 220: ...206 Figure 4 93 Figure 4 94 ...
Page 240: ...226 Figure 4 110 Figure 4 111 Figure 4 112 ...
Page 251: ...237 Figure 4 123 Figure 4 124 ...
Page 253: ...239 Figure 4 126 Click draw button to draw the zone See Figure 4 127 ...
Page 257: ...243 Figure 4 130 Click Draw button to draw a zone See Figure 4 131 Figure 4 131 ...
Page 262: ...248 Figure 4 136 Click draw button to draw the zone See Figure 4 137 ...
Page 275: ...261 Figure 4 148 Figure 4 149 ...
Page 276: ...262 Figure 4 150 Figure 4 151 ...
Page 387: ...373 Figure 5 60 Figure 5 61 ...
Page 388: ...374 Figure 5 62 Figure 5 63 ...
Page 412: ...398 Figure 5 96 Figure 5 97 ...


