Dual Band AC1750 Gigabit ADSL2+ Modem Router User Manual
Basic Installation
Page 20
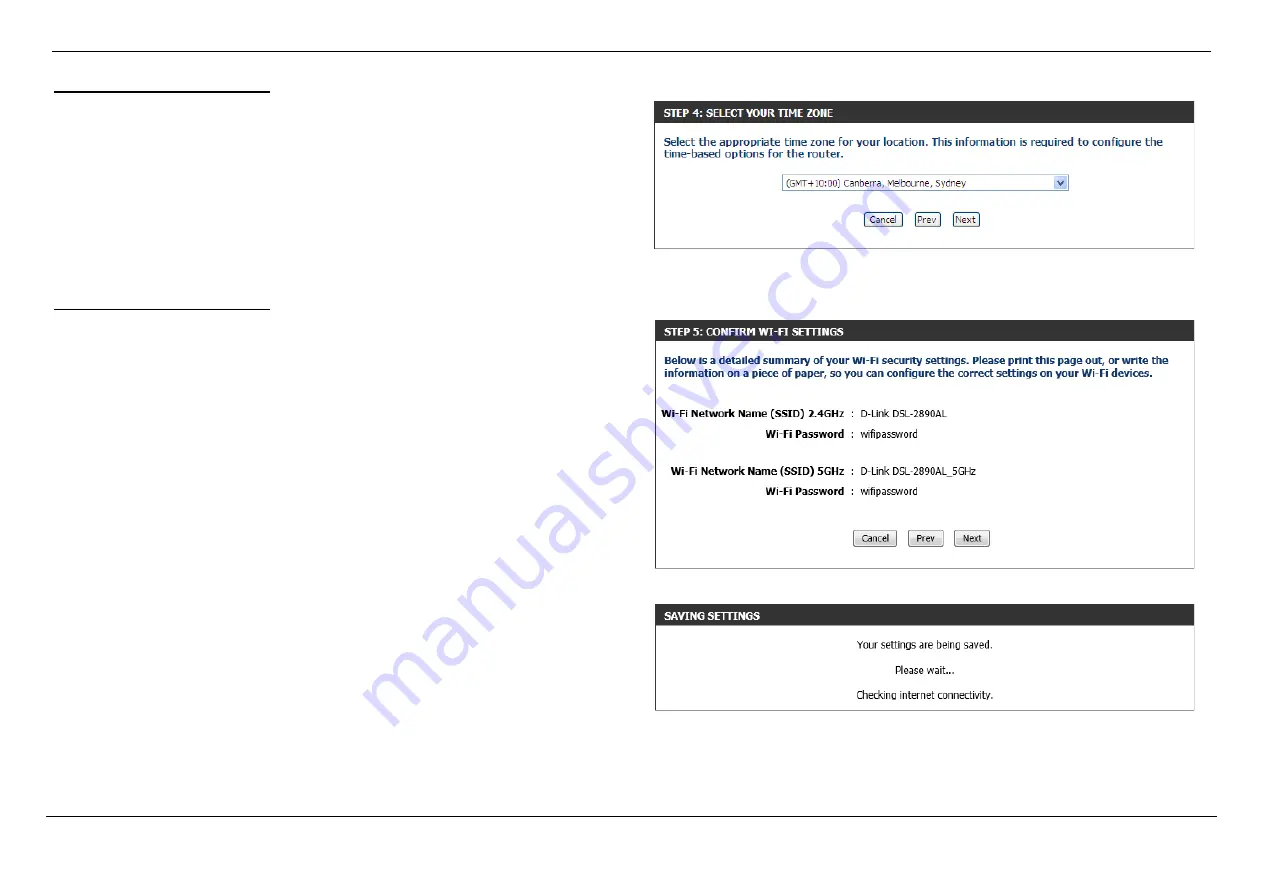
Step 4: Select Your Time Zone
After configuring the Web UI login details, we can configure the time zone used by
this router. In this section, we can configure the following:
Time Zone:
Select the time zone that should be used by this router. This will be
used by the time and date configuration later on in this manual.
Click the
Next
button to continue to the next step.
Click the
Prev
button to return to the previous step.
Click the
Cancel
button to discard the changes made and return to the main menu.
Step 5: Confirm Wi-Fi Settings
After configuring the time zone, we can view a summary of the Wi-Fi settings for
confirmation.
Click the
Next
button to continue to the next step.
Click the
Prev
button to return to the previous step.
Click the
Cancel
button to discard the changes made and return to the main menu.
After clicking the
Next
button, the settings will be saved and Internet connectivity will
be attempted.
After this, the
D-Link Setup Wizard
will be completed and the user will be navigated
to the main Web UI page.
When the Internet connection is ready, the router will proceed to the mydlink™
registration in step 6. When the Internet connection is not ready, a pop-up window will
be displayed to remind the user to restart or quit the Setup Wizard.


