background image

DGS-3700-12/DGS-3700-12G Series Layer 2 Gigabit Ethernet Switch User Manual 


92 

IGMP Snooping 

Internet Group Management Protocol (IGMP) snooping allows the Switch to recognize IGMP queries and reports sent 
between network stations or devices and an IGMP host. When enabled for IGMP snooping, the Switch can open or 
close a port to a specific device based on IGMP messages passing through the Switch. 

In order to use IGMP Snooping it must first be enabled for the entire Switch (see the 

DGS-3700-12/DGS-3700-12G 

Switch Series Web Management Tool

). You may then fine-tune the settings for each VLAN using the 

IGMP 

Snooping

 link in the 

L2 Features

 folder. When enabled for IGMP snooping, the Switch can open or close a port to a 

specific multicast group member based on IGMP messages sent from the device to the IGMP host or vice versa. The 
Switch monitors IGMP messages and discontinues forwarding multicast packets when there are no longer hosts 
requesting that they continue. 

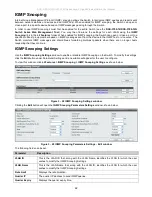
IGMP Snooping Settings 

Use the

 IGMP Snooping Settings

 window to enable or disable IGMP Snooping on the Switch. To modify the settings, 

click the 

Edit 

button under Parameter Settings and a new table will appear for the user to configure. 

To view this window, click 

L2 Features > IGMP Snooping > IGMP Snooping Settings 

as shown below: 


Figure 3 - 28 IGMP Snooping Settings window 

Clicking the 

Edit

 button will open the 

IGMP Snooping Parameters Settings

 window, shown below: 


Figure 3 - 29 IGMP Snooping Parameters Settings - Edit window 

The following fields can be set: 

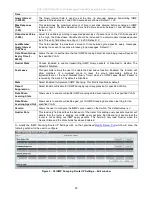
Parameter                 Description 


VLAN ID 

This is the VLAN ID that, along with the VLAN Name, identifies the VLAN for which the user 
wishes to modify the IGMP Snooping Settings. 

VLAN Name 

This is the VLAN Name that, along with the VLAN ID, identifies the VLAN for which the user 
wishes to modify the IGMP Snooping Settings. 

Rate Limit 

Displays the rate limitation. 

Querier IP 

The querier IP address to send IGMP queries. 

Querier Expiry 

Displays the querier expiry time.  

Summary of Contents for DGS-3700 Series

Page 1: ...Copyright 2009 All rights reserved User Manual Product Model DGS 3700 Series Layer 2 Managed Gigabit Ethernet Switch Release 1 00...

Page 2: ...thout the written permission of D Link Corporation is strictly forbidden Trademarks used in this text D Link and the D LINK logo are trademarks of D Link Corporation Microsoft and Windows are register...

Page 3: ...erface Settings 11 IPv6 Route Settings 13 IPv6 Neighbor Settings 13 Port Configuration 14 Port Settings 14 Port Description 15 Port Error Disabled 16 Static ARP Settings 16 User Accounts 17 System Log...

Page 4: ...lobal State Settings 41 SNMP View Table 41 SNMP Group Table 42 SNMP User Table 43 SNMP Community Table 44 SNMP Host Table 45 SNMP v6Host Table 45 SNMP Engine ID 46 SNMP Trap Configuration 47 Time Rang...

Page 5: ...ocol Group Settings 82 802 1v Protocol VLAN Settings 83 RSPAN Settings 84 GVRP Settings 84 GVRP Global Settings 85 MAC based VLAN Settings 86 PVID Auto Assign Settings 86 Port Trunking 87 LACP Port Se...

Page 6: ...ast Filtering Mode 116 LLDP 116 LLDP Global Settings 117 LLDP Port Settings 118 LLDP Management Address List 119 LLDP Basic TLVs Settings 119 LLDP Dot1 TLVs Settings 120 LLDP Dot3 TLVs Settings 121 LL...

Page 7: ...ck List 151 Port Security 151 Port Security Port Settings 151 Port Security VLAN Settings 152 Port Security Entries 153 DHCP Server Screening Settings 153 DHCP Screening Port Settings 154 DHCP Offer F...

Page 8: ...trol 180 MAC based Access Control Settings 180 MAC based Access Control Local Settings 182 Web Authentication 183 Conditions and Limitations 184 Web based Access Control Settings 184 Web based Access...

Page 9: ...outer Port 245 MLD Snooping Group 245 MLD Snooping Forwarding Table 246 Browse MLD Snooping Counter 247 Browse Session Table 247 CFM 247 CFM Packet Counter List 247 CFM Packet Counter CCM List 248 Bro...

Page 10: ...G Series Layer 2 Gigabit Ethernet Switch User Manual x Download Firmware 258 Reboot System 258 Mitigating ARP Spoofing Attacks Using Packet Content ACL 259 System Log Entries 267 Glossary 278 Password...

Page 11: ...QoS functions including HOL Blocking Prevention Bandwidth Control Traffic Control 802 1P Default Priority 802 1P User Priority QoS Scheduling Mechanism QoS Scheduling In Band Manage Settings and SRED...

Page 12: ...xample use the copy command Boldface Typewriter Font Indicates commands and responses to prompts that must be typed exactly as printed in the manual Initial capital letter Indicates a window name Name...

Page 13: ...te directly with the Switch using the HTTP protocol The Web based management module and the Console program and Telnet are different ways to access the same internal switching software and configure i...

Page 14: ...management features available in the web based manager are explained below Web based User Interface The user interface provides access to various Switch configuration and management windows allows you...

Page 15: ...showing port activity duplex mode or flow control depending on the specified mode Various areas of the graphic can be selected for performing management functions including port configuration Area 3...

Page 16: ...Segmentation BPDU Tunneling Settings IGMP Snooping MLD Snooping Port Mirror Loopback Detection Settings Spanning Tree Forwarding Filtering LLDP CFM and Ethernet OAM QoS Features information on Switch...

Page 17: ...User Accounts System Log Configuration System Severity Settings DHCP Relay Out of Band Management Settings External Alarm Settings DHCP Auto Configuration Settings MAC Address Aging Time Web Settings...

Page 18: ...ation is helpful to keep track of PROM and firmware updates and to obtain the Switch s MAC address for entry into another network device s address table if necessary In addition this window displays t...

Page 19: ...ription Baud Rate This field specifies the baud rate for the serial port on the Switch There are four possible baud rates to choose from 9600 19200 38400 and 115200 For a connection to the Switch usin...

Page 20: ...is installed you can leave the default address 0 0 0 0 in this field 4 If no VLANs have been previously configured on the Switch you can use the default VLAN Name The default VLAN contains all of the...

Page 21: ...nage the Switch in band unless their IP addresses are entered in the Security IP Management window If VLANs have not yet been configured for the Switch the default VLAN contains all of the Switch s po...

Page 22: ...pif System ipaddress xxx xxx xxx xxx z where the x s represents the corresponding number of subnets in CIDR notation The IP interface named System on the Switch can be assigned an IP address and subne...

Page 23: ...ion allows user to enable the IPv4 address on the IP interface Click Apply to implement changes made To edit an entry for IPv6 features click the corresponding IPv6 Edit button Figure 2 8 IPv6 Interfa...

Page 24: ...on IPv6 Route Settings as shown below Figure 2 9 IPv6 Route Settings window The following parameters can be configured Parameter Description Interface Name Enter the name you wish to give the IPv6 Rou...

Page 25: ...f the IP interface previously created Address Select Address and enter the IPv6 address of the entry you wish to find Static Select Static to view all statically entered IPv6 neighbors on the Switch D...

Page 26: ...ontrol is set on a master physical layer by a local source The slave setting 1000M Full_S uses loop timing where the timing comes form a data stream received from the master If one connection is set f...

Page 27: ...ate Describes the current running state of the port whether Enabled or Disabled Connection Status This field will read the uplink status of the individual ports whether enabled or Disabled Reason Desc...

Page 28: ...entering the IP Address and MAC Address of the Static ARP entry click Apply to implement the new entry To completely clear the Static ARP Settings click the Delete All button NOTE The Switch supports...

Page 29: ...the new password in the Confirm Password field Use the drop down menu to select the type of encryption Default Plain Text or Sha 1 and click Apply NOTICE In case of lost passwords or password corrupti...

Page 30: ...y Strings and Trap Stations Yes Yes Read only Update Firmware and Configuration Files Yes No No System Utilities Yes Yes No Factory Reset Yes No No User Account Management Add Update Delete User Accou...

Page 31: ...ll trigger a log entry You can choose between On Demand Time Interval and Log Trigger On Demand This method will only save log files when they manually tell the Switch to do so using the Save Log link...

Page 32: ...the user level Facility Those Facilities that have been designated are shown in the following Bold font indicates the facility values that the Switch is currently employing Numerical Facility Code Num...

Page 33: ...scribed below Parameter Description System Severity Choose how the alerts are used from the drop down menu Select log to send the alert of the Severity Type configured to the Switch s log for analysis...

Page 34: ...DHCP messages can be forwarded across The default hop count is 4 DHCP Relay Time Threshold 0 65535 Allows an entry between 0 and 65535 seconds and defines the maximum time limit for routing a DHCP pac...

Page 35: ...ady exists in the packet received from the DHCP client DHCP Relay Option 60 State This function enables or disables the DHCP option 60 state When option 60 is enabled if the packet does not have optio...

Page 36: ...sub option format 1 2 3 4 5 6 7 1 6 0 4 VLAN Module Port 1 byte 1 byte 1 byte 1 byte 2 bytes 1 byte 1 byte a Sub option type b Length c Circuit ID type d Length e VLAN the incoming VLAN ID of DHCP cl...

Page 37: ...rver IPs can be configured per IP Interface Click Apply to implement changes made DHCP Relay Option 60 Default Settings This window allows the user to configure the DHCP Relay Option 60 Default server...

Page 38: ...Partial Match The option 60 string in the packet only needs to partially match the specified string Click Add to add a new entry To search for a particular entry enter the correct IP Address or String...

Page 39: ...opriate information into the box provided Relay Rule Use the pull down menu to choose either Relay or Drop When drop is specified the packet with no matching rules found will be dropped without furthe...

Page 40: ...ssages the Switch will send out alarm traps to the NMS according to the message you configured To view this window click Configuration External Alarm Settings as shown below Figure 2 28 External Alarm...

Page 41: ...out being accessed that is how long a learned MAC Address is allowed to remain idle To change this enter a value representing the MAC address age out time in seconds The MAC Address Aging Time can be...

Page 42: ...hown below Figure 2 34 Password Encryption window Clipaging Settings Clipaging Status can be Enabled or Disabled in this window it is Enabled by default Clipaging settings are used when issuing a comm...

Page 43: ...eb based management interface SSH If the IP address has these three letters attached it denotes a firmware update through SSH SIM If the IP address has these letters attached it denotes a firmware upg...

Page 44: ...ration file settings Delete Click the Delete button under this heading to delete this configuration file from the Switch s memory Ping Test Ping is a small program that sends ICMP Echo packets to the...

Page 45: ...efault setting of 100 bytes Timeout Select a timeout period between 1 and 10 seconds for this Ping message to reach its destination If the packet fails to find the IPv6 address in this specified time...

Page 46: ...ount or packet count and can be counted for different frame types To view this window click Configuration VLAN Counter Settings as shown below Figure 2 40 VLAN Counter Settings window The following pa...

Page 47: ...t an Enabled or Disabled SNTP state Current Time Displays the Current Time set on the Switch Time Source Displays the time source for the system SNTP Settings SNTP First Server This is the IP address...

Page 48: ...own menu to enable or disable the DST Settings Daylight Saving Time Offset in Minutes Use this pull down menu to specify the amount of time that will constitute your local DST offset 30 60 90 or 120 m...

Page 49: ...pril 3 and end DST on October 14 From Month Enter the month DST will start on each year From Day Enter the day of the week DST will start on each year From Time in HH MM Enter the time of day DST will...

Page 50: ...tion Up to 500 entries can be specified Click Apply to implement changes MAC Notification Port Settings This window is used to configure the MAC Notification Port Settings for the Switch To view this...

Page 51: ...for a listed group of SNMP managers Thus you may create a group of SNMP managers that are allowed to view read only information or receive traps using SNMPv1 while assigning a higher level of securit...

Page 52: ...on SNMP Settings SNMP View Table as shown below Figure 2 46 SNMP View Table window The following parameters can be set Parameter Description View Name Type an alphanumeric string of up to 32 character...

Page 53: ...ceive SNMP trap messages generated by the Switch s SNMP agent User based Security Model SNMPv1 Specifies that SNMP version 1 will be used SNMPv2 Specifies that SNMP version 2c will be used The SNMPv2...

Page 54: ...SNMP version 3 is in use SNMP V3 Encryption None Indicates that there is no SNMP V3 Encryption Password Indicates that there is SNMP V3 Encryption through a password Key Indicates that there is SNMP...

Page 55: ...e or read only level permission for the MIB objects accessible to the SNMP community To view this window click Configuration SNMP Settings SNMP Community Table as shown below Figure 2 49 SNMP Communit...

Page 56: ...rity level AuthNoPriv To specify an AuthNoPriv security level AuthPriv To specify an AuthPriv security level Community String SNMP V3 User Name Type in the community string or SNMP V3 user name as app...

Page 57: ...op down menu to select from the following noauth_nopriv Specifies that there will be no authorization and no encryption of packets sent between the Switch and a remote SNMP manager auth_nopriv Specifi...

Page 58: ...Time Range Settings as shown below Figure 2 54 Time Range Settings window Parameter Description Range Name Enter a name of no more than 32 alphanumeric characters that will be used to identify this ti...

Page 59: ...Select Disabled or Enabled and click Apply sFlow Analyzer Server Settings This window is used to configure the sFlow analyzer server settings You can specify more than one analyzer server with the sam...

Page 60: ...to create sFlow flow sampler settings on the Switch By configuring the sampling function for a port a sample packet received by this port will be encapsulated and forwarded to the analyzer server at t...

Page 61: ...window click Configuration sFlow sFlow Counter Poller Settings as shown below Figure 2 58 sFlow Counter Poller Settings window The following parameters can be configured Parameter Description From Po...

Page 62: ...IM group is a group of switches that are managed as a single entity SIM switches may take on three different roles 1 Commander Switch CS This is a switch that has been manually configured as the contr...

Page 63: ...occur 3 This version will support multiple switch upload and downloads for firmware configuration files and log files as follows Firmware The switch now supports multiple MS firmware downloads from a...

Page 64: ...30 90 The user may set the discovery protocol interval in seconds that the Switch will send out discovery packets Returning information to a Commander Switch will include information about other swit...

Page 65: ...fy it Remote Port Displays the number of the physical port on the CS that the MS or CaS is connected to The CS will have no entry in this field Speed Displays the connection speed between the CS and t...

Page 66: ...P Management Group are connected to other groups and devices Possible icons in this screen are as follows Icon Description Group Layer 2 commander switch Layer 3 commander switch Commander switch of o...

Page 67: ...mouse cursor over a specific device in the topology window tool tip will display the same information about a specific device as the Tree view does See the window below for an example Figure 2 63 Devi...

Page 68: ...igits of the MAC Address to identify it Module Name Displays the full module name of the switch that was right clicked MAC Address Displays the MAC Address of the corresponding Switch Local Port No Di...

Page 69: ...ber icon The following options may appear for the user to configure Remove from group Remove a member from a group Configure Launch the web management to configure the Switch Property To pop up a wind...

Page 70: ...nce Will set display properties such as polling interval and the views to open at SIM startup Group Add to group Add a candidate to a group Clicking this option will reveal the following dialog for th...

Page 71: ...Configuration Single IP Management Firmware Upgrade as shown below Figure 2 74 Firmware Upgrade window Configuration File Backup Restore This screen is used to upgrade configuration files from the Com...

Page 72: ...the Switch and to configure alarm settings warning settings temperature threshold settings voltage threshold settings bias current threshold settings Tx power threshold settings and Rx power threshold...

Page 73: ...h To view this window click Configuration DDM DDM Temperature Threshold Settings as shown below Figure 2 79 DDM Temperature Threshold Settings window The following fields can be configured Parameter D...

Page 74: ...ld for the warning When the operating parameter rises above this value action associated with the warning is taken Low Warning This is the lowest threshold for the warning When the operating parameter...

Page 75: ...rt Specifies a port or range of ports to be configured High Alarm This is the highest threshold for the alarm When the operating parameter rises above this value action associated with the alarm will...

Page 76: ...ciated with the alarm will be taken Low Alarm This is the lowest threshold for the alarm When the operating parameter falls below this value action associated with the alarm is taken High Warning This...

Page 77: ...Forwarding Filtering LLDP CFM Ethernet OAM The following section will aid the user in configuring Layer 2 functions for the Switch The Switch includes various functions all discussed in detail in the...

Page 78: ...for delivery Strict mode and weighted round robin system are employed on the Switch to determine the rate at which the queues are emptied of packets The ratio used for clearing the queues is 4 1 This...

Page 79: ...can also provide a level of security to your network IEEE 802 1Q VLANs will only deliver packets between stations that are members of the VLAN Any port can be configured as either tagging or untagging...

Page 80: ...Ring packets so they can be carried across Ethernet backbones and 12 bits of VLAN ID VID The 3 bits of user priority are used by 802 1p The VID is the VLAN identifier and is used by the 802 1Q standar...

Page 81: ...have only one PVID but can have as many VIDs as the Switch has memory in its VLAN table to store them Because some devices on a network may be tag unaware a decision must be made at each port on a tag...

Page 82: ...ut of switch ports Thus all devices connected to a port are members of the VLAN s the port belongs to whether there is a single computer directly connected to a switch or an entire department On port...

Page 83: ...s large ISP s create L2 Virtual Private Networks and also create transparent LANs for their customers which will connect two or more customer LAN points without over complicating configurations on the...

Page 84: ...N with one set of protocols and one routing behavior Regulations for Double VLANs Some rules and regulations apply with the implementation of the Double VLAN procedure 1 All ports must be configured f...

Page 85: ...shown below Figure 3 6 Current 802 1Q Static VLANs Entries window To create a new 802 1Q VLAN entry or edit an existing one click the Add Edit VLAN tab at the top of the 802 1Q VLAN window A new wind...

Page 86: ...AN See the table below for a description of the parameters in the new menu NOTE The Switch supports up to 4k static VLAN entries Figure 3 8 802 1Q VLAN window Edit window The following fields can then...

Page 87: ...esignate the port as untagged Forbidden Select this to specify the port as not being a member of the VLAN and that the port is forbidden from becoming a member of the VLAN dynamically Not Member Allow...

Page 88: ...nd out GVRP packets to outside sources notifying that they may join the existing VLAN Port List e g 1 5 Allows an individual port list to be added or deleted as a member of the VLAN Tagged Specifies t...

Page 89: ...dress Is used to specify an IPv6 network address The format is ipaddress prefix length The prefix length of the IPv6 network address cannot be greater than 64 Priority The priority to be associated wi...

Page 90: ...VLAN ID is being used by different customers This is achieved by inserting SPVLAN tags into the customer s frames when they enter the service provider s network and then removing the tags when the fr...

Page 91: ...the packet that does not match any assignment rule in the Q in Q profile will be dropped If disabled then the packet will be assigned to the PVID of the receiving port Outer TPID The Outer TPID is us...

Page 92: ...priority for the VLAN ranging from 0 7 With 7 having the highest priority Click Apply to make a new entry and Delete All to remove a VLAN Translation entry Q in Q and VLAN Translation Rules For ingres...

Page 93: ...ated groups To view this window click L2 Features 802 1v Protocol VLAN 802 1v Protocol Group Settings as shown below Figure 3 15 802 1v Protocol Group Settings window The following fields can be set P...

Page 94: ...in the Switch which is used to determine the CoS queue to which packets are forwarded to Once this field is specified packets accepted by the Switch that match this priority are forwarded to the CoS...

Page 95: ...Settings as shown below Figure 3 17 RSPAN Settings window Enter the VLAN Name or VID and click Create To remove an entry click Delete to modify an entry click the corresponding Modify button Figure 3...

Page 96: ...two are equal the port will receive the packet Ingress Check This field can be toggled using the space bar between Enabled and Disabled Enabled enables the port to compare the VID tag of an incoming...

Page 97: ...Settings as shown below Figure 3 21 MAC based VLAN Settings window The following fields can be set Parameter Description MAC Address Specify the MAC address to be reauthenticated by entering it into t...

Page 98: ...e order they were sent NOTE If any ports within the trunk group become disconnected packets intended for the disconnected ports will be load shared among the other unlinked ports of the link aggregati...

Page 99: ...a single port that has a redundant link To view this window click L2 Features Port Trunking as shown below Figure 3 24Port Trunking window The following fields can be set Parameter Description Algorit...

Page 100: ...th the selected port Activity Active Active LACP ports are capable of processing and sending LACP control frames This allows LACP compliant devices to negotiate the aggregated link so the group may be...

Page 101: ...ports on that switch Select a port number from the drop down menu to display the forwarding ports To configure new forwarding ports for a particular port select a port from the menu and click Apply T...

Page 102: ...nel uplink setting When the device is operated without Q in Q enabled the BPDU will have its DA replaced by the tunnel multicast address and be transmitted out based on the VLAN configuration and the...

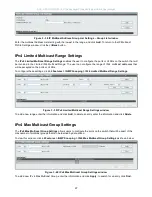
Page 103: ...ing multicast packets when there are no longer hosts requesting that they continue IGMP Snooping Settings Use the IGMP Snooping Settings window to enable or disable IGMP Snooping on the Switch To modi...

Page 104: ...st Leave This parameter allows the user to enable the Fast Leave function Enabled this function will allow members of a multicast group to leave the group immediately without the implementation of the...

Page 105: ...port or VLAN Click Apply to implement changes made IGMP Snooping Static Group Settings This table is used to configure the current IGMP snooping static group information on the Switch To view this win...

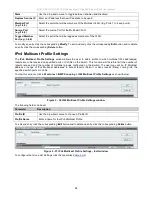
Page 106: ...ulticast Address List and click Add the new information will be displayed in the table Click Back to return to the IGMP Multicast Group Profile Settings window and click Delete to remove an entry IGMP...

Page 107: ...which multicast IPv4 address es reports are to be received on specified ports or VLANs on the Switch This function will therefore limit the number of reports received and the number of multicast group...

Page 108: ...be accepted on the ports or VLANs To configure these settings click L2 Features IGMP Snooping IPv4 Limited Multicast Range Settings Figure 3 39 IPv4 Limited Multicast Range Settings window To add a n...

Page 109: ...the router to ask if any link is requesting multicast data There are two types of MLD query messages emitted by the router The General Query is used to advertise all multicast addresses that are ready...

Page 110: ...amount of time between group specific query messages including those sent in response to leave group messages A value between 1 and 25 The default is 1 second Data Driven Group Expiry Time 1 65535 Sp...

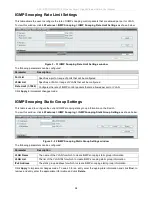
Page 111: ...indow click L2 Features MLD Snooping MLD Snooping Rate Limit Settings as shown below Figure 3 44 MLD Snooping Rate Limit Settings window The following parameters may be viewed or modified Parameter De...

Page 112: ...ame Specifies the name of the VLAN for which to configure the MLD snooping static group information VLAN List Specifies the list of the VLAN IDs for which to configure the MLD snooping static group in...

Page 113: ...g Multicast VLAN settings on the Switch To view this window click L2 Features MLD Snooping MLD Snooping Multicast VLAN Settings as shown below Figure 3 49 MLD Snooping Multicast VLAN Settings window T...

Page 114: ...addresses to accept reports Permit or deny reports Deny coming into the specified switch ports or VLANs To view this window click L2 Features MLD Snooping IPv6 Multicast Profile Settings as shown belo...

Page 115: ...shown below Figure 3 53 IPv6 Limited Multicast Range Settings window To add a new range enter the information and click Add to delete an entry enter the information and click Delete IPv6 Max Multicast...

Page 116: ...irror window To configure a mirror port 1 Change the status to Enabled 2 Select the Source Port from where you want to the frames to come from 3 Select the Target Port which receives the copies from t...

Page 117: ...the pull down menu To view this window click L2 Features Loopback Detection Settings as shown below Figure 3 56 Loopback Detection Settings window The following parameters can be configured Parameter...

Page 118: ...either case ports do not forward packets In the STP port transition states disabled blocking or listening or in the RSTP port state discarding there is no functional difference the port is not active...

Page 119: ...with legacy equipment and is capable of automatically adjusting BPDU packets to 802 1D format when necessary However any segment using 802 1D STP will not benefit from the rapid transition and rapid t...

Page 120: ...Max Age may be set to ensure that old information does not endlessly circulate through redundant paths in the network preventing the effective propagation of the new information Set by the Root Bridg...

Page 121: ...and the information held for the port will age out The user may set a hop count from 1 to 20 The default is 20 NNI BPDU Address Configure NNI port address dot1d Specifies GVRP s bpdu MAC address of NN...

Page 122: ...the connection to the network for the group Redundant links will be blocked just as redundant links are blocked on the switch level The STP on the switch level blocks redundant links between switches...

Page 123: ...tatus whenever possible and operate as if the p2p status were true If the port cannot maintain this status for example if the port is forced to half duplex operation the p2p status changes to operate...

Page 124: ...parameter Remove VID Select this parameter to remove VIDs from the MSTI ID in conjunction with the VID List parameter VID List 1 4094 This field displays the VLAN IDs associated with the specific MSTI...

Page 125: ...e viewed or set Parameter Description Port Use the drop down menu to select a port Instance ID Displays the MSTI ID of the instance being configured The range is from 0 to 15 An entry of 0 in this fie...

Page 126: ...The VLAN ID number of the VLAN on which the above Unicast MAC address resides MAC Address The MAC address to which packets will be statically forwarded This must be a unicast MAC address Port Allows...

Page 127: ...er half of the Multicast Forwarding Table window Multicast Filtering Mode This table is used to configure the Multicast Filtering settings on the switch It allows users to configure the switch to forw...

Page 128: ...ge the packet transmission interval enter a value in seconds 5 to 32768 Message TX Hold Multiplier 2 10 This function calculates the Time to Live for creating and transmitting the LLDP advertisements...

Page 129: ...on will include new available information information timeout and information updates The changing type includes any data update insert remove Admin Status This functions controls the local LLDP agent...

Page 130: ...gs An active LLDP port on the Switch always includes mandatory data in its outbound advertisements There are four optional data types that can be configured for an individual port or group of ports to...

Page 131: ...1 organizationally defined port VLAN TLV transmission is allowed on a given LLDP transmission capable port Dot1 TLV Protocol VLAN Use the drop down menu to enable or disable the advertised Protocol V...

Page 132: ...is possible for two ends of an IEEE 802 3 link to be configured with different duplex and or speed settings and still establish some limited network connectivity More precisely the information includ...

Page 133: ...n below To view this window click L2 Features LLDP LLDP Local Port Information as shown below Figure 3 73 LLDP Local Port Information window To view the information on a per port basis click the Show...

Page 134: ...rt Information Show Normal window CFM Connectivity Fault Management CFM is defined by IEEE 802 1ag which is a standard for detecting isolating and reporting connectivity faults in a network CFM is an...

Page 135: ...t the performance requirement the handling of CCM can be changed to hardware mode To view this window click L2 Features CFM CFM CCM PDUs Forwarding Mode as shown below Figure 3 79 CFM CCM PDUs Forward...

Page 136: ...ivity Fault Management Settings as shown below Figure 3 82 Connectivity Fault Management Settings window The following parameters can be set or are displayed Parameter Description CFM State Used to En...

Page 137: ...FM Loopback Settings This window is used to configure the CFM Loopback settings on the Switch To view this window click L2 Features CFM CFM Loopback Settings as shown below Figure 3 83 CFM Loopback Se...

Page 138: ...tings as shown below Figure 3 84 CFM Linktrace Settings window The following parameters can be configured Parameter Description MEP Name The name of the Maintenance End Point MEP ID 1 8191 The ID for...

Page 139: ...Settings as shown below Figure 3 85 Ethernet OAM Settings window The following parameters can be configured Parameter Description From Port To Port Specify a range of ports to be configured Mode Speci...

Page 140: ...of ports to be configured Link Event Configures the Ethernet OAM critical link event Specify Link Monitor or Critical Link Event Link Monitor Indicates that the OAM entity can send and receive Event...

Page 141: ...f QoS QoS is an implementation of the IEEE 802 1p standard that allows network administrators a method of reserving bandwidth for important functions that require a large bandwidth or have a high prio...

Page 142: ...gged packets and maps them to a class queue on the Switch Then in turn the administrator will set a priority for this queue so that will be emptied before any other packet is forwarded This results in...

Page 143: ...E1 F1 G1 H1 A2 B2 C2 D2 E2 F2 G2 A3 B3 C3 D3 E3 F3 A4 B4 C4 D4 E4 A5 B5 C5 D5 A6 B6 C6 A7 B7 A8 A9 B8 C7 D6 E5 F4 G3 H2 A10 B9 C8 D7 E6 F5 G4 B10 C9 D8 E7 F6 C10 D9 E8 D10 E9 F7 G5 H3 E10 F8 G6 F9 F10...

Page 144: ...ort To view this window click QoS Bandwidth Control as shown below Figure 4 3 Bandwidth Control window The following parameters can be set or are displayed Parameter Description From port To port A co...

Page 145: ...to the Switch until the storm has subsided This method can be utilized by selecting the Drop option of the Action field in the window below The Switch will also scan and monitor packets coming into th...

Page 146: ...useful for ports configured as Shutdown in their Action field and therefore will not operate for Hardware based Traffic Control implementations The possible time settings for this field are 0 5 30 mi...

Page 147: ...e seen as link down in all windows and screens until the user recovers these ports 802 1p Default Priority The Switch allows the assignment of a default 802 1p priority to each port on the Switch To v...

Page 148: ...y to set your changes QoS Scheduling Mechanism Changing the output scheduling used for the hardware queues in the Switch can customize QoS As with any changes to QoS implementation careful considerati...

Page 149: ...ther queues empty Weighted Round Robin Use the weighted round robin WRR algorithm to handle packets in an even distribution in priority classes of service For weighted round robin queuing the number o...

Page 150: ...ackets in an even distribution in priority classes of service When Weight is selected a field appears next to this field for the user to specify the maximium number of packets The specified hardware p...

Page 151: ...nagement is a class of algorithms that attempt to proactively drop or mark frames before congestion becomes excessive The goal is to detect the onset of persistent congestion and take proactive action...

Page 152: ...ed Pobabilistic drop red colored packets if the queue depth is above the lower threshold and probabilistic drop yellow colored packets if the queue depth is above the upper threshold Green packets wil...

Page 153: ...Figure 4 11 SRED Drop Counter window DSCP Trust Settings This window is used to enable DSCP Trust Settings on the Switch To view this window click QoS SRED DSCP Trust Settings as shown below Figure 4...

Page 154: ...the user to enter a DSCP value in the space provided which will instruct the Switch to examine the DiffServ Code part of each packet header and use this as the or part of the criterion for forwarding...

Page 155: ...port To port A consecutive group of ports may be configured starting with the selected port Priority List 0 7 This parameter is specified if you want to re write the 802 1p default priority previously...

Page 156: ...ch memory it will enter an Exhausted mode When in this mode the Switch only receives a small amount of ARP or IP broadcast packets for a calculated time interval Every five seconds the Switch will che...

Page 157: ...o longer detected the wait period for limiting ARP and IP broadcast packets will return to 5 seconds and the process will resume Once in Exhausted mode the packet flow will decrease by half of the lev...

Page 158: ...onding Delete button IP MAC Port Binding The IP network layer uses a four byte address The Ethernet link layer uses a six byte MAC address Binding these two address types together allows the transmiss...

Page 159: ...led can only be automatically installed if the Access Profile table has two entries available of the possible six entries allowed Trap Log This field will enable and disable the sending of trap log me...

Page 160: ...sage and will not create ACL profile and rules to capture unicast DHCP packets Enabled Loose This mode provides a looser way of control If the user selects loose mode ARP packets and IP Broadcast pack...

Page 161: ...configure this entry for all ports on the Switch Mode The user may set the IP MAC Binding Mode here by using the pull down menu The choices are ARP Choosing this selection will set a normal IP Mac Bi...

Page 162: ...entry click the delete button next to the entry s port To delete all the entries in the Blocked Address Browser window click Clear All To view this window click Security IP MAC Port Binding MAC Block...

Page 163: ...p of ports The options are Permanent The locked addresses will not age out after the aging timer expires DeleteOnTimeout The locked addresses will age out after the aging timer expires DeleteOnReset T...

Page 164: ...Specifies a port or list of ports to be configured Click Apply to implement changes DHCP Server Screening Settings This function allows the user to not only restrict all DHCP Server packets but also t...

Page 165: ...nction allows the user not only to restrict all DHCP Server packets but also to receive any specified DHCP server packet by any specified DHCP client it is useful when one or more DHCP servers are pre...

Page 166: ...icate users trying to access a network by relaying Extensible Authentication Protocol over LAN EAPOL packets between the Client and the Server The following figure represents a basic EAPOL packet Figu...

Page 167: ...uthentication Server and the Client The Authenticator serves two purposes when utilizing the 802 1X function The first purpose is to request certification information from the Client through EAPOL pac...

Page 168: ...l authentication is made This port is locked until the point when a Client with the correct username and password and MAC address if 802 1X is enabled by MAC address is granted access and therefore su...

Page 169: ...tate of the Port and initiate the process of authenticating the attached device if the Port is unauthorized This is the Port Based Network Access Control Port Based Network Access Control Figure 5 20...

Page 170: ...each attached device that required access to the LAN The Switch would regard the single physical Port connecting it to the shared media segment as consisting of a number of distinct logical Ports eac...

Page 171: ...sabled Port Based or MAC Based Authentication Mode When choosing MAC Based Host based Network Access Control will be enabled on the port Authentication Protocol Choose the Authentication Protocol eith...

Page 172: ...authorized state without any authentication exchange required This means the port transmits and receives normal traffic without 802 1X based authentication of the client If forceUnauthorized is select...

Page 173: ...dow click Security 802 1X Authentication RADIUS Server as shown below Figure 5 25 Authentication RADIUS Server window This window displays the following information Parameter Description Index Choose...

Page 174: ...ick Security 802 1X Initialize Port s as shown below Figure 5 26 Initialize Port s window To initialize port s use the drop down menu to select the port s and click Apply Reauthenticate Port s This wi...

Page 175: ...ient wishing services on the Switch will need to be authenticated by a remote RADIUS Server or local authentication on the Switch to be placed in a fully operational VLAN If authenticated and the auth...

Page 176: ...n RSA public key algorithm and the Digital Signature Algorithm DSA specified here as the DHE DSS Diffie Hellman DHE public key algorithm This is the first authentication process between client and hos...

Page 177: ...e SSL on the Switch and implement any one or combination of listed ciphersuites on the Switch A ciphersuite is a security string that determines the exact cryptographic parameters specific encryption...

Page 178: ...ble or disable this ciphersuite This field is enabled by default RSA EXPORT with RC4 40 MD5 This ciphersuite combines the RSA Export key exchange and stream cipher RC4 encryption with 40 bit keys Use...

Page 179: ...t Based Password and Public Key 3 Configure the encryption algorithm that SSH will use to encrypt and decrypt messages sent between the SSH client and the SSH server using the SSH Authmode and Algorit...

Page 180: ...configuration set on a SSH server for authentication on the Switch The default is enabled Host based This parameter may be enabled if the administrator wishes to use a host computer for authenticatio...

Page 181: ...gorithm encryption The default is enabled Click Apply to implement changes made SSH User Authentication Lists The following windows are used to configure parameters for users attempting to access the...

Page 182: ...sion Extended TACACS XTACACS An extension of the TACACS protocol with the ability to provide more types of authentication requests and more types of response codes than TACACS This protocol also uses...

Page 183: ...roup for authentication until the authentication has been verified or denied or the list is exhausted Please note that when the user logins to the device successfully through TACACS XTACACS TACACS ser...

Page 184: ...nt of attempts will be denied access to the Switch and will be locked out of further authentication attempts Command line interface users will have to wait 60 seconds before another authentication att...

Page 185: ...ation Server Groups on the Switch A server group is a technique used to group TACACS XTACACS TACACS RADIUS server hosts into user defined categories for authentication using method lists The user may...

Page 186: ...ities and are not compatible with each other Authentication Server This window will set user defined Authentication Server Hosts for the TACACS XTACACS TACACS RADIUS security protocols on the Switch W...

Page 187: ...CS XTACACS TACACS are separate entities and are not compatible with each other Login Method Lists This command will configure a user defined or default Login Method List of authentication techniques f...

Page 188: ...parameter will require the user to be authenticated using the local user account database on the Switch none Adding this parameter will require no authentication to access the Switch Enable Method Li...

Page 189: ...cal enable password none Adding this parameter will require no authentication to access the Switch radius Adding this parameter will require the user to be authenticated using the RADIUS protocol from...

Page 190: ...s user RADIUS Accounting Settings The Accounting feature of the Switch uses a remote RADIUS server to collect information regarding events occurring on the Switch The following is a list of informatio...

Page 191: ...FDB of that port 2 If a port is granted clearance for a MAC address in a VLAN that is not a Guest VLAN other MAC addresses on that port must be authenticated for access and otherwise will be blocked...

Page 192: ...the authenticator for MAC based Access Control Remember the MAC list must be previously set on the RADIUS server and the settings for the server must be first configured on the Switch Password Enter...

Page 193: ...ciated with it here The switch administrator may enter up to 128 MAC addresses to be authenticated using the local method configured here To view this window click Security MAC based Access Control MA...

Page 194: ...placed in the authentication VLAN set by the user All clients in this authentication VLAN will be queried for authentication by the local method or through a RADIUS server Once accepted the user will...

Page 195: ...ased Access Control will not be enabled 6 If a RADIUS server is to be used for authentication the user must first establish a RADIUS Server with the appropriate parameters including the target VLAN be...

Page 196: ...ll down menu to enable these configured ports as Web based Access Control ports Click Apply to implement changes made NOTE To enable the Web based Access Control function the redirection path field mu...

Page 197: ...erface was created as a data link layer frame structure for NetBIOS A simple mechanism to carry NetBIOS traffic NetBEUI has been the protocol of choice for small MS DOS and Windows based workgroups Ne...

Page 198: ...rofiles are limited to a total of 1536 rules for the Switch ACL Configuration Wizard The ACL Configuration Wizard will aid with the creation of access profiles and ACL rules The ACL Wizard will create...

Page 199: ...ppropriate information Click Apply to implement changes made Access Profile List Creating an access profile is divided into two basic parts The first is to specify which part or parts of a frame the S...

Page 200: ...700 12G Series Layer 2 Gigabit Ethernet Switch User Manual 189 Figure 6 3 Add Access Profile Ethernet If creating an Ethernet ACL enter the Profile ID and Profile Name and click Select the following w...

Page 201: ...MAC address Select ACL Type Select profile based on Ethernet MAC Address IPv4 address IPv6 or packet content mask This will change the menu according to the requirements for the type of profile Select...

Page 202: ...ng Delete button to view the specific configurations for an entry click the Show Details button To add a rule to the Access Profile entry click the Add View Rules button Figure 6 5 Access Profile List...

Page 203: ...rt defined in the config mirror port command Port Mirroring must be enabled and a target port must be set Priority Enter a priority value if you want to re write the 802 1p default priority of a packe...

Page 204: ...led This is optional the default is disabled If the rule is not binded with flow_meter then all packet matched will be countered If the rule is binded with flow_meter then counter here will be overrid...

Page 205: ...ng Source IP Mask Enter an IP address mask for the source IP address Destination IP Mask Enter an IP address mask for the destination IP address ICMP Type icmp Specifies that the Switch will examine t...

Page 206: ...ation port in hex form hex 0x0 0xffff which you wish to filter Select UDP to use the UDP port number contained in an incoming packet as the forwarding criterion Selecting UDP requires that you specify...

Page 207: ...Mirror to specify that packets that match the access profile are mirrored to a port defined in the config mirror port command Port Mirroring must be enabled and a target port must be set Priority 0 7...

Page 208: ...te of 10 then the ingress rate is 640Kbit sec The user many select a value between 1 and 15624 or tick the No Limit check box The default setting is No Limit Time Range Name Tick the check box and ent...

Page 209: ...ill instruct the Switch to examine the flow label field of the IPv6 header This flow label field is used by a source to label sequences of packets such as non default quality of service or real time s...

Page 210: ...an entry click the Show Details button To add a rule to the Access Profile entry click the Add View Rules button Figure 6 17 Access Profile List IPv6 To view the configurations for previously configu...

Page 211: ...alue entered in the Priority field which meets the criteria specified previously in this command before forwarding it on to the specified CoS queue Otherwise a packet will have its incoming 802 1p use...

Page 212: ...implemented on the Switch Counter Enable or disable the counter settings Ports Specifies that the access rule will take effect on one port or a range of ports VLAN Name Specifies the access rule will...

Page 213: ...hat can be configured A chunk mask presents 4 bytes 4 offset_chunks can be selected from a possible 32 predefined offset_chunks as described below offset_chunk_1 offset_chunk_2 offset_chunk_3 offset_c...

Page 214: ...e button to view the specific configurations for an entry click the Show Details button To add a rule to the Access Profile entry click the Add View Rules button Figure 6 23 Access Profile List Packet...

Page 215: ...forwarding it on to the specified CoS queue Otherwise a packet will have its incoming 802 1p user priority re written to its original value before being forwarded by the Switch Replace DSCP Select th...

Page 216: ...to prevent ARP spoofing attack please see Appendix B at the end of this manual CPU Interface Filtering Due to a chipset limitation and needed extra switch security the Switch incorporates CPU Interfac...

Page 217: ...PU Access Profile List entries created on the Switch one CPU access profile of each type has been created for explanatory purposes To view the configurations for an entry click the corresponding Show...

Page 218: ...each frame s header Select Packet Content Mask to specify a mask to check the content of the packet header Source MAC Mask Enter a MAC address mask for the source MAC address Destination MAC Mask Ent...

Page 219: ...the menu according to the requirements for the type of profile Select Ethernet to instruct the Switch to examine the layer 2 part of each packet header Select IPv4 to instruct the Switch to examine t...

Page 220: ...y filter packets by filtering certain flag bits within the packets by checking the boxes corresponding to the flag bits of the TCP field The user may choose between urg urgent ack acknowledgement psh...

Page 221: ...Pv6 address in each frame s header Select Packet Content Mask to specify a mask to check the content of the packet header IPv6 Class Checking this field will instruct the Switch to examine the class f...

Page 222: ...ique identifier number for this profile set This value can be set from 1 to 5 Select ACL Type Select profile based on Ethernet MAC Address IPv4 address IPv6 or packet content mask This will change the...

Page 223: ...window to view the following window Figure 6 36 CPU Access Profile Detail Information window for Packet Content To establish the rule for a previously created CPU Access Profile To configure the Acces...

Page 224: ...thernet type value in each frame s header Time Range Name Tick the check box and enter the name of the Time Range settings that has been previously configured in the Time Range Settings window This wi...

Page 225: ...s value can be set from 1 to 100 Action Select Permit to specify that the packets that match the access profile are forwarded by the Switch according to any additional rule added see below Select Deny...

Page 226: ...igure 6 44 Add Access Rule window for IPv6 To set the Access Rule for IPv6 adjust the following parameters and click Apply Parameter Description Access ID 1 100 Enter a unique identifier number for th...

Page 227: ...corresponding Show Details button on the CPU Access Rule List window to view the following window Figure 6 45 CPU Access Rule Detail Information window for IPv6 To establish the rule for a previously...

Page 228: ...at has been previously configured in the Time Range Settings window This will set specific times when this access rule will be implemented on the Switch Ports Specifies the access rule can take effect...

Page 229: ...appropriate information and click Find the entries will be displayed on the lower half of the table To edit an entry click the corresponding Modify button to delete an entry click the corresponding De...

Page 230: ...e is 16 1024 srTCM Single Rate Three Color Marker marks packets green yellow or red based on a rate and two burst sizes This is useful when only burst size matters CIR 64Kbps value 0 15624 Specifies t...

Page 231: ...ilization System Log Device Status The Device Status window displays status information for Power Status Temperature and Side Fan Status To view this window click Monitoring Device Status as shown bel...

Page 232: ...below Figure 7 3 CPU Utilization window To view the CPU utilization by port use the real time graphic of the Switch and or switch stack at the top of the web page by simply clicking on a port Click Ap...

Page 233: ...rop down menu to choose the port that will display statistics Time Interval Select the desired setting between 1s and 60s where s stands for seconds The default value is one second Record Number Selec...

Page 234: ...llowing fields can be set or viewed Parameter Description Port Use the drop down menu to choose the port that will display statistics Time Interval Select the desired setting between 1s and 60s where...

Page 235: ...ncluding FCS octets Show Hide Check whether or not to display 64 65 127 128 255 256 511 512 1023 and 1024 1518 packets received Clear Clicking this button clears all statistics counters on this window...

Page 236: ...RX Table window for Bytes and Packets The following fields may be set or viewed Parameter Description Port Use the drop down menu to choose the port that will display statistics Time Interval Select...

Page 237: ...button clears all statistics counters on this window Clicking this button instructs the Switch to display a table rather than a line graph View Table Clicking this button instructs the Switch to displ...

Page 238: ...port Unicast Counts the total number of good packets that were received by a unicast address Multicast Counts the total number of good packets that were received by a multicast address Broadcast Count...

Page 239: ...click the link View Table Figure 7 13 Transmitted TX Table window for Bytes and Packets The following fields may be set or viewed Parameter Description Port Use the drop down menu to choose the port...

Page 240: ...st Counts the total number of good packets that were transmitted by a multicast address Broadcast Counts the total number of good packets that were transmitted by a broadcast address Show Hide Check w...

Page 241: ...port to view these statistics for select the port by using the Port pull down menu The user may also use the real time graphic of the Switch at the top of the web page by simply clicking on a port To...

Page 242: ...n 64 bytes with either bad framing or an invalid CRC These are normally the result of collisions Jabber Counts invalid packets received that were longer than 1518 octets and less than the MAX_PKT_LEN...

Page 243: ...elds may be set or viewed Parameter Description Port Use the drop down menu to choose the port that will display statistics Time Interval Select the desired setting between 1s and 60s where s stands f...

Page 244: ...rather than a line graph View Table Clicking this button instructs the Switch to display a line graph rather than a table View Graphic Port Access Control The following windows are used to monitor 802...

Page 245: ...s server Malformed packets include packets with an invalid length Bad authenticators or Signature attributes or known types are not included as malformed access responses BadAuthenticators The number...

Page 246: ...ber of RADIUS Accounting Request packets retransmitted to this RADIUS accounting server Retransmissions include retries where the Identifier and Acct Delay have been updated as well as those in which...

Page 247: ...evice A polling interval between 1s and 60s seconds can be set using the drop down menu at the top of the window and clicking OK The information on this window is described as follows Parameter Descri...

Page 248: ...econds The default value is one second The following fields can be viewed Parameter Description Port The identification number assigned to the Port by the System in which the Port resides Frames Rx Th...

Page 249: ...id Last Version The protocol version number carried in the most recently received EAPOL frame Last Source The source MAC address carried in the most recently received EAPOL frame Authenticator Session...

Page 250: ...od The authentication method used to establish the session Valid Authentic Methods include 1 Remote Authentication Server The Authentication Server is external to the Authenticator s System 2 Local Au...

Page 251: ...ndicating successful authentication of the Supplicant authSuccess TRUE Auth Timeout Counts the number of times that the state machine transitions from AUTHENTICATING to ABORTING as a result of the Bac...

Page 252: ...ssage to the Supplicant i e executes txReq on entry to the REQUEST state Indicates that the Authenticator chose an EAP method NonNakRespFromSup Counts the number of times that the state machine receiv...

Page 253: ...ws are used to configure the VLAN settings of the Switch Browse VLAN This window allows the VLAN status for each of the Switch s ports to be viewed by VLAN Enter a VID VLAN ID in the field at the top...

Page 254: ...ole or Web based management interfaces is displayed as a static router port designated by S A router port that is dynamically configured by the Switch is designated by D while a Forbidden port is desi...

Page 255: ...r the Switch go to the L2 Features folder and select IGMP Snooping IGMP Snooping Settings IGMP Snooping Forwarding Table This window will display the current IGMP forwarding information on the Switch...

Page 256: ...gnated by D whereas a Forbidden port is designated by F Enter a VID VLAN ID in the field at the top of the window and click the Find button To view this window click Monitoring MLD Snooping Browse MLD...

Page 257: ...s in the appropriate field and click the Find button MLD Snooping Forwarding Table This window is used to display the current MLD snooping forwarding information on the Switch To view this window clic...

Page 258: ...This window displays the management sessions since the Switch was last rebooted To view this window click Monitoring Browse Session Table as shown below Figure 7 38 Browse Session Table window CFM Th...

Page 259: ...s shown below Figure 7 41 Browse CFM Fault MEP window Browse CFM Port MP List This window is used to browse the CFM port MP list on the Switch To view this window click Monitoring CFM Browse CFM Port...

Page 260: ...a VLAN Name for the forwarding table to be browsed by MAC Address Enter a MAC address for the forwarding table to be browsed by Find Allows the user to move to a sector of the database corresponding t...

Page 261: ...vent Log information and Ethernet OAM Statistics Browse Ethernet OAM Event Log This window allows the user to view the Ethernet OAM event log information The Switch can buffer up to 1000 event logs Th...

Page 262: ...DGS 3700 12 DGS 3700 12G Series Layer 2 Gigabit Ethernet Switch User Manual 251 Figure 7 46 Browse Ethernet OAM Statistics window...

Page 263: ...ies supported To view this window click Monitoring Historical Counter Utilization Browse Historical Counter as shown below Figure 7 47 Browse Historical Counter window The following parameters may be...

Page 264: ...to 15 minute intervals or 1 day intervals 15 Minutes Specifies historical utilization information based on 15 minute intervals 1 Day Specifies historical utilization information based on one day inter...

Page 265: ...s logins or firmware transfers Attack Log Choose this option to view attack log files such as spoofing attacks Index A counter incremented whenever an entry to the Switch s history log is made The tab...

Page 266: ...tions include Save Configuration_ID_1 to save the configuration file indexed as Image file 1 To use this file for configuration it must be designated as the Boot configuration Save Configuration_ID_2...

Page 267: ...Configuration ID 2 to open the following window Figure 8 2 Save Configuration ID 2 window Save Log Open the Save drop down menu at the top of the Web manager and click Save Log to open the following...

Page 268: ...d a log file enter a Server IP address Interface Name and file path name and then click Upload or Upload Attack Log Figure 8 6 Upload Log File window Reset The Reset function has several options when...

Page 269: ...nload to initiate the file transfer Reboot System The following window is used to restart the Switch Figure 8 9 Reboot System window Clicking the Yes radio button will instruct the Switch to save the...

Page 270: ...igure 1 Figure 1 In the mean time PC A s MAC address will be written into the Sender H W Address and its IP address will be written into the Sender Protocol Address in ARP payload As PC B s MAC addres...

Page 271: ...able the switch will learn PC A s MAC and the associated port into its Forwarding Table Port1 00 20 5C 01 11 11 In addition when the switch receives the broadcast ARP request it will flood the frame t...

Page 272: ...t H W address Target protocol address ARP reply 00 20 5C 01 11 11 10 10 10 1 00 20 5C 01 22 22 10 10 10 2 Table 3 ARP Payload When PC B replies the query the Destination Address in the Ethernet frame...

Page 273: ...Any traffic meant for that IP address would be mistakenly re directed to the node specified by the attacker IP spoofing attack is caused by Gratuitous ARP that occurs when a host sends an ARP request...

Page 274: ...istent or specified MAC address to the IP address of the network s default gateway The malicious attacker only needs to broadcast ONE Gratuitous ARP to the network claiming it is the gateway so that t...

Page 275: ...the Sender MAC address and Sender IP address in the ARP protocol can pass through the switch In this example it is the gateway s ARP 2 The switch will deny all other ARP packets which claim they are f...

Page 276: ...fset Chunk25 Offset Chunk26 Offset Chunk27 Offset Chunk28 Offset Chunk129 Offset Chunk30 Byte 63 67 71 75 79 83 87 91 95 99 103 107 111 115 119 123 Byte 64 68 72 76 80 84 88 92 96 100 104 108 112 116...

Page 277: ...DGS 3700 12 DGS 3700 12G Series Layer 2 Gigabit Ethernet Switch User Manual 266...

Page 278: ...l Side Fan failed Side Fan failed Critical Side Fan recovered Side Fan recovered Critical Upload Download Firmware upgraded successfully Firmware upgraded by console telnet WEB SSH SNMP SIM successful...

Page 279: ...ful login through Web SSL Successful login through Web SSL Username username Informational Login failed through Web SSL Login failed through Web SSL Username username Warning Logout through Web SSL Lo...

Page 280: ...ormational Successful login through Console authenticated by AAA local method Successful login through Console authenticated by AAA local method Username username Informational Login failed through Co...

Page 281: ...ugh SSH authenticated by AAA none method Successful login through SSH from userIP authenticated by AAA none method Username username MAC macaddr Informational Successful login through Console authenti...

Page 282: ...through Web from userIP authenticated by AAA local_enable method Username username MAC macaddr Warning Successful Enable Admin through Telnet authenticated by AAA local_enable method Successful Enabl...

Page 283: ...ername username MAC macaddr Warning Successful Enable Admin through SSH authenticated by AAA server Successful Enable Admin through SSH from userIP authenticated by AAA server serverIP Username userna...

Page 284: ...ule AAA Successful Enable from userIP Module AAA Informational Enable failed from user Module AAA Enable failed from userIP Module AAA Warning AAA server response is wrong AAA server serverIP Protocol...

Page 285: ...s Port s Warning Logout normal JWAC host logout normally Username s IP s MAC s Port s Informational Logout forcibly JWAC host logout forcibly Username s IP s MAC s Port s Warning CFM Cross connect is...

Page 286: ...ver successfully This Ingress bandwidth will assign to the port Radius server ipaddr assigned ingress bandwith ingressBandwidth to port portNum account username Informational Egress bandwidth assigned...

Page 287: ...perStatus V2 RFC2863 IF MIB Informational newRoot None V2 RFC1493 BRIDGE MIB Informational topologyChange None V2 RFC1493 BRIDGE MIB Informational Proprietary Trap List Trap Name OID Variable Bind For...

Page 288: ...rning SwMacBasedAuthAgesOut 1 3 6 1 4 1 171 12 35 11 1 0 3 SwMacBasedAuthAgesOut V2 MBA MIB Warning SwExternalAlarm 1 3 6 1 4 1 171 12 11 2 2 5 0 1 swExternalAlarm V2 EQUIPMENT MIB Warning SwDdmAlarmT...

Page 289: ...what higher level protocols are involved Bridges form a single logical network centralizing network administration broadcast A message sent to all destination devices on the network broadcast storm M...

Page 290: ...A protocol which allows IP to run over a serial line connection SNMP Simple Network Management Protocol A protocol originally designed to be used in managing TCP IP internets SNMP is presently impleme...

Page 291: ...with terminal emulation to the console port of the switch 2 Power on the switch After the runtime image is loaded to 100 the Switch will allow 2 seconds for the user to press the hotkey Shift 6 to en...

Page 292: ...281 Command Parameters username reset show account The show account command displays all previously created accounts...

Reviews: