


DES-3226L Layer 2
Fast Ethernet Switch User’s Guide
Basic Switch Setup
The
Basic Switch Setup
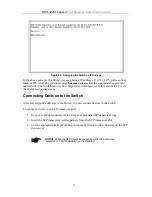
may initially be set using the console interface prior to connecting to
it through the Ethernet. If the Switch IP address has not yet been changed, read the
Introduction of the CLI Reference or skip ahead to the end of this section for a quick
description of how to use the console port and CLI IP settings commands to establish IP
settings for the Switch.
To change IP settings using the web manager you must access the
Basic Switch Setup
menu
located in the
Management
folder.
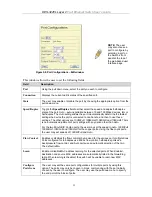
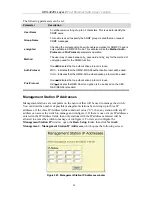
To configure the switch’s IP address:
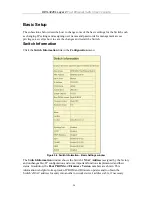
Open the
Management
folder and click the
Basic Switch Settings
menu button. The web
manager will display the Switch’s current IP settings and an IP configuration menu, as seen
below.
Figure 5-5. Basic Switch Setup window
To manually assign the switch’s IP address, subnet mask, and default gateway address:
•
Select
Manual
from the
Get IP From
drop-down menu.
•
Enter the appropriate IP address and subnet mask.
•
If you want to access the switch from a different subnet from the one it is installed on,
enter the IP address of the gateway. If you will manage the switch from the subnet on
which it is installed, you can leave the default address (0.0.0.0) in this field.
•
If no VLANs have been previously configured on the switch, you can use the default
VLAN Name (default). The default VLAN contains all of the switch ports as
27


