CYUSB3KIT-001 EZ-USB FX3 Development Kit Guide, Doc. #: 001-70237 Rev. *C
21
Getting Started
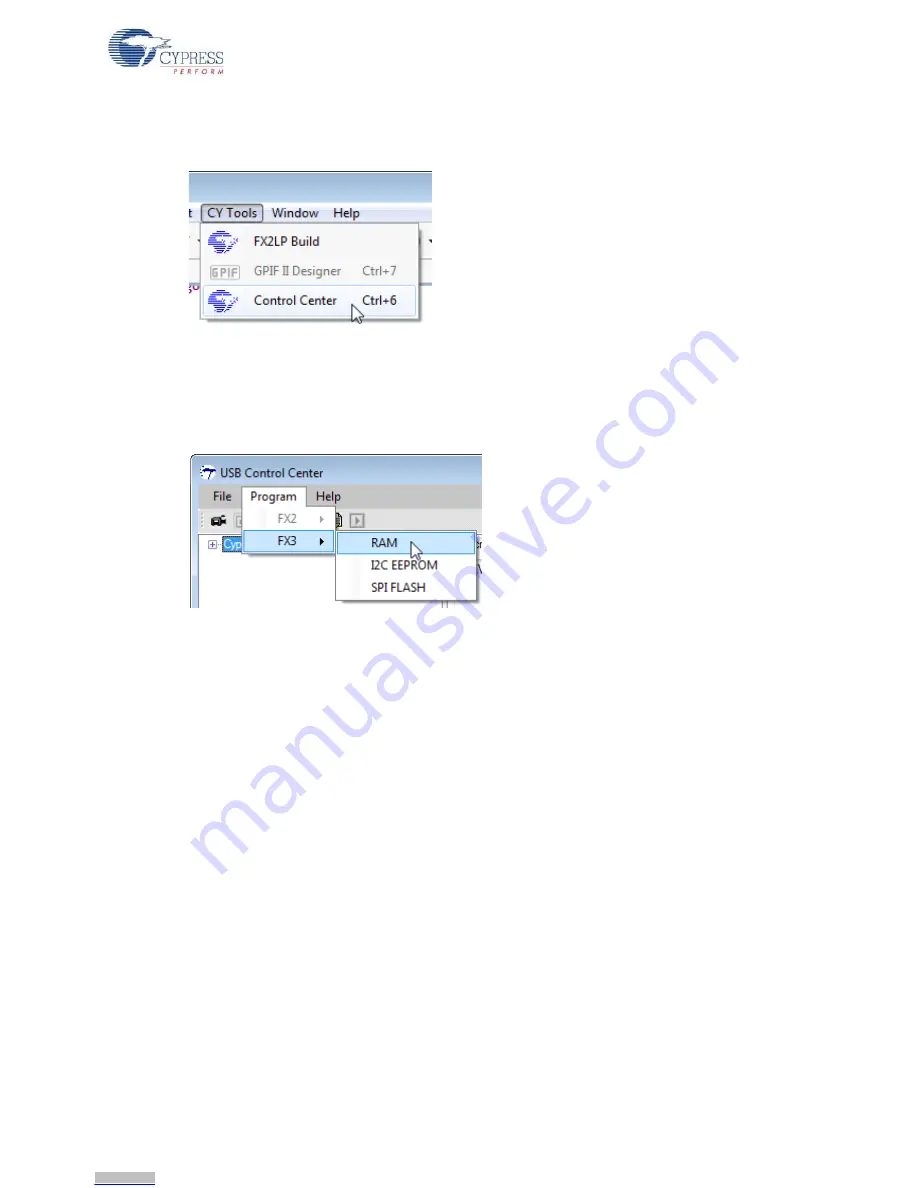
4. In the Eclipse IDE, select
CY Tools > Control Center
(
Figure 2-17
).
Figure 2-17. Open the Cypress USB Control Center
This tool downloads code into FX3 RAM or to a flash memory connected to the FX3 and also
allows you to schedule USB transfers to a Cypress device. Highlight the
Cypress USB Boot-
Loader
item, and select
Program > FX3 > RAM
(
Figure 2-18
). This opens a dialog to locate the
download file.
Figure 2-18. Download Code into FX3
5. Navigate to the Debug folder in your workspace folder and double-click the
First_FX3_App.img
(img = code image) file. If your PC has sound turned on, you will hear the USB disconnect sound.
The bootloader has loaded the code image and restarted as the First_FX3_App program. This
application does not implement a USB device, so the
Cypress USB BootLoader
item
disappears from the
USB Control Center
device window. Most Cypress examples implement
USB devices, in which case you will see the new device name appear in place of the
Cypress
USB BootLoader
device.
You should see the LED blinking with a 2 second period. If an LED is not connected to GPIO[54]
then you can see the output of this project by probing the GPIO pin using an oscilloscope.
To reload any code, you first must press the RESET button in the upper left corner of the FX3
board. Try it now. You will hear the USB “connect” sound as the
Cypress USB BootLoader
device re-appears. If you highlight it and again choose
Program > FX3 RAM
, the USB Control
Center code remembers your last download path. This is convenient when making and testing
many code edits.
Downloaded from
Downloaded from
Downloaded from
Downloaded from
Downloaded from
Downloaded from
Downloaded from
Downloaded from
Downloaded from
Downloaded from
Downloaded from
Downloaded from
Downloaded from
Downloaded from
Downloaded from
Downloaded from
Downloaded from
Downloaded from
Downloaded from
Downloaded from
Downloaded from


