3.11
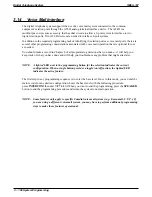
Direct Department Calling
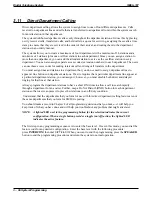
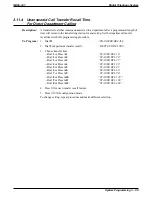
Direct department calling allows the system to assign lines to one of four different departments. Calls
received on department lines and calls that are transferred to a department from within the system search
for an idle station in that department.
The system distributes department calls evenly throughout the department stations. It does this by placing
newly received calls, transferred calls, and held calls in a queue for servicing, assigning these calls a time
stamp to ensure that they are serviced in the order of their arrival, and routing them to the department
stations in an orderly manner.
The system allows you to create a maximum of four departments with a maximum of 16 stations and a
minimum of 3 stations (plus one overflow station) in each department. Since you can assign a station to
more than one department, you can add the attendant station to serve as the overflow station in every
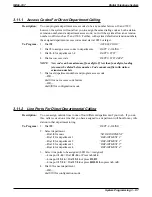
department. You can also assign separate access codes (extension numbers) to each department. The users
can use these access codes for making intercom calls or doing call transfers to the department.
You must assign lines and stations to a department but you do not need to assign department lines to
appear at line buttons on department stations. If a site requires that a particular department line appear at
a particular department station, you can assign it; however, you must disable both direct and delayed
ringing for that line at that station.
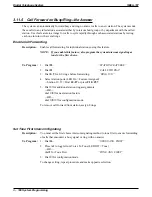
Always program the department stations to have a short RNA time to allow a call to search rapidly
through a department for an answer. Further, map a Do Not Disturb (DND) button for each department
station so that users can press it to place their stations in an off-duty condition.
Understand, that the departments that you form for use with this direct department calling feature are not
the same departments that you form for SMDA reporting.
You should make a record in Chapter 4 of all programming decisions that you make—it will help you
keep track of what you have done and will help you troubleshoot any problem that might arise later.
NOTE: A lighted LED next to the programming button for the selection indicates the current
configuration. When a single button provides a toggle (on/off) action, the lighted LED
indicates the active feature.
The first step in any programming sequence is to enter the base level. Once in this mode, you can dial the
feature code for any desired configuration. Enter the base level with the following procedure:
press INTERCOM then dial
✳
# 7 4 6
✳
. When you want to end the programming, press the SPEAKER
button to end the programming procedure and return the system to normal operation.
Digital Telephone System
IMI66–107
3 – 96 System Programming
Summary of Contents for Air Impact DSU
Page 2: ...Printed in U S A GCA47 157 ...
Page 30: ......
Page 112: ......
Page 192: ...Digital Telephone System IMI66 107 3 80 System Programming ...
Page 283: ......
Page 284: ......
Page 285: ......
Page 286: ......
Page 287: ......
Page 288: ......
Page 289: ......
Page 290: ......
Page 291: ......
Page 292: ......
Page 293: ......
Page 294: ......
Page 295: ......
Page 296: ......
Page 297: ......
Page 298: ......
Page 299: ......
Page 300: ......
Page 301: ......
Page 302: ......
Page 303: ......
Page 304: ......
Page 305: ......
Page 306: ......
Page 307: ......
Page 308: ......
Page 309: ......
Page 310: ......
Page 311: ......
Page 312: ......
Page 313: ......
Page 314: ......
Page 315: ......
Page 316: ......
Page 317: ......
Page 318: ......
Page 319: ......
Page 320: ......
Page 321: ......
Page 322: ......
Page 323: ......
Page 324: ......
Page 325: ......
Page 326: ......
Page 327: ......
Page 328: ......
Page 329: ......
Page 330: ......
Page 331: ......
Page 332: ......
Page 333: ......
Page 334: ......
Page 335: ......
Page 336: ......
Page 337: ......
Page 338: ......
Page 339: ......
Page 340: ......
Page 431: ......
Page 436: ......
Page 437: ......
Page 438: ......

