SECTION 16 — MOTOR
16
Motor
DANGER
• See General Warnings on page 1-2.
WARNING
• See General Warnings on page 1-2.
GENERAL INFORMATION
The IQ Plus vehicle is equipped with a 48-volt DC, shunt-wound, reversible traction motor. This 3.7 horsepower motor
is designed for use on IQ Plus vehicles only. Club Car recommends that motors requiring major repair be sent to a
qualified motor repair shop; however, there are many relatively simple tasks that can be performed by a technician with
general knowledge and experience in electric motor repair.
EXTERNAL MOTOR TESTING
The following tests can be performed without disassembling the motor using a multimeter or continuity tester.
NOTE:
Tag the motor wires for identification before disconnecting.
Index of Test Procedures
1 – Internal Short Circuits
2 – Armature Circuit Open
3 – Field Circuit Open
TEST PROCEDURE 1 – Internal Short Circuits
See General Warnings on page 1-2.
1.
Disconnect the batteries and discharge the controller.
See Disconnecting the Batteries – Electric Vehicles,
2.
Disconnect wires from terminals on motor using two wrenches to prevent posts from turning.
3.
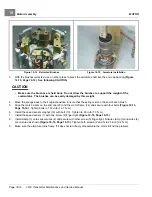
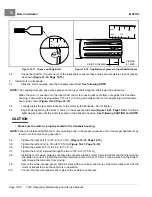
With a multimeter set to 200 ohms, place black (–) probe on motor housing. Scratch through paint to ensure a
good connection. Place red (+) probe on A1, A2, F1, and F2 terminals respectively. Multimeter should indicate no
continuity. If readings are incorrect, motor will need to be removed from the vehicle and repaired by a qualified
technician.
See Motor Removal on page 16-3.
3.1.
An incorrect reading from the A1 or A2 terminal indicates three possible problems: a grounded A1 or A2
terminal, a grounded wire in the brush area, or a grounded armature/commutator. An incorrect reading for
the F1 or F2 terminal indicates a possible grounded F1 or F2 terminal or field coil.
4.
Connect the batteries.
See Connecting the Batteries – Electric Vehicles, Section 1, Page 1-4.
2019 Transporter Maintenance and Service Manual
Page 16-1
Summary of Contents for TransPorter 4
Page 2: ......
Page 271: ...ELECTRIC MAIN HARNESS Wiring Diagrams Electric Main Harness 18 ...
Page 272: ... Page intentionally left blank ...
Page 273: ...ELECTRIC INSTRUMENT PANEL HARNESS Wiring Diagrams Electric Instrument Panel Harness 18 ...
Page 274: ... Page intentionally left blank ...
Page 275: ...ELECTRIC ACCESSORIES HARNESS Wiring Diagrams Electric Accessories Harness 18 ...
Page 276: ... Page intentionally left blank ...
Page 282: ...NOTES ...
Page 283: ...NOTES ...
Page 284: ...NOTES ...
Page 285: ......
Page 286: ......


