11
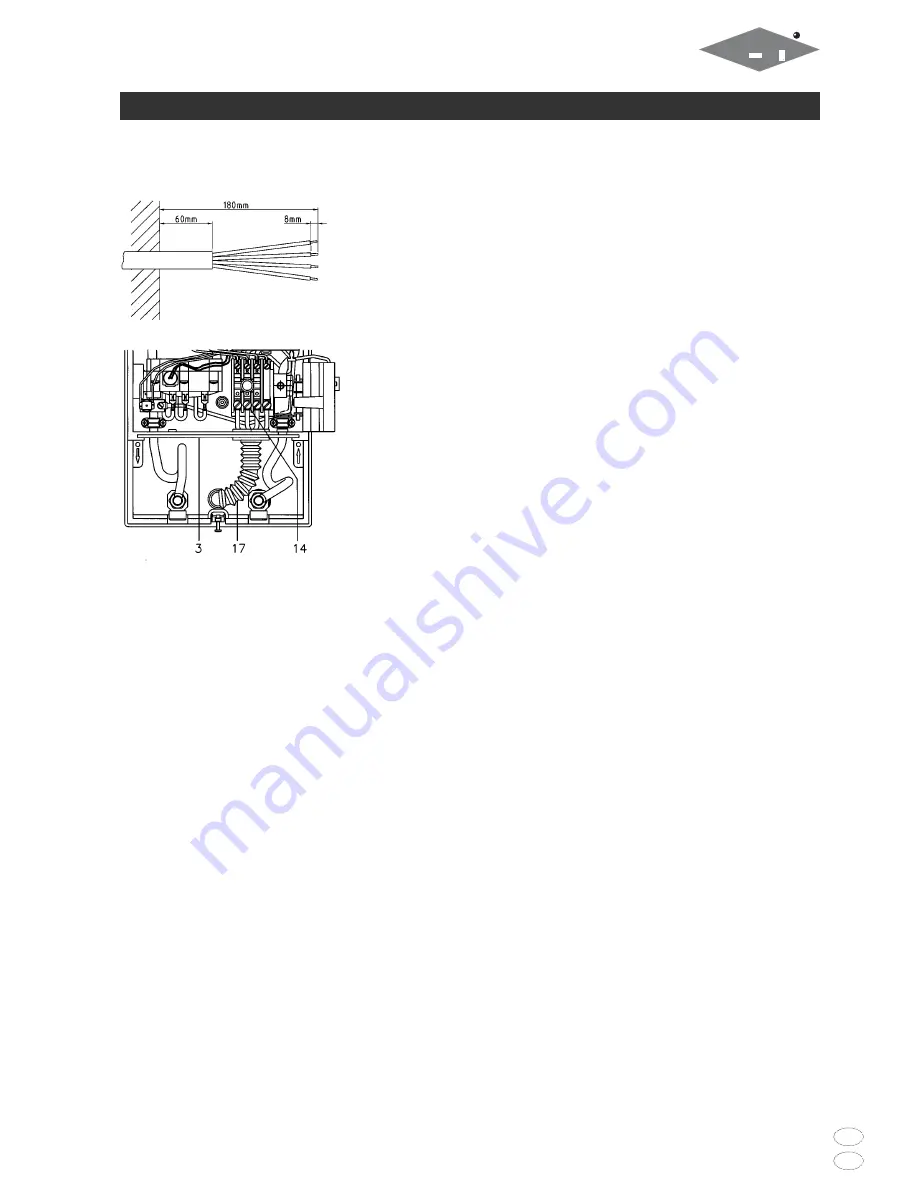
Standard-Elektroanschluss
von unten
1. Manteln Sie das Anschlusskabel
ungefähr 6 cm über dem Wandaustritt
ab. Schieben Sie die Spritzwasser-
schutztülle (17) mit der kleineren
Öffnung voran über das Anschluss-
kabel, so daß die Schutztülle wand-
bündig abschließt. Diese verhindert,
daß eventuell eindringendes Wasser
mit den Elektroleitungen in Kontakt
kommt. Sie darf nicht beschädigt sein!
2. Lösen Sie die Schraube am Deckel
der Platinenaufnahme und klappen
Sie den Deckel zur Seite.
Nehmen Sie den vorderen Teil der
Zwischenwand (3) ab.
3. Isolieren Sie die Kabel ab und
schließen diese an die Anschluss-
klemmen des Sicherheitsdruck-
begrenzers (14) gemäß des auf
S. 10 abgebildeten Schaltplanes an.
Das Gerät ist an den Schutzleiter
anzuschließen.
4. Ziehen Sie die Schutztülle soweit über
die Anschlusskabel, daß die
Schutztülle einwandfrei in die
Aussparung der Zwischenwand paßt.
Setzen Sie den vorderen Teil der
Zwischenwand wieder ein und sichern
Sie den Deckel der Platinenaufnahme
wieder mit der Verschlussschraube.
5. Setzen Sie die Abdeckhaube
auf das Gerät und drehen Sie
die Befestigungsschraube ein.
10
Anschluss (nur durch den Fachmann)
Electrical connection
(only by a specialist)
Standard electrical connection
from below
1. Strip approximately 6 cm off the
connecting cable above the wall
outlet. With the smaller opening
ahead, slide the water splash
protection sleeve (17) over the
connecting cable so that the sleeve is
flush with the wall. This prevents any
leaking water from coming into
contact with the electrical leads. It
must not become damaged!
2. Undo the screw on the cover of the pc
board support and tilt the cover to the
side. Detach the front part of the
intermediate panel (3).
3. Strip the cables. Connect them
to the connecting terminals of the
safety pressure limiter (14) according
to the wiring diagram Page 10.
This appliance must be earthed!
4. Pull the protective sleeve over the
connecting cables until the sleeve
fits perfectly in the recess of the
intermediate panel. Reinsert the front
part of the intermediate panel and
again lock the cover of the PC board
support with the securing screw.
5. Place the cover hood on the appliance
and screw in the securing screw.
CLAGE
D
GB
Summary of Contents for DX 18
Page 21: ......


