


ASUS P9X79 WS
2-29
8.
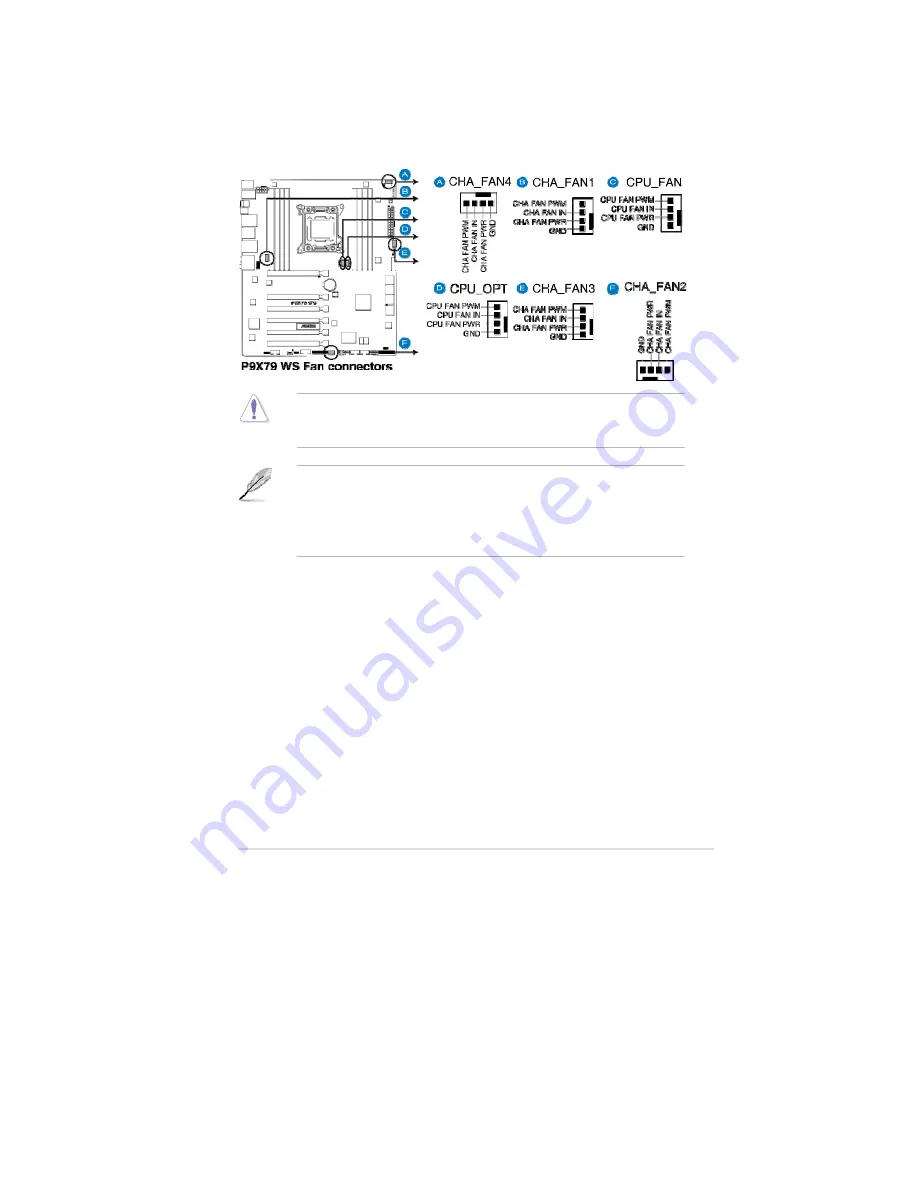
CPU, CPU OPT, Chassis fan connectors
(4-pin CPU_FAN; 4-pin CPU_OPT; 4-pin CHA_FAN1/2/3/4)
Connect the fan cables to the fan connectors on the motherboard, ensuring
that the black wire of each cable matches the ground pin of the connector.
Do not forget to connect the fan cables to the fan connectors. Insufficient air
flow inside the system may damage the motherboard components. These are
not jumpers! Do not place jumper caps on the fan connectors!
•
The CPU_FAN connector supports the CPU fan of maximum 2A (24 W) fan
power.
•
If you install two VGA cards, we recommend that you plug the rear chassis
fan cable to the motherboard connector labeled CHA_FAN1, CHA_FAN2,
CHA_FAN3 for better thermal environment.
Summary of Contents for Kronos 600 X79-KA SERIES
Page 1: ...User Guide Kronos 600 Workstation X79 KA XXXXX XX XXX...
Page 8: ...CIARA Kronos 600 workstation X79 KA XXXXX XX XXX 8...
Page 36: ...CIARA Kronos 600 workstation X79 KA XXXXX XX XXX 36 NOTES...
Page 43: ...P9X79 WS Motherboard...
Page 58: ...16...
Page 107: ...ASUS P9X79 WS 2 37 5 6 Triangle mark 7 8 B A 9 B A...
Page 109: ...ASUS P9X79 WS 2 39 2 3 4 DIMM installation 1 2 3 To remove aDIMM B A...
Page 111: ...ASUS P9X79 WS 2 41 3 DO NOT overtighten the screws Doing so can damage the motherboard...
Page 112: ...2 42 Chapter 2 Hardware information 2 3 6 ATX Power connection 1 2 OR...
Page 113: ...ASUS P9X79 WS 2 43 2 3 7 SATAdevice connection 1 OR 2...
Page 122: ...2 52 Chapter 2 Hardwareinformation...
Page 226: ...5 14 Chapter 5 rv JltipleGPUtechnology support...


