


6 Setting up the 3D scanner system
3DPIXA
CD40131 Version 1
63 / 99
Fig. 30: Setting the IO-configuration for the Master/Slave mode of the 3DPIXA dual camera
6. In the IO-configuration, set the definition by selecting the corresponding checkboxes:
– Select the IO-interface
X5-3
for the master camera and for the slave camera.
– If the standard configuration is used, select
X5-6/8
for the Master/Slave interface.
6.8.2
Setting the Master/Slave mode for 3DPIXApro dual (CP000520)
The Master/Slave mode is factory preset for the 3DPIXA dual. It is therefore
not
necessary to make settings in Master/Slave mode for the first startup or standard
operation.
For the 3DPIXApro dual camera, starting with the article code CP00520, the master/slave
synchronization is carried out via an internal synchronization cable in the camera housing.
Setting the Master/Slave mode via the CST
1. Open the CST for the master camera and for the slave camera and disable
Display only
compatible cameras
.
If no selection window is shown after opening the CST, select the
Set system settings
icon in the toolbar and disable
Display only compatible cameras
in the
Select camera
type
field.
For adjusting the master/slave parameters, it is necessary to select the camera type
allPIXA. If the CST is used with the compatible camera type 3DPIXA dual, no changes of
the master/slave mode can be made.
2. In the
Camera Settings
select
Synchronization
in the
Image Parameter
folder.
3. In the
Set master-slave-mode
field select
Camera acts as master
for the master
camera and
Camera acts as slave
for the slave camera.
4. In both CST for the master camera and the slave camera, select the
IO
button in the
toolbar.
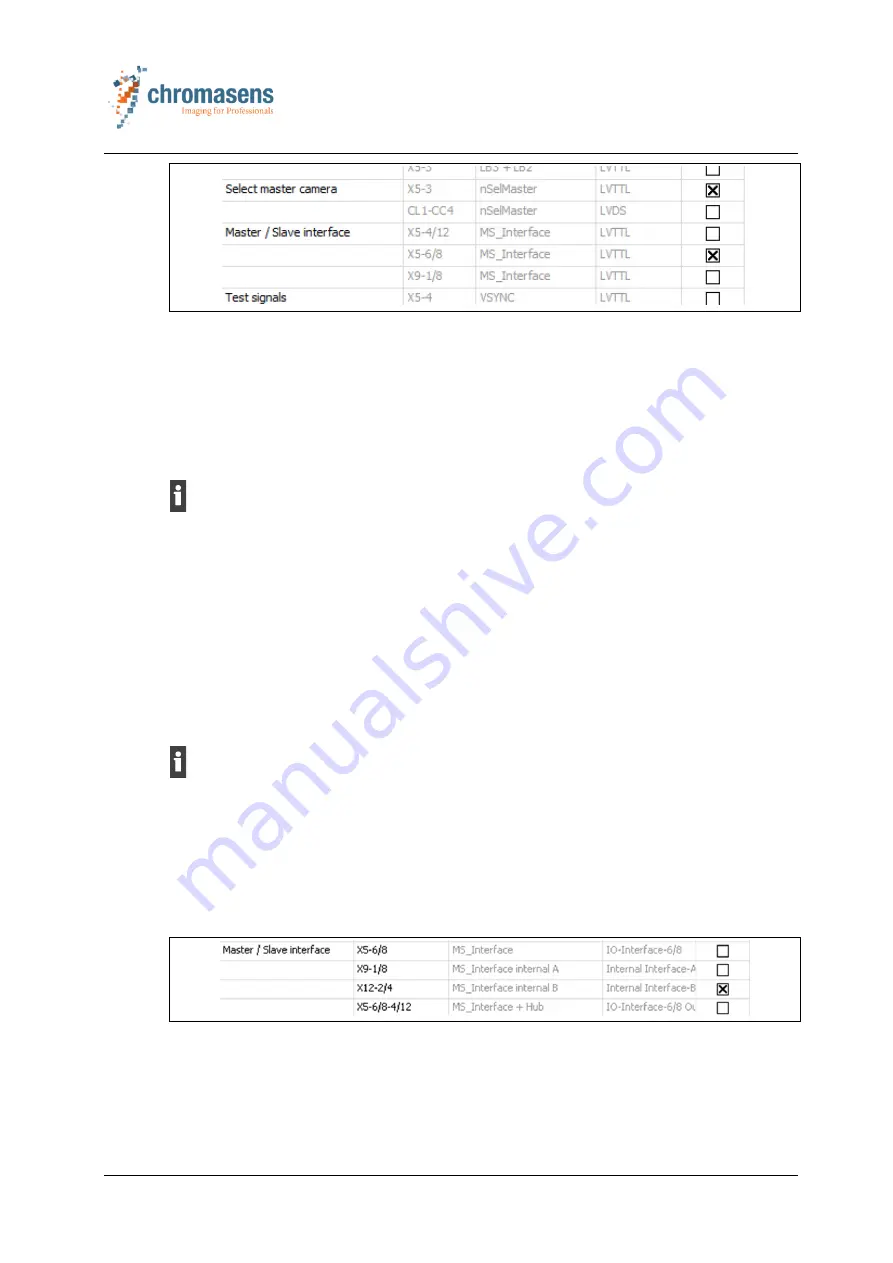
Fig. 31: Setting the IO-configuration for the Master/Slave mode of the 3DPIXApro dual
camera
5. In the IO-configuration, set the definition by selecting the IO-interface
X12-2/4
for the
master camera and for the slave camera.


