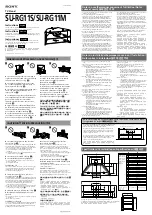
In the landscape orientation, make sure there is a minimum 16” (406.4 mm) horizontal
distance between the #14 x 2.5” screws.
Landscape orientation
Portrait orientation
5. Drill four 5/32" (4 mm) diameter holes 2-1/2" (65 mm) deep.
6. Tighten the four #14 x 2.5" wood screws and fender washers so that the wall plate is firmly
attached, but do not over-tighten.
Never tighten in excess of 80 in-lbs (9Nm).
Installing the mount to solid concrete or cinder block
Learn how to install the wall mounts onto solid concrete or cinder block walls.
Warning! Failure to comply with the following could result in death or serious injury.
•
Concrete must be a minimum of 2000 psi density. Lighter density concrete may not hold the
concrete anchor.
•
The supporting structure must safely support the combined load of the product, all attached
hardware, and components following all local safety standards and regulations.
When installing wall mounts onto cinder blocks, verify that you have a minimum of 1-3/8" (35 mm) of
actual concrete thickness in the hole to be used for the concrete anchors. Cinder block must meet
ASTM C-90 specifications and a minimum nominal width of 8".
1. Place the pull out mount assembly on the wall to use as a template, and verify the pull out
mount is level.
2. Mark the center of the four mounting holes.
In the landscape orientation, make sure there is a minimum 16” (406.4 mm) horizontal
distance between the #14 x2.5” screws.
Landscape orientation
Portrait orientation
Installing 46-55" flat panel screens on the ML10/MP10 wall mount
Installing Flat Panels on the ML10/MP10 Wall Mount Instruction Sheet
7
020-101712-03 Rev. 1 (07-2015)


