


Hardware
4 x
#12 x 2” Pan Screw
S7
S7
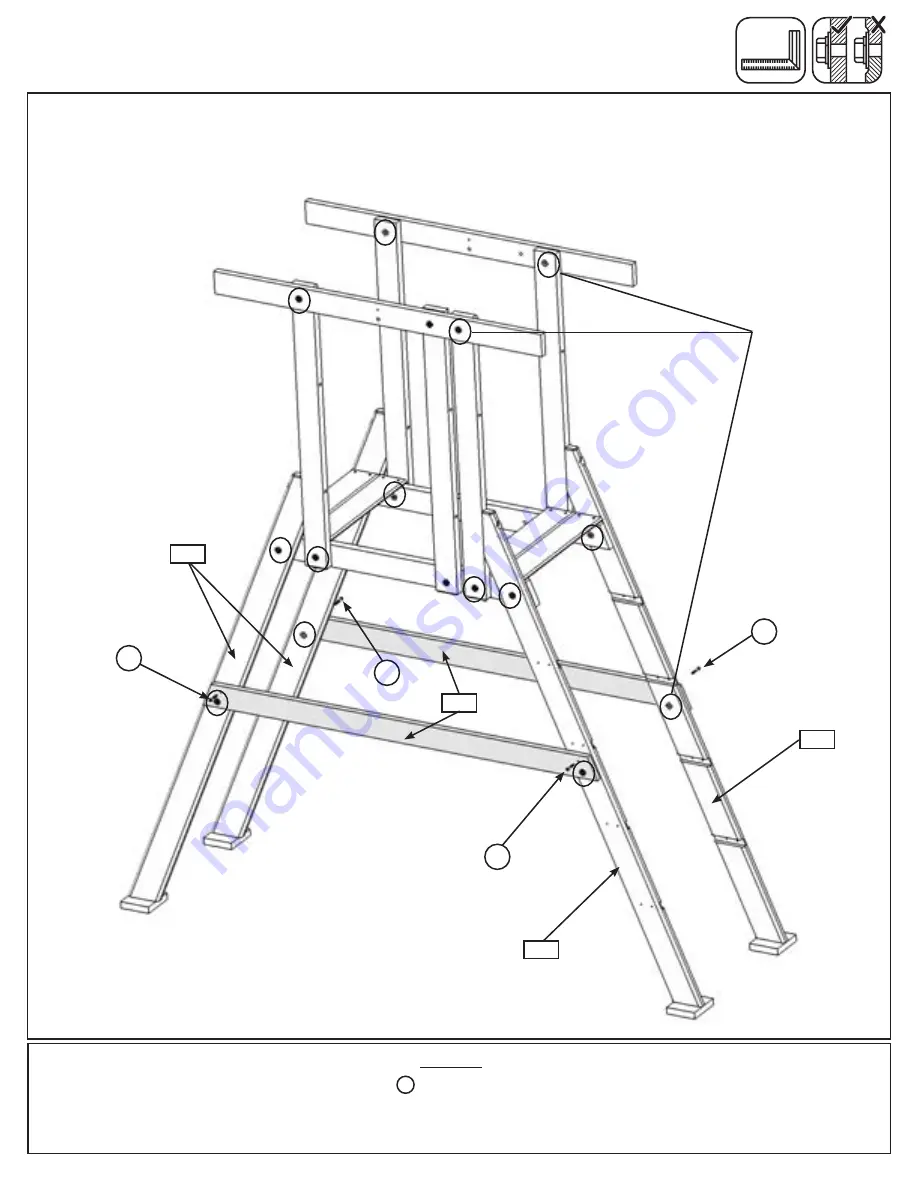
Step 42: Secure and Tighten Assembly
A:
Make sure the assembly is square then attach both (393) A Frame Lower Sides to (380) A Frame Access R,
(381) A Frame Access L and both (382) A Frame Posts with 2 (S7) #12 x 2” Pan Screws per wall. (fig. 42.1)
B:
Tighten all bolts on both walls. (fig. 42.1)
S7
S7
381
380
382
393
S7
Tighten all
bolts, both
walls
Fig. 42.1
114