O
PERATION
M
ANUAL
- M
ODEL
97XX-Series
4-18
SECTION 4 - CURRENCY HANDLING
TRITON SYSTEMS, INC.
Closing the Reject Vault
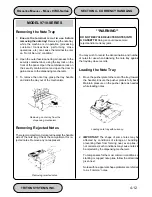
After removing any rejected notes, turn the small
handle about a half-turn counterclockwise and close
the lid. Allow the handle to return to the position of the
seal bracket. At this point, the vault is primed and the
color window should be showing GREEN. If applicable,
apply a new vault seal and lock the small handle to
the seal bracket.
Installing the Reject Vault
Using the reverse of the steps taken to remove the
Reject Vault, slide the Reject Vault back into its slot
in the mechanism. Make sure the Vault is fully inserted.
LOCK all cassettes into position using the Cassette
Lock/Unlock function (see Section 5, Management
Functions).
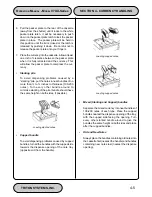
3.
To remove the Reject Vault, grasp the Vault handle
with one hand while holding the mechanism in
place with the other hand. Pull the Vault out
slightly. Place one hand underneath to support
the Vault as you slide it completely out of the unit.
Place it on a level surface.
Opening the Reject Vault
The Reject Vault is locked when it is removed from
the dispenser. A color indicator window shows GREEN
when the vault is opened for collection and when it is
ready for use. This condition is also referred to as the
PRIME position of the color window.
The color window shows RED when the vault is in-
serted into the dispenser and will show red until it has
been removed from the dispenser and opened for
collection.
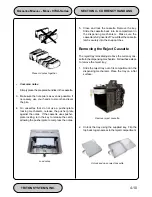
Remove the vault seal (if applicable). Turn the small
handle on the front counterclockwise and lift the lid.
Release the handle. Collect the rejected notes.
Removing reject vault.
Opening reject vault top.
**WARNING**
DO NOT RECYCLE REJECTED NOTES INTO
A CASSETTE! Doing so could cause more
rejects and/or currency jams.
Closing reject vault top.
Summary of Contents for Triton 9700
Page 1: ...Owner s manual Triton Owner s Manual 9700...
Page 12: ...SECTION 1 INTRODUCTION...
Page 22: ...SECTION 2 BASIC OPERATION...
Page 28: ...SECTION 3 INITIAL SETUP...
Page 36: ...SECTION 4 CURRENCY HANDLING...
Page 55: ......
Page 56: ...SECTION 5 MANAGEMENT FUNCTIONS...
Page 213: ......
Page 214: ...SECTION 6 MAINTENANCE...
Page 220: ...SECTION 7 JOURNAL ENTRIES...
Page 223: ......
Page 224: ...SECTION 8 ERROR RECOVERY...
Page 246: ...SECTION 9 CUSTOMER TRANSACTIONS...
Page 251: ......
Page 252: ...APPENDIX A MECHANICAL LOCK...
Page 255: ......
Page 256: ...APPENDIX B ELECTRONIC LOCK...
Page 259: ......
Page 260: ...APPENDIX C WARRANTY POLICY...


