O
PERATION
M
ANUAL
- M
ODEL
97XX-Series
4-10
SECTION 4 - CURRENCY HANDLING
TRITON SYSTEMS, INC.
•
Common notes
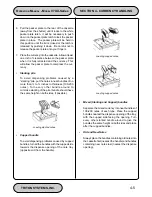
Simply place the prepared bundles in the cassette.
3.
Make sure the note pile is as even as possible. If
necessary, use your hands to smooth and level
the pile.
4.
On cassettes that do not use a pusher-plate
locking mechanism, release the pusher plate
against the notes. If the cassette uses pusher-
plate locking, turn the key to release the catch,
allowing the pusher plate to compress the notes.
5.
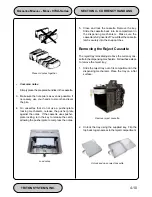
Close and lock the cassette. Remove the key.
Slide the cassette back into its compartment in
the dispensing mechanism. Make sure the
cassette is fully inserted! You will feel the cassette
latch securely into the snap catches.
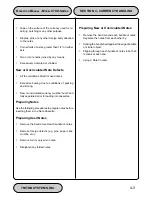
Removing the Reject Cassette
The reject tray is located just above the currency cas-
sette in the dispensing mechanism. Follow these steps
to remove the reject tray:
1.
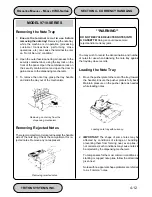
Slide the reject tray out of its compartment in the
dispensing mechanism. Place the tray on a flat
surface.
2.
Unlock the tray using the supplied key. Flip the
top back to gain access to the reject compartment.
Unlock and open reject cassette.
Load notes.
Remove reject cassette.
Place old notes together.
Summary of Contents for Triton 9700
Page 1: ...Owner s manual Triton Owner s Manual 9700...
Page 12: ...SECTION 1 INTRODUCTION...
Page 22: ...SECTION 2 BASIC OPERATION...
Page 28: ...SECTION 3 INITIAL SETUP...
Page 36: ...SECTION 4 CURRENCY HANDLING...
Page 55: ......
Page 56: ...SECTION 5 MANAGEMENT FUNCTIONS...
Page 213: ......
Page 214: ...SECTION 6 MAINTENANCE...
Page 220: ...SECTION 7 JOURNAL ENTRIES...
Page 223: ......
Page 224: ...SECTION 8 ERROR RECOVERY...
Page 246: ...SECTION 9 CUSTOMER TRANSACTIONS...
Page 251: ......
Page 252: ...APPENDIX A MECHANICAL LOCK...
Page 255: ......
Page 256: ...APPENDIX B ELECTRONIC LOCK...
Page 259: ......
Page 260: ...APPENDIX C WARRANTY POLICY...


