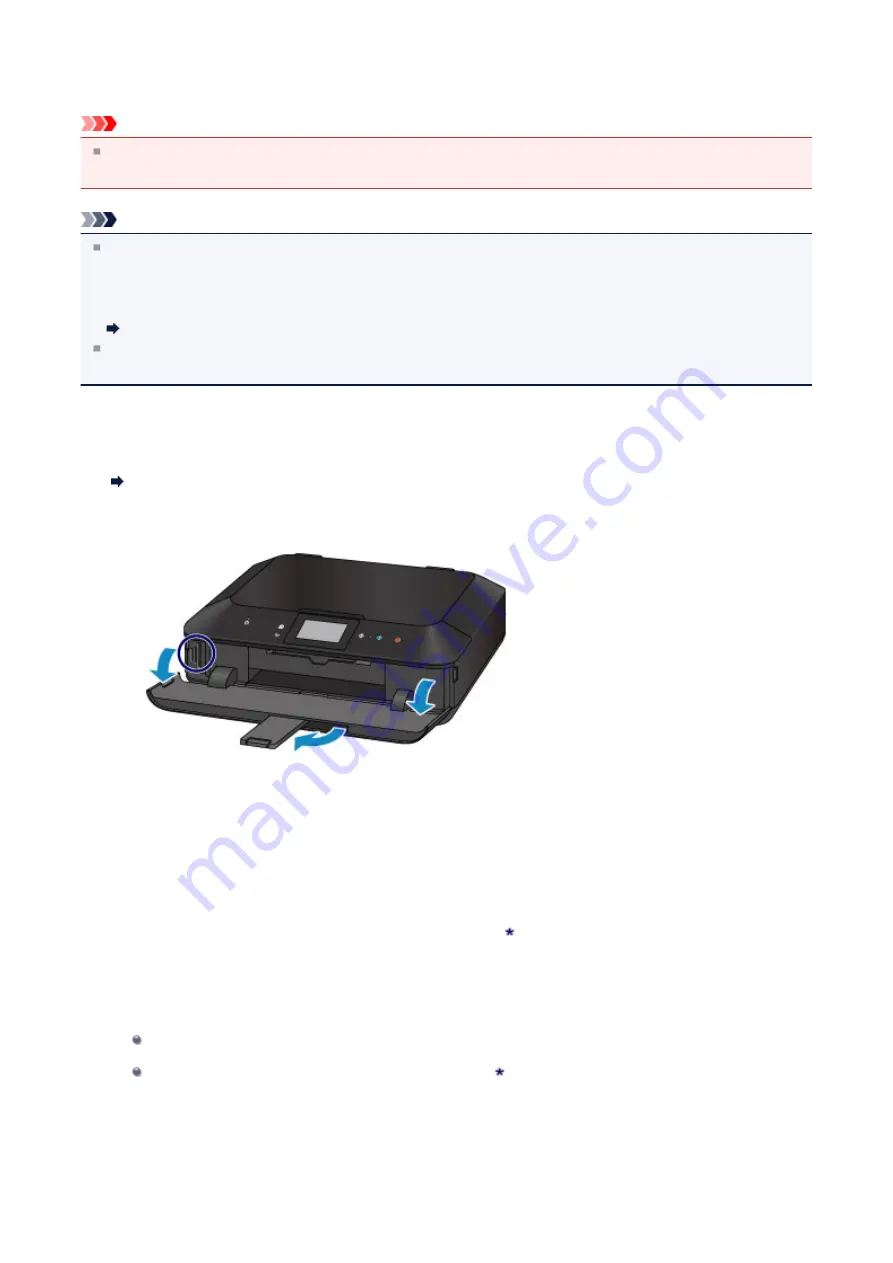
Inserting the Memory Card
Important
When a memory card is inserted into the card slot, the
Access
lamp is lit. When the
Access
lamp is flashing, the
machine is accessing the memory card. In this case, do not touch the area around the card slot.
Note
When
Read/write attribute
is set to
Writable from USB PC
or
Writable from LAN PC
, you cannot print image data
from the memory card or save scanned data on the memory card using the operation panel of the machine. After
using the card slot as the memory card drive of a computer, remove the memory card, select
Device user settings
in
Device settings
of
Setup
on the HOME screen, then set
Read/write attribute
to
Not writable from PC
.
Setting Up the Card Slot as the Memory Card Drive of the Computer
When you use a computer to edit or enhance photos saved on a memory card, be sure to print them from the
computer. If you use the operation panel, the photos may not be printed properly.
1.
Prepare your memory card.
Attach a special card adapter if your memory card requires one.
Before Inserting the Memory Card
2.
Turn on the power, then, holding both sides of the paper output tray, gently open it.
3.
Insert only one memory card into the card slot.
The location to insert a memory card varies depending on each type of memory card. Insert your memory card
straightforward WITH THE LABELED SIDE FACING TO THE LEFT into the card slot, according to the insert location
in the figure below.
When the memory card is inserted properly, the
Access
lamp
(A)
will light up.
Be sure to attach the card adapter for memory card with the mark (asterisk), and then insert it into the card slot as
shown below.
Insert the following types of memory cards into the left card slot:
Memory Stick Duo, Memory Stick PRO Duo
Memory Stick Micro (with the Duo size adapter)
168
Summary of Contents for Pixma MG7100 Series
Page 1: ...MG7100 series Online Manual Printing Copying English ...
Page 43: ...Related Topics Registering a Stamp Registering Image Data to be Used as a Background 43 ...
Page 51: ...3 Complete the setup Click OK then it returns to Stamp Background dialog box 51 ...
Page 89: ...Adjusting Contrast Adjusting Intensity Contrast Using Sample Patterns Printer Driver 89 ...
Page 105: ...In such cases take the appropriate action as described 105 ...
Page 196: ...Using the Slide Show Function Printing Photo While Viewing the Slide Show 196 ...
Page 220: ...9 Touch the Color button The machine starts printing 220 ...
Page 260: ...Specifications 335 ...
Page 330: ... 8 Display area The display changes based on the menu you select 77 ...
Page 352: ...Safety Guide Safety Precautions Regulatory and Safety Information 99 ...
Page 358: ...Main Components Front View Rear View Inside View Operation Panel 105 ...
Page 396: ...143 ...
Page 424: ...Replacing an Ink Tank Replacing an Ink Tank Checking the Ink Status 171 ...
Page 494: ...Language selection Changes the language for the messages and menus on the touch screen 241 ...
Page 506: ...Information about Network Connection Useful Information about Network Connection 253 ...
Page 553: ...5 Delete Deletes the selected IP address from the list 300 ...
Page 591: ...MG7100 series Online Manual Scanning English ...
Page 601: ...Scanning with Favorite Settings 11 ...
Page 691: ...Related Topic Basic Mode Tab 101 ...
Page 694: ...Related Topic Advanced Mode Tab 104 ...
Page 811: ...MG7100 series Online Manual Troubleshooting English ...
Page 870: ...Problems with Printing Quality Print Results Not Satisfactory Ink Is Not Ejected 60 ...
Page 967: ...1401 Cause The print head may be damaged Action Contact the service center 157 ...
Page 968: ...1403 Cause The print head may be damaged Action Contact the service center 158 ...
Page 969: ...1405 Cause The print head may be damaged Action Contact the service center 159 ...
Page 977: ...1660 Cause The ink tank is not installed Action Install the ink tank 167 ...
Page 1009: ...5B00 Cause Printer error has occurred Action Contact the service center 199 ...
Page 1010: ...5B01 Cause Printer error has occurred Action Contact the service center 200 ...
Page 1011: ...5B10 Cause Printer error has occurred Action Contact the service center 201 ...
Page 1012: ...5B11 Cause Printer error has occurred Action Contact the service center 202 ...


