1
Certificate].
2
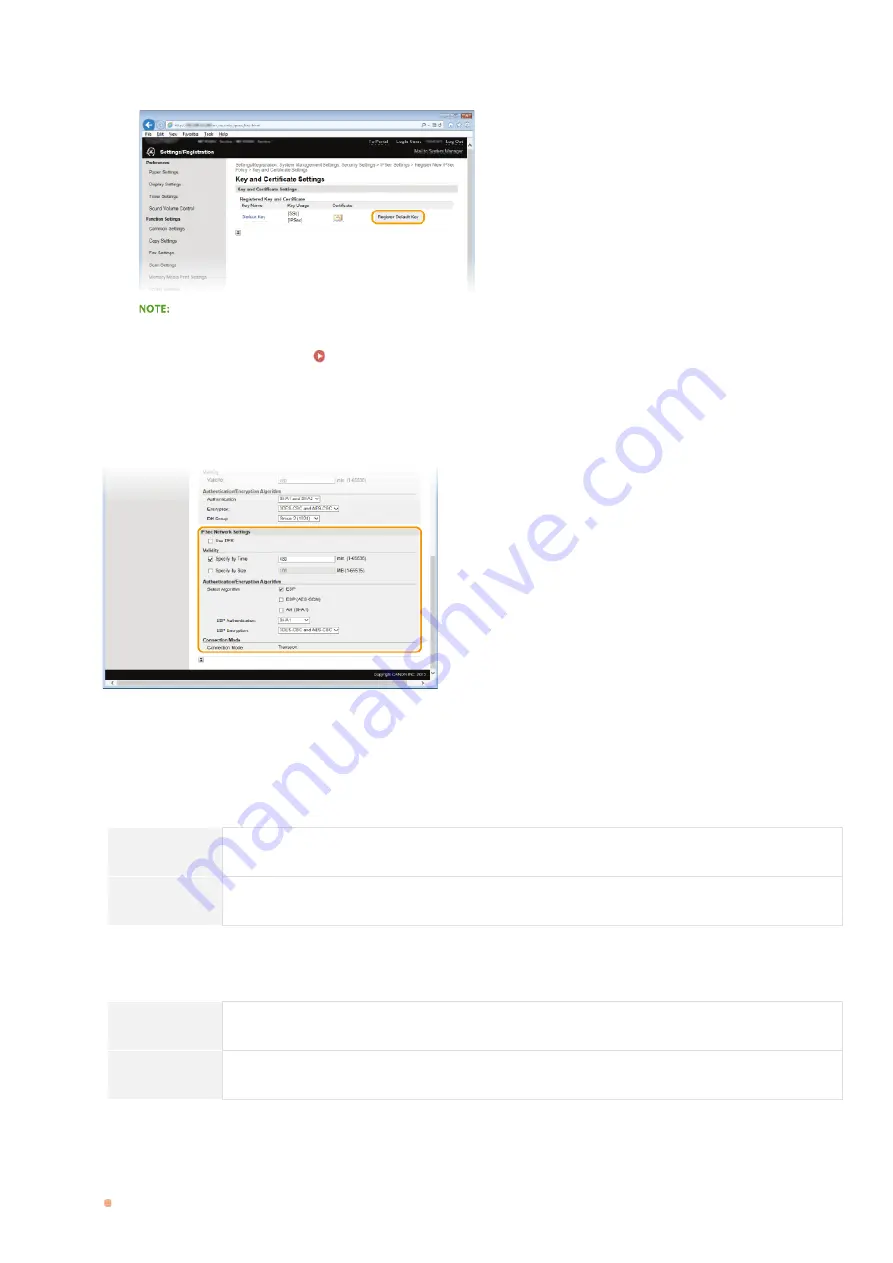
Click [Register Default Key] on the right of a key pair you want to use.
Viewing details of a key pair or certificate
You can check the details of the certificate or verify the certificate by clicking the corresponding text link under [Key
Name], or the certificate icon.
Verifying Key Pairs and Digital Certificates
3
Specify the [Valid for] and [Authentication]/[Encryption]/[DH Group] settings.
Specify the IPSec Network Settings.
[Use PFS]
Select the check box to enable Perfect Forward Secrecy (PFS) for IPSec session keys. Enabling PFS enhances the security while
increasing the load on the communication. Make sure that PFS is also enabled for the other devices.
[Specify by Time]/[Specify by Size]
Set the conditions for terminating a session for IPSec SA. IPSec SA is used as a communication tunnel. Select either or both of the
check boxes as necessary. If both check boxes are selected, the IPSec SA session is terminated when either of the conditions has
been satisfied.
[Specify by
Time]
Enter a time in minutes to specify how long a session lasts.
[Specify by
Size]
Enter a size in megabytes to specify how much data can be transported in a session.
[Select Algorithm]
Select the [ESP], [ESP (AES-GCM)], or [AH (SHA1)] check box(es) depending on the IPSec header and the algorithm used. AES-
GCM is an algorithm for both authentication and encryption. If [ESP] is selected, also select algorithms for authentication and
encryption from the [ESP Authentication] and [ESP Encryption] drop-down lists.
[ESP
Authentication]
To enable the ESP authentication, select [SHA1] for the hash algorithm. Select [Do Not Use] if you want
to disable the ESP authentication.
[ESP
Encryption]
Select the encryption algorithm for ESP. You can select [NULL] if you do not want to specify the
algorithm, or select [Do Not Use] if you want to disable the ESP encryption.
[Connection Mode]
The connection mode of IPSec is displayed. The machine supports transport mode, in which the payloads of IP packets are
encrypted. Tunnel mode, in which whole IP packets (headers and payloads) are encapsulated is not available.
Click [OK].
If you need to register an additional security policy, return to step 6.
10
11
㻠㻢㻝㻌㻛㻌㻣㻟㻡
Summary of Contents for MF729Cx
Page 35: ...Display 㻟㻡㻌㻛㻌㻣㻟㻡 ...
Page 43: ...LINKS Setting the Department ID Management Setting the System Manager ID 㻠㻟㻌㻛㻌㻣㻟㻡 ...
Page 52: ...LINKS Paper Notify to Check Paper Settings 㻡㻞㻌㻛㻌㻣㻟㻡 ...
Page 89: ...LINKS Basic Copy Operations 㻤㻥㻌㻛㻌㻣㻟㻡 ...
Page 94: ...LINKS Basic Copy Operations Adjusting Color Balance Adjusting Sharpness 㻥㻠㻌㻛㻌㻣㻟㻡 ...
Page 96: ...LINKS Basic Copy Operations Adjusting Density Adjusting Sharpness 㻥㻢㻌㻛㻌㻣㻟㻡 ...
Page 115: ...LINKS Receiving Faxes MF729Cx MF728Cdw MF628Cw 㻝㻝㻡㻌㻛㻌㻣㻟㻡 ...
Page 166: ...5 㻝㻢㻢㻌㻛㻌㻣㻟㻡 ...
Page 191: ...㻝㻥㻝㻌㻛㻌㻣㻟㻡 ...
Page 201: ...LINKS Printing a Document 㻞㻜㻝㻌㻛㻌㻣㻟㻡 ...
Page 208: ...LINKS Printing a Document 㻞㻜㻤㻌㻛㻌㻣㻟㻡 ...
Page 212: ...LINKS Printing a Document Printing Borders Printing Dates and Page Numbers 㻞㻝㻞㻌㻛㻌㻣㻟㻡 ...
Page 263: ...LINKS Configuring Scan Settings in Simple Mode Scanning Using an Application 㻞㻢㻟㻌㻛㻌㻣㻟㻡 ...
Page 308: ...㻟㻜㻤㻌㻛㻌㻣㻟㻡 ...
Page 348: ...LINKS Setting IPv6 Addresses Viewing Network Settings Configuring WINS 㻟㻠㻤㻌㻛㻌㻣㻟㻡 ...
Page 354: ...Configuring DNS 㻟㻡㻠㻌㻛㻌㻣㻟㻡 ...
Page 362: ...LINKS Setting Up Print Server 㻟㻢㻞㻌㻛㻌㻣㻟㻡 ...
Page 483: ...Portal Page main page will be displayed Remote UI Screens 4 㻠㻤㻟㻌㻛㻌㻣㻟㻡 ...
Page 490: ...LINKS Remote UI Screens 㻠㻥㻜㻌㻛㻌㻣㻟㻡 ...
Page 533: ...Initial Settings for Fax Functions MF729Cx MF728Cdw MF628Cw 㻡㻟㻟㻌㻛㻌㻣㻟㻡 ...
Page 707: ...When replacing toner cartridges see How to Replace Toner Cartridges 㻣㻜㻣㻌㻛㻌㻣㻟㻡 ...
Page 717: ...Click Back Exit 6 㻣㻝㻣㻌㻛㻌㻣㻟㻡 ...
Page 736: ...㻝㻌㻛㻌㻠㻣 ...
Page 768: ...㻟㻟㻌㻛㻌㻠㻣 ...


