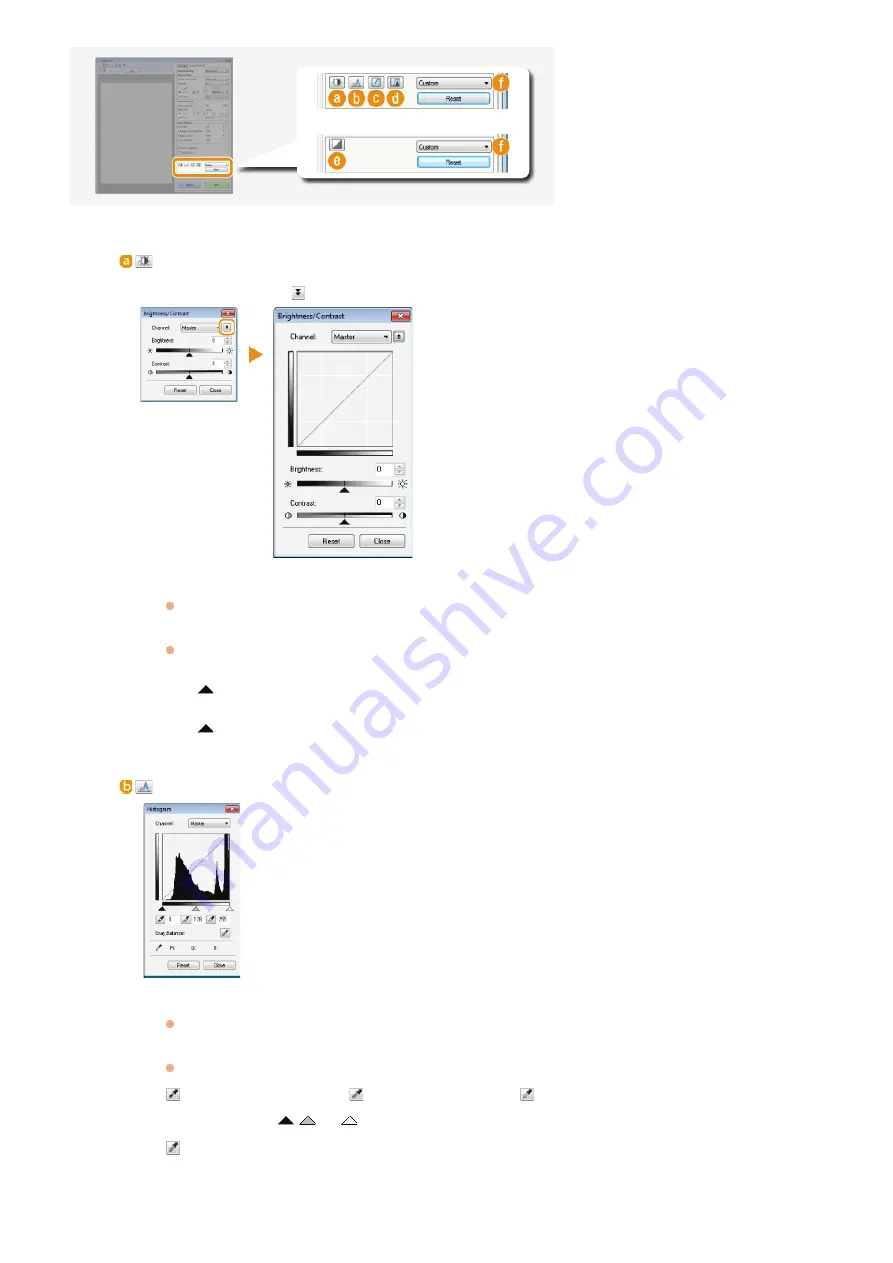
(Brightness/Contrast)
Adjusts the brightness and contrast (the difference between the light and dark parts) of the image. To adjust while
checking on a graph, click
on the upper-right of the screen.
[Channel]
If you select [Color] for [Color Mode], you can adjust the [Red], [Green] and [Blue] color channels separately.
To adjust all three colors at the same time, select [Master]. You can combine the adjustments made in [Master]
and those made in the individual color channels.
If you select [Grayscale] for [Color Mode], only [Grayscale] is displayed.
[Brightness]
Slide
or enter a value.
[Contrast]
Slide
or enter a value. When contrast is reduced, the difference between the light and dark parts of the image
is reduced to create a softer appearance. When contrast is increased, the difference between the light and dark
parts is increased to create a bolder appearance.
(Histogram)
A histogram is a graph that shows the distribution of brightness in an image. You can adjust
the image while checking the preview image and histogram. Specify the part of the image you
want to make brightest (or darkest) in the preview image, so that the brightness balance of
the original image is automatically adjusted with the specified part being the average.
Likewise, you can also adjust the balance with the brightness of the medium tone being the
average.
[Channel]
If you select [Color] for [Color Mode], you can adjust the [Red], [Green] and [Blue] color channels separately.
To adjust all three colors at the same time, select [Master]. You can combine the adjustments made in [Master]
and those made in the individual color channels.
If you select [Grayscale] for [Color Mode], only [Grayscale] is displayed.
(Black-point Eyedropper)/
(Mid-point Eyedropper)/
(White-point Eyedropper)
Click the parts on the preview image (or cropping frame) you want to specify as the darkest, the medium, and
the brightest. Slide
,
, or
. Alternatively, you can enter a value.
(Gray Balance Eyedropper Tool)
Click a part on the preview image (or cropping frame) you want to render as an achromatic color, which is black,
grey, or white, each of which does not have color depth. Color tone on the rest of the image is adjusted with the
clicked part being the average. For example, if snow on a photograph image is bluish, click this part because you
essentially want to render this part as white. When you click this part, the snow is no longer bluish, and the
㻞㻡㻣㻌㻛㻌㻣㻟㻡
Summary of Contents for MF729Cx
Page 35: ...Display 㻟㻡㻌㻛㻌㻣㻟㻡 ...
Page 43: ...LINKS Setting the Department ID Management Setting the System Manager ID 㻠㻟㻌㻛㻌㻣㻟㻡 ...
Page 52: ...LINKS Paper Notify to Check Paper Settings 㻡㻞㻌㻛㻌㻣㻟㻡 ...
Page 89: ...LINKS Basic Copy Operations 㻤㻥㻌㻛㻌㻣㻟㻡 ...
Page 94: ...LINKS Basic Copy Operations Adjusting Color Balance Adjusting Sharpness 㻥㻠㻌㻛㻌㻣㻟㻡 ...
Page 96: ...LINKS Basic Copy Operations Adjusting Density Adjusting Sharpness 㻥㻢㻌㻛㻌㻣㻟㻡 ...
Page 115: ...LINKS Receiving Faxes MF729Cx MF728Cdw MF628Cw 㻝㻝㻡㻌㻛㻌㻣㻟㻡 ...
Page 166: ...5 㻝㻢㻢㻌㻛㻌㻣㻟㻡 ...
Page 191: ...㻝㻥㻝㻌㻛㻌㻣㻟㻡 ...
Page 201: ...LINKS Printing a Document 㻞㻜㻝㻌㻛㻌㻣㻟㻡 ...
Page 208: ...LINKS Printing a Document 㻞㻜㻤㻌㻛㻌㻣㻟㻡 ...
Page 212: ...LINKS Printing a Document Printing Borders Printing Dates and Page Numbers 㻞㻝㻞㻌㻛㻌㻣㻟㻡 ...
Page 263: ...LINKS Configuring Scan Settings in Simple Mode Scanning Using an Application 㻞㻢㻟㻌㻛㻌㻣㻟㻡 ...
Page 308: ...㻟㻜㻤㻌㻛㻌㻣㻟㻡 ...
Page 348: ...LINKS Setting IPv6 Addresses Viewing Network Settings Configuring WINS 㻟㻠㻤㻌㻛㻌㻣㻟㻡 ...
Page 354: ...Configuring DNS 㻟㻡㻠㻌㻛㻌㻣㻟㻡 ...
Page 362: ...LINKS Setting Up Print Server 㻟㻢㻞㻌㻛㻌㻣㻟㻡 ...
Page 483: ...Portal Page main page will be displayed Remote UI Screens 4 㻠㻤㻟㻌㻛㻌㻣㻟㻡 ...
Page 490: ...LINKS Remote UI Screens 㻠㻥㻜㻌㻛㻌㻣㻟㻡 ...
Page 533: ...Initial Settings for Fax Functions MF729Cx MF728Cdw MF628Cw 㻡㻟㻟㻌㻛㻌㻣㻟㻡 ...
Page 707: ...When replacing toner cartridges see How to Replace Toner Cartridges 㻣㻜㻣㻌㻛㻌㻣㻟㻡 ...
Page 717: ...Click Back Exit 6 㻣㻝㻣㻌㻛㻌㻣㻟㻡 ...
Page 736: ...㻝㻌㻛㻌㻠㻣 ...
Page 768: ...㻟㻟㻌㻛㻌㻠㻣 ...


