Setting the Image-Recording Quality
156
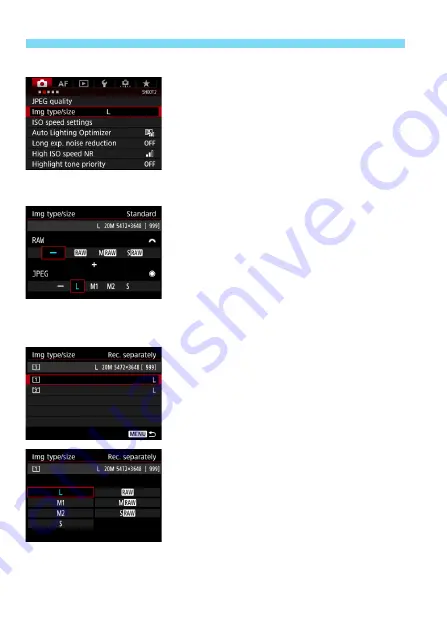
Using the Menu Screen to Set the Image Size
1
Select [Img type/size].
Under the [
z
2
] tab, select [
Img
type/size
], then press <
0
>.
2
Set the image size.
To select a RAW image size, turn the
<
6
> dial. To select a JPEG image
size, turn the <
5
> dial.
On the screen, the “
***M
(megapixels)
**** x ****
” number
indicates the recorded pixel count,
and [
****
] is the number of possible
shots (displayed up to 9999).
Press <
0
> to set it.
Under [
5
1: Record func+card/
folder sel.
], if [
Record func.
] is set to
[
Rec. separately
], select CF card
[
f
] or CFast card [
g
], then press
<
0
>.
Select the desired image size, then
press <
0
>.
Standard / Auto switch
card / Rec. to multiple
Rec. separately
Summary of Contents for EOS-1 D X Mark II G
Page 40: ...40 ...
Page 86: ...86 ...
Page 210: ...210 ...
Page 226: ...226 ...
Page 270: ...270 ...
Page 476: ...476 ...
Page 540: ...540 ...
Page 541: ...541 ...
Page 542: ...542 ...
Page 543: ...543 ...
Page 544: ...544 ...
Page 545: ...545 ...
Page 546: ...546 ...
Page 547: ...547 ...
Page 548: ...548 ...
Page 549: ...549 15 Software Overview I ...
Page 561: ......


