COPYRIGHT © CANON ELECTRONICS INC. 2008 CANON DR-X10C FIRST EDITION
4-9
CHAPTER 4 INSTALLATION & MAINTENANCE
3. Pre-imprinter Installation Procedure
No. Step
Details/Remarks
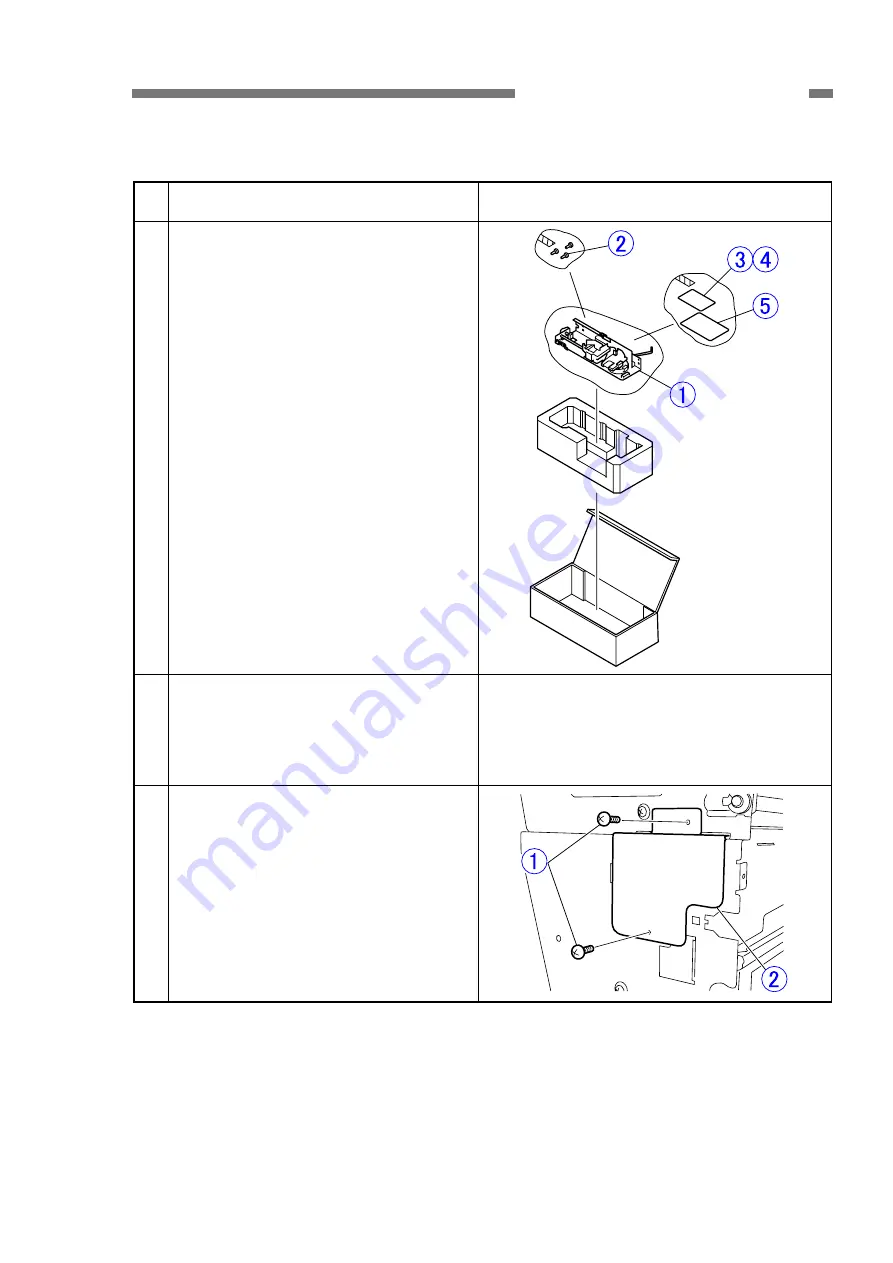
1 Take out the main body and accessories
from the box and check that the acces-
sories are present.
Bundled items
1
Main body
2
Screws (stepped)
3
Operation label
4
Lever operation label
5
Precautions for the user
Note:
1) Provide an ink cartridge for operation
check. The ink cartridge is separately
sold.
2) The ink pad for the pre-imprinter is built
in the frame detection unit of the
scanner main body.
2 Remove the eject tray unit, entrance
upper unit and upper reading roller
(front).
Refer to “CHAPTER 3, DISASSEMBLY &
REASSEMBLY” for details.
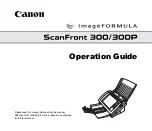
3 Open the upper unit and remove 2
screws
1
(M3, round tip) and remove
the screen plate
2
.
Note:
1) Use the removed screws (2) in the next
procedure.


