background image

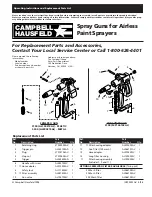
Spray Guns for Airless Paint Sprayers

3

General Safety Information
(Cont.)

NOTE:

If gun sprays while in the locked

position follow instructions in
Maintenance section for trigger lock.

12. Verify that all connections are

secure before operating. Do not use
pliers to tighten or loosen high
pressure connections.

13. Know how to stop your unit and

bleed pressure quickly. Be
thoroughly familiar with the
controls.

To reduce the risk of injury:

1.  Do not spray acids,

corrosive materials, toxic
chemicals, fertilizers, or pesticides.
Using these materials could result
in death or serious injury.

2.  Always wear appropriate gloves,

eye protection, and a respirator or
mask when painting.

3.  Always work in a clean

environment. Do not aim the spray
gun at any dust or debris.

4.  Do not operate or spray near

children. Keep children, pets, and
visitors away from equipment and
work area at all times.

5.  Do not over reach or stand on an

unstable support. Keep effective
footing and balance at all times.

6.  Stay alert and watch what you are

doing.

7. Do not operate the equipment

when fatigued or under the
influence of drugs or alcohol.

Preparation

Airless painting systems, unlike most
other power tools, require additional
care to ensure proper working order.

CONSULT YOUR AIRLESS PAINT
SPRAYER OWNER'S MANUAL FOR
OPERATING INSTRUCTIONS.

Spraying Instructions

Professional looking results can be
obtained by following the spray tips
below.

1. Keep the gun perpendicular to the

surface.

Always hold the gun perpendicular
to the surface with the tip
approximately 12” from the surface.
If held at an angle (up and down or
side to side), paint will build up
unevenly, leave the work splotchy,
and cause excessive overspray  (See
Figure 1).

2.  Move with a smooth arm stroke

Move the gun at a steady, even
pace while keeping the gun
perpendicular to the surface (See
Figures 1 & 2). Do not fan the gun.
Fanning the gun will cause excessive
overspray and uneven coverage
(See Figure 2).

3. Start moving the gun before triggering

To get a smooth overlap and
prevent initial paint buildup, start
your stroke movement before
pulling the trigger. Release the
trigger before stopping at the end
of the stroke (See Figure 3).

NOTE: 

To assure uniform paint coverage,

overlap each stroke by 20% - 30% and
use two coats with a cross pattern (one
coat horizontal, second coat vertical).

HOW TO CHANGE SPRAY TIPS:

It may be necessary to change spray
tips during a paint job. Follow these
steps for safe, easy tip changes.
1. Depressurize and turn off unit per

manufacturer’s instructions.

2.  Engage gun trigger lock.
3.  Pull red tip insert

out of spray base
and replace with
different tip, fully
inserting tip into base.

HOW TO ATTACH ROLLER 
ACCESSORY:

1.  Depressurize and turn off unit per

manufacturer’s instructions.

2.  Engage gun trigger lock.
3.  Remove spray base, tip, seal and

washer assembly.

4. Attach 

roller

accessory
(AL2275
shown) to
airless spray
gun. If needed
use thread adapter and washer
between roller and spray gun as
shown.

INTERMITTENT USE

If you are spraying and decide to stop
for several minutes, lock the spray gun
trigger and submerge the tip in a
container of suitable solvent (See Figure
4). This will prevent paint from
hardening in the tiny spray opening and
clogging the tip. 

Be sure to release

the pressure in the system and turn
the unit off according to the
manufacturer’s instructions.

12”

Figure 1 - Holding the Spray Gun

Approx.

10-12”

Start
Stroke

Pull

Trigger

Release

Trigger

End

Stroke

Figure 3 - Proper Way to Trigger 

Spray Gun

Thin Coat

Thin Coat

Heavy

Coat

Over-
spray

Over-
spray

Figure 2 - Result of Flexing Wrist 

While Spraying

INCORRECT

www.chpower.com

FAILURE TO FOLLOW
THESE INSTRUCTIONS
CAN RESULT IN SERIOUS
INJURY INCLUDING
DEATH.

Summary of Contents for AL1860 - METAL

Page 1: ...0 Mesh yellow AL086101AJ 2 pk 50 Mesh white AL086100AJ 2 pk 16 Washer Long Filter MJ105402AV 1 17 Adapter Long Filter AL072301AV 1 18 Assembly Pro Gun Swivel optional AL183500AJ 1 19 Guard Pro Gun Tri...

Page 2: ...all containers and collection systems are grounded to prevent static discharge 4 Connect your sprayer to a grounded outlet and use grounded extension cords Do not use a 3 prong to 2 prong adapter 5 D...

Page 3: ...e gun at a steady even pace while keeping the gun perpendicular to the surface See Figures 1 2 Do not fan the gun Fanning the gun will cause excessive overspray and uneven coverage See Figure 2 3 Star...

Page 4: ...or any accessory being used still require cleaning CLEANING SPRAY TIP GUARD 1 Remove Spray Tip with 1 or adjustable wrench 2 Clean Tip Guard with a cleaning brush Maintenance Pump damage may occur if...

Page 5: ...Spray Guns for Airless Paint Sprayers 5 www chpower com Notes...

Page 6: ...tion of incidental or consequential damages so the above limitation or exclusion may not apply to you C Any failure that results from an accident purchaser s abuse neglect or failure to operate produc...

Page 7: ...3804AV 1 14 Trousse g chette de pistolet pistolet vis AL183100SV 15 Filtres de pistolet 100 m ches jaune AL086101AJ2 pqt 50 m ches blanc AL086100AJ2 pqt 16 Rondelle long filtre MJ105402AV 1 17 Adaptat...

Page 8: ...t des tuyaux de pulv risateurs de peinture sans air haute pression mis la terre ou conducteurs sp cifi s par le fabricant 3 V rifier que tous les contenants et syst mes de cueillette sont mis la terre...

Page 9: ...u sol et un bon quilibre en tout temps 6 Il faut tre vigilant et savoir ce qu on fait 7 Ne pas faire fonctionner l quipement fatigu ou sous l influence de drogues ou d alcool Pr paration Les syst mes...

Page 10: ...e dans l eau ou dans un dissolvant convenable et la brosser avec une brosse dents afin d enlever la peinture ou impuret s du bout de la buse BUSE R GLABLE 1 Tourner le bouton de r glage compl tement d...

Page 11: ...ontraire des aiguilles d une montre JOINT DE BUSE ET RONDELLE l occasion l on doit remplacer le joint d argent et la rondelle noire l int rieur de la base de la buse 1 Pour remplacer le joint et la ro...

Page 12: ...uelques Provinces tats n autorisent pas l exclusion ni la limitation des dommages fortuits ou indirects La limitation ou exclusion pr c dente peut donc ne pas s appliquer C Toute panne r sultant d un...

Page 13: ...ltros de la pistola Malla 100 amarilla AL086101AJ 2 pk Malla 50 blanca AL086100AJ 2 pk 16 Arandela filtro largo MJ105402AV 1 17 Adaptador filtro largo AL072301AV 1 18 Ensamblaje conector giratorio de...

Page 14: ...nguera la pistola rociadora y los objetos dentro y alrededor del rea de rociado deben estar conectados a tierra adecuadamente para protegerlos contra descargas y chispas de est tica Use s lo mangueras...

Page 15: ...alejados del equipo y del rea de trabajo en todo momento 5 No se estire ni se pare en sobre un apoyo inestable Mantenga un soporte y equilibrio eficaz en todo momento 6 Mant ngase alerta y mire lo que...

Page 16: ...ad de acuerdo a las instrucciones del fabricante 2 P ngale el seguro al gatillo 3 Desconecte la boquilla y la tapa protectora de la pistola 4 Sumerja la boquilla en agua o un solvente adecuado y utili...

Page 17: ...el gatillo en la posici n de trabado leng etas en posici n horizontal 2 Mientras sostiene con una mano suavemente el gatillo contra el seguro use una llave de tuercas de 6 35mm 1 4 para girar la tuer...

Page 18: ...AUSFELD Algunos estados no permiten la exclusi n o limitaci n de da os emergentes o consecuentes por lo que la limitaci n arriba mencionada podr a no regir para Ud C Cualquier falla resultante de un a...

Page 19: ...19 Notes Notes Notas Operating Instructions and Replacement Parts List Instructions d Utilisation et Liste de Pi ces de Rechange Manual de Instrucciones y Lista de Repuestos...

Page 20: ...20 Operating Instructions and Replacement Parts List Instructions d Utilisation et Liste de Pi ces de Rechange Manual de Instrucciones y Lista de Repuestos Notes Notes Notas...

Reviews: