


®
SECTION 4: FLOW
making
since 1986
water work
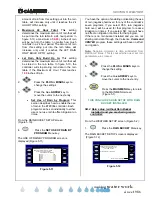
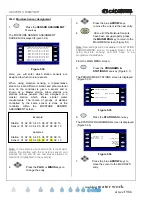
Example:
If you set the below limit at 65 gpm to 100 gpm.
and set your limit at -10/+10,
You will be alerted if the flow at the low end of the
scale fluctuates by more than 10 gallons per
minute in either direction.
That is less than 55 gpm or more than 75 gpm
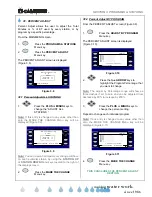
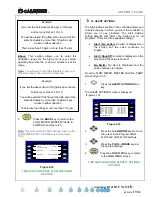
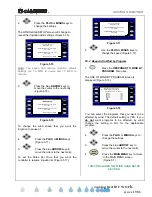
Above:
This section allows you to enter the
fluctuation range for the high end of your normal
operating flow. Use the (-) and (+) entries to set the
range.
Note:
You will want to set this allowable range up a
little wider due to the amount of water flow.
Example:
If you set the above limit at 100 gallons per minute.
And set your limit at -15/+15.
You will be alerted if the flow at the high end of the
scale fluctuates by more than 15 gallons per
minute in either direction.
That is less than 85 gpm or more than 115 gpm
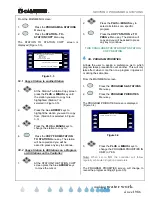
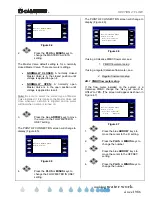
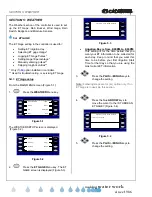
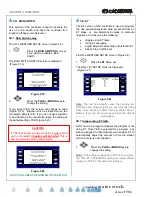
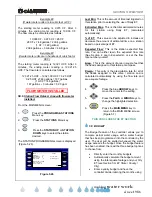
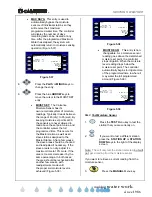
4.
Press the
BACK
key to return to the
FLOW METER, MASTER VALVE, &
PUMP screen (Figure 4.1).
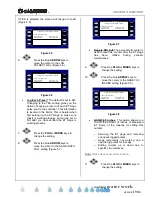
Note:
This will enable the Alert Actions option to the
FLOW METER, MV & PUMP screen See figure
4.18).
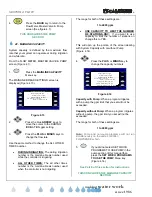
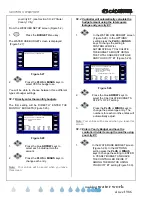
FLOW METER, MASTER VALVE & PUMP
& Valve Close Times
Line Fill Flow Meter
Alert Actions Flow Checking
Pump On-at-a-Time
Master Valve Mainline Capacity
Figure 4.18
THIS CONCLUDES THE FLOW CHECKING
SECTION
4I. ALERT ACTIONS
The Alert Actions section of the controller allows you
to setup the way in which you want the controller to
inform you of any problems. The Alert Actions
setting defaults with Alert / No Action set for all
programs. There are three possible settings:
•
Alert / No Action:
An alert is displayed on
the screen but the valve continues to
irrigate.
•
Alert / Shut-Off:
An alert is displayed on the
screen and the value is shut off.
•
No Alerts:
No alert is displayed and the
valve continues to irrigate.
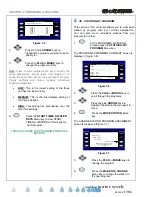
From the FLOW METER, MASTER VALVE & PUMP
screen (Figure 4.1).
1.
Press the
ALERT ACTIONS
Menu
key.
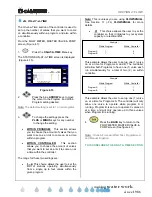
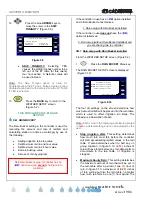
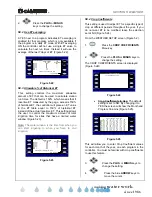
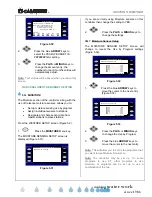
The ALERT ACTIONS screen is displayed
(Figure 4.19).
PROG A : Alert / No Action Alert / No Action
STATIONS ON - AT - A - TIME
HIGH FLOW LOW FLOW
(NO PROGRAM TAG)
DRIP 2 : Alert / No Action Alert / No Action
PROG E : Alert / No Action Alert / No Action
DRIP 1 : Alert / No Action Alert / No Action
PROG B : Alert / No Action Alert / No Action
PROG C : Alert / No Action Alert / No Action
PROG D : Alert / No Action Alert / No Action
Figure 4.19
2.
Press the blue
ARROW
keys to move
the cursor to the Program HIGH
FLOW and LOW FLOW settings.
3.
Press the
PLUS
or
MINUS
keys to
change the settings.
4.
Press the MAIN MENU key to return
to the MAIN MENU screen.
THIS CONCLUDES THE ALERTS / ACTIONS
SECTION


