background image

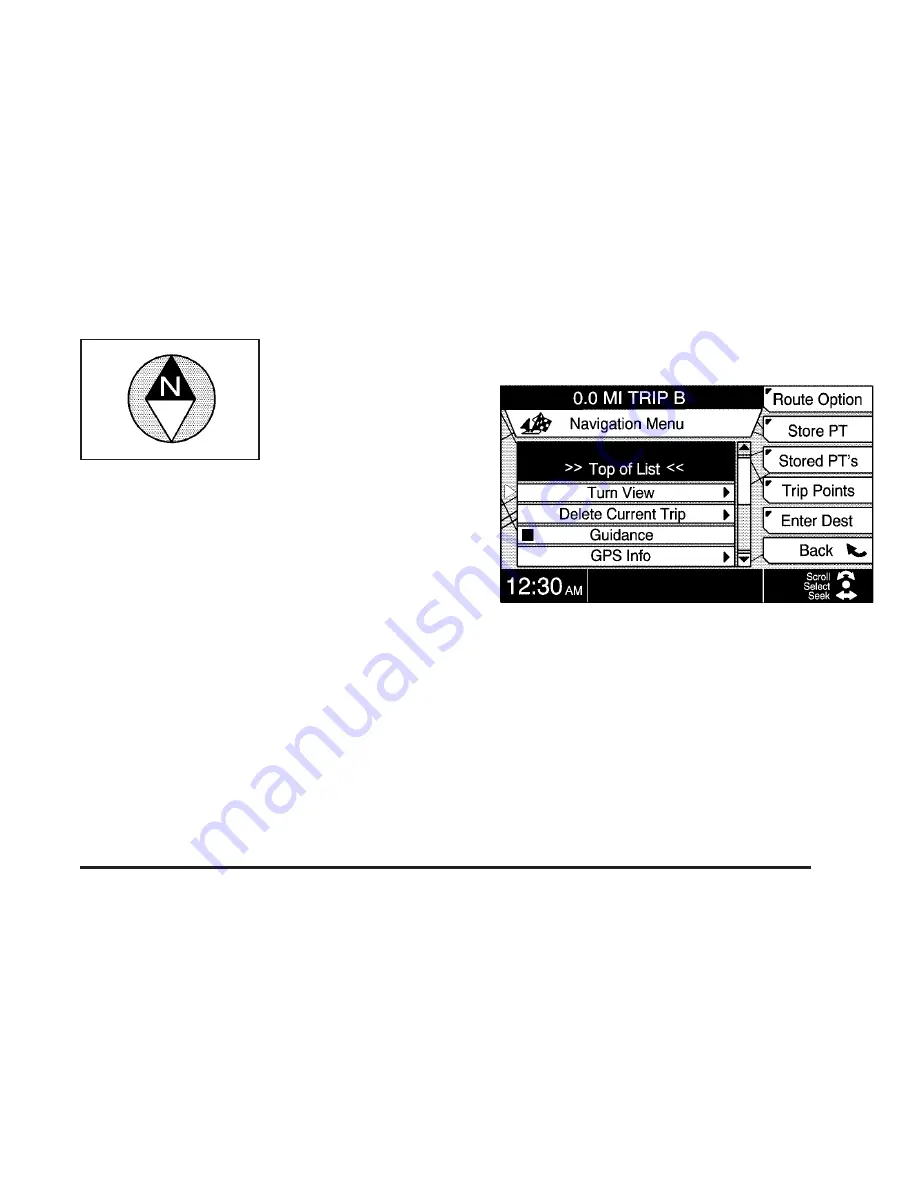
This symbol indicates
the map with the vehicle
travel direction up,
known as Heading
Up mode.

The shaded diamond with the N indicates North.
While in Heading Up mode, the direction your
vehicle is traveling will always be at the top of the
map screen.

If a red stick pin appears along a highlighted route
on a map screen, it marks a place where turn
guidance is provided.

Navigation Menu

To access the Navigation Menu, press the
TUNE/SEL knob when viewing a map screen.
Using this menu, you can choose from several
options and use the reconfigurable soft keys
to make adjustments to the system and plan
routes.

33

Summary of Contents for CTS 2007

Page 1: ...ntrols 21 Features and Controls 22 Navigation Audio System 63 Navigation Audio System 64 Voice Recognition 93 Voice Recognition 94 Vehicle Customization 101 Vehicle Customization 102 Index 141 2007 Cadillac CTS CTS V Navigation System M 1 ...

Page 2: ...uct after that time without notice For vehicles first sold in Canada substitute the name General Motors of Canada Limited for Cadillac Motor Car Division whenever it appears in this manual Keep this manual with the owner manual in the vehicle so it will be there if it is needed If the vehicle is sold leave this manual in the vehicle Canadian Owners For Canadian owners that would like to obtain a F...

Page 3: ...Overview 4 Navigation System Overview 4 Screen Features 6 Main Menu 9 Browser 13 Getting Started 15 Section 1 Overview 3 ...

Page 4: ...Overview Navigation System Overview 4 ...

Page 5: ... J DISC Key See CD DVD Player on page 84 K BAND Key See Radio Screen and Finding a Station under Navigation Audio System on page 64 L DVD Loading Slot See CD DVD Player on page 84 for more information M Navigation System Screen N Z Single CD Changer DVD Video DVD Map Disc Eject Key See CD DVD Player on page 84 or Ejecting the DVD Map Disc under Maps on page 30 O Beam Window for Infrared Data Trans...

Page 6: ...ffic announcements and program type PTY Emergency Test will display when the RDS station you are tuned to conducts a test of the local emergency broadcast system If there is a real emergency Emergency will display on the screen and further information will be provided Traffic will appear next to the frequency when a station supports the traffic feature The traffic symbol will display in the lower ...

Page 7: ...w the CD in that slot is the currently selected CD If a line is gray there is no CD in that slot G Time Radio CD CD Changer Information This displays the time Radio frequency audio source CD or CD changer information will also display here briefly if any of the following occurs The radio is on and the screen is not a radio CD or CD changer main screen The radio frequency has been changed in a non ...

Page 8: ...ation Audio System on page 64 for more information L TUNE SEL Select and SEEK SCAN Functions This displays the functions that are available for the TUNE SEL knob and SEEK SCAN key Only the highlighted functions are available The curved double arrow represents the TUNE SEL knob the solid dot represents pressing the TUNE SEL knob and the straight double arrow represents the SEEK SCAN key M Reconfigu...

Page 9: ...to play See CD DVD Player on page 84 for more information Audio Select Audio to display the audio screen You can also access the Audio screen by pressing the AUDIO key From this screen you can adjust sound levels such as bass and treble See Setting the Tone under Navigation Audio System on page 64 for more information Navigation Select Navigation to display the Navigation System Startup screen if ...

Page 10: ...on can be entered manually or transferred from a Palm hand held computing device See Receive later in this section for more information New Entry To enter information manually to the Address Book select New Entry then do the following 1 Turn the TUNE SEL knob to scroll to the desired entry field and select Edit or press the TUNE SEL knob 2 Turn the TUNE SEL knob to select the first letter required...

Page 11: ...EL knob to bring up the alpha numeric keypad 3 Edit the desired information 4 Select Done to save your changes and then select Back to exit the Edit menu Delete All Select Delete All to delete all information stored in the address book The system will ask you to confirm deletion Press and hold the Yes reconfigurable key until it beeps to delete all of the information or select No to cancel deletio...

Page 12: ... 1 Turn the TUNE SEL knob until the message you want to add to is highlighted 2 Press the Append key then begin recording the additional information Play r Press this key to play a previously recorded message Play is also used to resume playback of a message after it has been paused Skip Fwd Skip Forward Press this key to fast forward through a message This key is only available while a message is...

Page 13: ...ewer on the navigation screen The files can be accessed and viewed but no input will be allowed using this system To access the Browser do the following 1 Press the MAIN key 2 Press the reconfigurable key next to the Browser prompt The Browser will appear on the screen You must have a DVD DVD R or CD ROM containing HTML files in the player to access the Browser If the file has an index labeled ind...

Page 14: ...tems on and off If this key is pressed the Browser menu items will display at the bottom of the screen To select a browser menu item turn the TUNE SEL knob until the menu item you want is highlighted then press the knob to select it The following Browser menu items may be selected Back Select this item to go back to the previous page Forward Select this item to go to the next page Reload Select th...

Page 15: ...ons using the presets and steering wheel controls if equipped Set up the navigation features that can only be done before you begin driving such as entering an address or a preset destination Entering a destination or alphanumeric text requires many steps so you can only perform these operations when the vehicle is in PARK P You will notice that touch sensitive screen buttons leading to the alphan...

Page 16: ...p guidance with voice prompts Select a destination using various methods and choices Receive broadcast announcements on traffic and emergency alert communications The information in the system may not always be complete Road conditions such as prohibited turns detours and construction zones change frequently It is important to consider whether you can follow the directions given by the system for ...

Page 17: ...ap information will load and display on the screen See Installing the DVD Map Disc under Maps on page 30 for more information Entering an Address You can set a destination by entering an address 1 If a DVD map disc is not currently loaded see Loading a DVD Map Disc earlier in this section If a disc is loaded proceed to Step 2 2 Press the TUNE SEL knob to display the Navigation Menu 3 Press the Ent...

Page 18: ...enu 3 Press the Enter Dest reconfigurable soft key 4 Press the All POI reconfigurable soft key 5 If you know the city where the POI is located press the City reconfigurable soft key Use the TUNE SEL knob to enter the name of the city where the address is located Press the List reconfigurable soft key to display a list of cities that match the letters you entered and use the TUNE SEL knob to select...

Page 19: ...ading a DVD Map Disc earlier in this section If a disc is loaded proceed to Step 2 2 Press the TUNE SEL knob to display the Navigation Menu 3 Press the Enter Dest reconfigurable soft key 4 Press the Nearby POI reconfigurable soft key 5 Use the TUNE SEL knob to scroll and select the desired category The system will display a list of all POIs in the selected category that are located within 30 miles...

Page 20: ... NOTES 20 ...

Page 21: ...igation Menu 33 Traveling Across Regions 56 Colors on the Screen 57 OnStar System 57 Global Positioning System GPS 57 Vehicle Positioning 58 Problems with Route Guidance 59 If the System Needs Service 60 Ordering Map DVDs 60 Database Coverage Explanations 61 Section 2 Features and Controls 21 ...

Page 22: ...s the Setup menu See Setup Menu on page 27 LOAD Press this key to load a CD s See CD DVD Player on page 84 PWR VOL Power Volume Knob Press the power volume knob to turn the audio and navigation system on and off Turn the knob to increase or decrease the volume to the audio system or the volume of a voice prompt while the prompt is playing NAV b Navigation Repeat Press the navigation repeat key to ...

Page 23: ...ccess the Audio menu See Setting the Tone under Navigation Audio System on page 64 DISC Press the DISC key to access the CD Changer menu See CD DVD Player on page 84 BAND Press the BAND key to access the Radio screen and switch between AM FM1 FM2 XM1 or XM2 if equipped See Finding a Station under Navigation Audio System on page 64 Z Eject Press one of the eject buttons to eject either the DVD map ...

Page 24: ...this key to switch between a North Up Heading Up or Bird s Eye view of the map This symbol changes to reflect the next available view Press this key to get a closer look at a smaller section of the map you are traveling on Press this key to see a larger scale of the map you are traveling on Press this key to view a list of all points of interest POI close to the area in which you are traveling 24 ...

Page 25: ...is key to detour around a problem area while you are traveling on a planned route You can choose the length of the detour When on a planned route press this key to activate the auto reroute feature The system may give you alternate routes to select Press this key to calculate the route based on the criteria that has been entered into the system 25 ...

Page 26: ...o you are at the end of the alpha numeric bar U Space Select the space symbol to enter a space between characters or the words of a name V Backspace Press the reconfigurable soft key next to the backspace prompt if you have selected an incorrect character To make your name selections easier the system will only allow you to select a character which can follow the last one entered For example if yo...

Page 27: ... Units to choose the units of measurement for the vehicle s systems You can choose between Mile feet Mi ft Mile yard Mi yd and Kilometer meter Km m Turn the TUNE SEL knob to scroll through the choices Once your choice is highlighted press the knob to select it An X will appear in the box next to the item to show it has been selected Once you set your choice all vehicle systems will change to those...

Page 28: ...ited for nighttime conditions The displays are more dim with a darker background so they can be seen better during nighttime hours Press the key next to the Night prompt to select it An X will appear to show it has been selected You can select this mode regardless of exterior lighting conditions Contrast Press the key next to the Contrast prompt to select it then turn the TUNE SEL knob to increase...

Page 29: ...on Select Time Zone Select this item to choose the correct time based on the time zone you live in Choose between Atlantic Eastern Central Mountain Pacific Alaskan and Hawaiian Turn the TUNE SEL knob to scroll through the choices and press the knob to set your selection The current time for that time zone will appear on the display along with an X to show it has been selected 12h 24h Select this i...

Page 30: ...osition Select Veh Position to correct an error in your vehicle s position or direction Use the scroll arrows to adjust the vehicle s position After adjusting press the Set key See Map Scroll under Navigation Menu on page 33 for more information This item is only available if the map DVD is loaded and the vehicle is in PARK P for an automatic transmission or the parking brake is engaged and the ve...

Page 31: ...t you have read the screen The map information will load and display on the screen The map will appear with your current vehicle position on the map If your current vehicle position is incorrect on the map see Vehicle Position under Setup Menu on page 27 Ejecting the DVD Map Disc When the DVD map disc is not loaded you will not be able to use the navigation portion of the system Z Eject Press the ...

Page 32: ...igation Menu on page 33 for more information on planning a route This symbol will appear on the map when a waypoint has been entered The number on the flag indicates the sequence of the waypoint on the route See Creating a Trip with Waypoints under Navigation Menu on page 33 for more information This symbol indicates the map with North up known as North Up mode While in North Up mode North will al...

Page 33: ...ng will always be at the top of the map screen If a red stick pin appears along a highlighted route on a map screen it marks a place where turn guidance is provided Navigation Menu To access the Navigation Menu press the TUNE SEL knob when viewing a map screen Using this menu you can choose from several options and use the reconfigurable soft keys to make adjustments to the system and plan routes ...

Page 34: ...his key to see a regular view of the map and to have the next turn represented by an arrow pointing in the direction of the turn pop up as you approach it Always Press this key to see the regular view of the map and the popup view on the screen together at all times TBT Turn By Turn Press this key to see the route as a series of turns No map view will display with this option The entire intersecti...

Page 35: ... direction of the turn Delete Current Trip Select this option to delete the current trip The system will ask you to confirm your choice by selecting Yes or No Press the Yes key to delete the current trip or the No key to continue with the planned route Guidance Select this option to turn guidance on and off If guidance has been turned off the navigation repeat key can also be used to turn guidance...

Page 36: ... the system will respond with Louder or Softer to provide you with an example of the new volume at each level You can also turn the navigation prompts on and off using the NAV key Map Scroll Select this option to move and adjust the map view This view can also be used to enter destinations waypoints and stored points While in Map Scroll turn the TUNE SEL knob to choose the direction in which you w...

Page 37: ...ar in the box next to the icon If you prefer to see all the icons press the Set All reconfigurable soft key This will select all five icons You can de select all previously chosen icons by pressing the Clear All reconfigurable soft key De selecting all icons means that these five icons will not appear on the screen while you are traveling on a planned route Interstate America This feature allows t...

Page 38: ...n see where you have already traveled When you wish to return to your point of origin without planning another route you can follow the tracking bubbles back to where you started When you drive into an area with few digitized roads listed on the DVD map disc you can follow the tracking bubbles back to a digitized area To clear the trail left by tracking turn off Tracking by pressing the TUNE SEL k...

Page 39: ...u item using the TUNE SEL knob 2 Press and hold the reconfigurable soft key you wish it to replace for two seconds The menu item will now be a reconfigurable soft key and will remain that way unless you choose to change it The item that was originally that reconfigurable soft key will now be a menu item Back is the only reconfigurable soft key that cannot be changed or moved Route Option The five ...

Page 40: ...hibited by the time of day you are traveling such as no left turns before 3 00 p m etc Auto Recalc Automatic Recalculation If you have selected this option and leave the original calculated route the system will automatically calculate a new route without any further input from the driver To choose from the list of options use the TUNE SEL knob You may select all or none of the options listed as r...

Page 41: ...e Point Press the Store PT key to save the current location to a stored point in the system s memory A total of 60 points can be stored The first stored point is reserved for your home location If all 60 points are entered the system will notify you that there is no available storage space left in memory A currently stored point must then be removed before another can be stored Stored Points Press...

Page 42: ...l This key deletes all stored points which have not been locked in Back This key always returns you to the previous screen Use the TUNE SEL knob to move to the stored point you want to edit Once you make your selection by pressing the TUNE SEL knob you will be able to do the following Edit Name Select this option to edit the name of a stored point The alpha numeric keypad will appear at the bottom...

Page 43: ... See Route Option listed earlier for more information Store Press this key to save a trip to memory Stored Trips Press this key to retrieve a list of all stored trips The following prompts are available to you while in the Stored Trips menu More Press this key to scroll through the full name of the stored trip when all of the information does not fit on the display Each time this key is pressed th...

Page 44: ...move using the TUNE SEL knob 2 Press the reconfigurable soft key next to the Move prompt 3 Turn the TUNE SEL knob to move the point to the desired location 4 Press the reconfigurable soft key next to the OK prompt to confirm the change Calc Calculation Press this key to start route calculation Back Press this key from the Trip Points Menu to return to the main Navigation Menu Enter Destination Pre...

Page 45: ...This option allows you to select a destination by inputting two intersecting roads To do this use the following 1 If a DVD map disc is not currently loaded see Installing the DVD Map Disc under Maps on page 30 for more information 2 Press the State reconfigurable soft key and use the TUNE SEL knob to enter in the correct state 3 Press the City reconfigurable soft key and use the TUNE SEL knob to e...

Page 46: ...DVD map disc Residential phone numbers are not available to be entered When you select Phone the alpha numeric keypad will appear Once the phone number has been entered the Map reconfigurable soft key will display a zoomed in map of the POI that matches the phone number entered The Set Dest reconfigurable soft key will add the destination as the final waypoint to the current trip The info reconfig...

Page 47: ...the desired destination press the Calc reconfigurable key and a trip will be planned with that as the only point in the trip You will also hear a voice prompt directing you to Proceed to the highlighted route Use the zoom in and zoom out keys to view the map as desired While in the Enter Destination menu you may also plan a route using the following reconfigurable soft keys Beam This option allows...

Page 48: ...be highlighted if the field is searchable You may be requested to select a city or street to narrow the search After successfully finding the match you can use the reconfigurable soft keys to map set the destination or calculate the route If the data cannot be found in the navigation database no data found will display If this occurs select another field to search Repeat this process until all sea...

Page 49: ...ion on some POIs Map Press this key to view the location of the vehicle on the map Set Dest Destination Press this key to add the highlighted POI as the final waypoint for the current trip The system will route to all previously entered waypoints before route guidance will begin to the highlighted POI Sort Press this key to sort the POI list by distance from the current location Use the TUNE SEL k...

Page 50: ...e a category from the Nearby POI list using the TUNE SEL knob Once a category is selected a list of available POIs will display The points are listed in order of straight line distance from the selected location If the selected location is the current location an arrow will show the direction of the Nearby POI Turn the TUNE SEL knob to select the desired POI This point can be added to your trip or...

Page 51: ...such as the address and phone number When a Nearby POI is not available within the search area No Facility Found in This Area will display From this screen you may also transfer information to your Palm hand held computing device See Address Book under Main Menu on page 9 for more information Last 10 This feature allows you to select a destination from the last 10 destinations entered Press the La...

Page 52: ...ble soft key Use the TUNE SEL knob to enter the name of the state using the alpha numeric bar As letters are entered the system will automatically display a list of matching states Use the TUNE SEL knob to scroll and select the desired state 3 Press the City reconfigurable soft key Use the TUNE SEL knob to enter the name of the city where the address is located Press the List reconfigurable soft k...

Page 53: ...l into the address number range shown on the system it is possible that the DVD map disc does not contain this information See Database Coverage Explanations on page 61 6 Press the Calc reconfigurable soft key to calculate a route to this destination Any current trip will be replaced with the new address you just entered 7 Press the Map reconfigurable soft key to see a zoomed in map of the address...

Page 54: ...hat waypoint and press Delete To change the order of the waypoints scroll to a waypoint and press Move Then turn the TUNE SEL knob to move it to the desired location within the list Once the waypoint is at the desired location press the TUNE SEL knob or the OK key Plan a Route After a destination has been entered you must press the Calc reconfigurable soft key Once the route is calculated the rout...

Page 55: ...oad For example the road may have a sharp curve in it The curve would not qualify as an official turn on the planned route However the driver must be aware of the curve so that he or she can stay on the planned route Maneuver pins are always displayed along a planned route but voice prompts and screen pop ups will only be given if these features are turned on See Voice Volume under Setup Menu on p...

Page 56: ...area Please use the direction arrow and distance indicator to proceed to your destination You should refer to the direction and distance information in the lower center area of the screen to navigate to the destination or refer to the information in the waypoint box for a waypoint A purple highlighted route will appear on the IPD roads This is only a suggested route due to the lack of traffic rest...

Page 57: ...ll can be adjusted by using the steering wheel volume controls See Audio Steering Wheel Controls and OnStar System in the index of your vehicle s owner manual for more information Global Positioning System GPS The navigation system determines the position of your vehicle by using satellite signals various vehicle signals and map data The Global Positioning System GPS locates the current position o...

Page 58: ... window of your vehicle If you are experiencing a problem see Vehicle Positioning on page 58 or Problems with Route Guidance on page 59 for more information Vehicle Positioning At times the position of the vehicle on the map may be inaccurate due to one or more of the following reasons The road system has changed The vehicle is driving on slippery road surfaces such as in sand gravel and or snow T...

Page 59: ...rience problems with your system see your dealer Problems with Route Guidance Inappropriate route guidance may occur under one or more of the following conditions You have not turned onto the road indicated Route guidance may not be available when using automatic rerouting for the next right or left turn The route may not be changed when using automatic rerouting There is no route guidance when tu...

Page 60: ...icle s navigation system has the most accurate information available about streets roads points of interest and business locations The updates are provided by the GM Nav Disc Center at the first and second anniversary dates of your vehicle s delivery date About four to six weeks before those anniversary dates you will receive a post card from the GM Nav Disc Center reminding you that a free update...

Page 61: ...is helps the center make sure you receive the correct and most up to date DVD map disc for your vehicle See Vehicle Identification Number VIN in the Index of your vehicle s owner manual for more information Database Coverage Explanations Coverage areas vary with respect to the level of map detail available for any given area Some areas will feature greater levels of detail than others If this happ...

Page 62: ... NOTES 62 ...

Page 63: ...Navigation Audio System 64 CD DVD Player 84 Section 3 Navigation Audio System 63 ...

Page 64: ...r additional equipment is added to your vehicle the chimes may not work Make sure that replacement or additional equipment is compatible with your vehicle before installing it See Accessories and Modifications in the Index of your vehicle s owner manual The audio system has been designed to operate easily and to give years of listening pleasure You will get the most enjoyment out of it if you acqu...

Page 65: ...formation you will see the banner with Radio and the currently selected band For example Radio FM1 means that the presets for FM1 are displayed at the right of the screen You will also see Autostore Home or Away This will tell you which set of presets are displayed See FM Menu following in this section and Screen Features on page 6 for more information Near the bottom left of the screen you will s...

Page 66: ...he FM1 or FM2 band must be active Press the TUNE SEL knob once The following menu will appear Help Prompt RDS List Seek RDS List Region Alt Frequency Display RDS Messages Intrpt Volume Display Freq The following reconfigurable keys will also be available Select Home P Sets Away P Sets Autostore Back Help Prompt This menu item displays system help information at the bottom center of the screen if y...

Page 67: ...forth between on and off When this feature is turned on an X will appear in the box Alt Alternate Frequency This menu item allows the radio to automatically switch to a stronger station with the same programming Press the TUNE SEL knob to switch back and forth between on and off When this feature is turned on an X will appear in the box Display RDS Messages This menu item allows you to see RDS mes...

Page 68: ...le key allows you to display your home or local radio station presets Press the reconfigurable key next to Home P Sets and the preset stations at the right of the screen will change to your local presets Home will appear on the screen near the current station frequency To store preset radio stations see Setting Preset Stations later in this section Away Presets This reconfigurable key allows you t...

Page 69: ...or press the TUNE SEL knob to seek to the first available channel in the selected category XM Radio Satellite Service XM is a satellite radio service that is based in the 48 contiguous United States and Canada XM offers a large variety of coast to coast channels including music news sports talk traffic weather U S subscribers and children s programming XM provides digital quality audio and text in...

Page 70: ...menu items See FM Menu listed previously in this section for more information on the menu items oSEEK SCAN p Press the left or right arrow to go to the previous or next station and stay there The volume will mute while seeking To scan stations press and hold the left or right arrow for two seconds until you hear a beep The radio will go to the next or previous station play for a few seconds then g...

Page 71: ... increase or decrease the midrange Treble This will increase or decrease treble If a station is weak or noisy decrease the treble EQ 1 3 Equalizer Once you adjust the bass midrange and treble you can save them for future use You may store up to three customized equalizations To store equalizations do the following 1 Manually set the levels for bass midrange and treble 2 Press and hold one of the t...

Page 72: ...ear Seat This setting adjusts the audio to give the rear seat passengers the best possible sound qualities Spacious This setting is used to make the listening area seem larger To change the current DSP settings do the following 1 Press DSP reconfigurable key to turn DSP on and to access the DSP choices 2 Continue to press the DSP reconfigurable key until the desired DSP mode is selected 3 Press th...

Page 73: ... different preset stations six per band AM FM1 FM2 XM1 and XM2 if equipped The Home and Away presets each have 30 separate presets For more information on the Home and Away feature see FM Menu listed previously in this section To store a radio station as a preset use the following steps 1 Select the band where you want the preset stored by pressing the BAND button 2 Select either the Home or Away ...

Page 74: ...the signal should return Loading XM Acquiring channel audio after 4 second delay The audio system is acquiring and processing audio and text data No action is needed This message should disappear shortly Channel Off Air Channel not in service This channel is not currently in service Tune in to another channel Channel Unavail Channel no longer available This previously assigned channel is no longer...

Page 75: ... active The XM receiver in the vehicle may have previously been in another vehicle For security purposes XM receivers cannot be swapped between vehicles If this message is received after having your vehicle serviced check with your GM dealer XM Radio ID Radio ID label channel 0 If tuned to channel 0 this message will alternate with the XM Radio 8 digit radio ID label This label is needed to activa...

Page 76: ...ch as accidents and disabled vehicles Scheduled traffic incident data such as road construction and road closures Traffic flow information rate of speed data Traffic information is delivered to the vehicle by the XM Radio satellites XM NavTraffic makes it possible for the navigation system to provide continuously updated traffic information personalized for a driver s needs XM NavTraffic currently...

Page 77: ...approaching traffic condition If currently driving using a planned route the pop up screen will appear on the display when this has been selected When traffic is enabled a TRF icon will appear at the top left corner of the display The TRF icon is color coded as follows Green indicates that the system is working and the traffic condition is far away Yellow indicates that a minor traffic condition i...

Page 78: ... traffic conditions If you are not traveling on a planned route the system will show traffic conditions for approximately 31 miles 150 km with a maximum of 250 traffic conditions The list of conditions will appear in order from closest to furthest distance from the vehicles current location To view the traffic condition location and information on the map 1 Press the TRAF hard key 2 Turn the TUNE ...

Page 79: ...a red square will appear around the traffic condition symbol and the street name of the traffic condition location will appear on the display 4 Turn the TUNE SEL knob to receive the information for the next traffic condition Scrolling Map While scrolling the map traffic condition icons may appear To receive information about the traffic condition place the cross hairs over the traffic condition ic...

Page 80: ... TUNE SEL knob 2 Turn the knob to Traffic Setup 3 Press the TUNE SEL knob 4 Turn the knob to Approaching Event Alert 5 Press the TUNE SEL knob to select it An X will appear when it is selected When driving on a planned route a pop up display will appear of the next approaching traffic condition The display will let you know in how many miles kilometers the event will occur how long in miles kilome...

Page 81: ...hat type of road the system will have you traveling on When traveling on a planned route the alternate route key is always available Press the alternate route key and a list will appear Select TRF Detour to be re routed around the approaching traffic condition s select from the list of miles kilometers This option will re route the route that many miles kilometers off of the current planned route ...

Page 82: ...he desired option is highlighted 2 Press the TUNE SEL knob to select the highlighted option Traffic Condition Symbols The following are traffic condition symbols that can appear on the display Stopped traffic Traffic jam Accident Road closed Lane Narrows 82 ...

Page 83: ...Road work Construction Alert Road condition Road visibility Other 83 ...

Page 84: ...be reduced due to CD R quality the method of recording the quality of the music that has been recorded and the way the CD R has been handled There may be an increase in skipping difficulty in finding tracks and or difficulty in loading and ejecting If these problems occur check the bottom surface of the CD If the surface of the CD is damaged such as cracked broken or scratched the CD will not play...

Page 85: ...CD changer screen The CD changer will begin playing the currently loaded CD The disc and disc number the track and the track number and the TIME and the elapsed time of the track will display on the screen The single CD player screen will display if a music CD is loaded in the player and no discs are loaded in the CD changer If you have a CD text disc and are using the single CD player any informa...

Page 86: ...s loaded in that slot If a line is green it means that a CD is loaded in the slot The slot with the currently active CD is yellow Repeat Press the reconfigurable key next to the Repeat prompt to turn this feature on For the CD changer the first press of the Repeat reconfigurable key will turn on Repeat Disc The CD changer will play the currently selected disc again once the last track has ended Pr...

Page 87: ...lay of a CD press the TUNE SEL knob once Press it again to resume playback Forward Press and hold the reconfigurable key next to Forward to quickly advance within the current track As the CD advances the elapsed time will display to help you find the correct passage Reverse r Press and hold the reconfigurable key next to Reverse to quickly go backward within the current track As the CD reverses th...

Page 88: ... it has been less than eight seconds the changer will skip to the beginning of the current CD The new CD will begin playing at track one oSEEK SCAN p Six Disc CD Changer Only Use the left or right arrow to skip to the previous or next CD loaded in the CD changer The CD will begin playing at track one Z Eject For the single CD player press this button located next to the single CD player slot to ej...

Page 89: ...ny DVD R the sound quality may be reduced due to disc quality the method of recording the quality of the music that has been recorded and the way the disc has been handled There may be an increase in skipping difficulty in finding chapters and or difficulty in loading and ejecting If these problems occur check the bottom surface of the DVD If the surface of the DVD is damaged such as cracked broke...

Page 90: ...ckwise the disc will fast forward The farther the knob is turned the quicker the disc will advance When the knob is turned counterclockwise the first four detents will play the disc in slow motion As the knob is turned farther counterclockwise the disc will begin reversing The farther the knob is turned the quicker the disc will reverse To resume normal play press the first reconfigurable key DVD ...

Page 91: ...he subtitles on and off Turn the TUNE SEL knob to toggle between on and off The last item on the bottom display is the audio track selection This allows you to choose to hear the DVD in different languages or listen to commentary The choices available are dependant on the DVD Turn the TUNE SEL knob to choose the track Stopping and Ejecting a DVD To stop a DVD from playing press the second reconfig...

Page 92: ... NOTES 92 ...

Page 93: ...Voice Recognition 94 Voice Recognition CTS 94 Section 4 Voice Recognition 93 ...

Page 94: ...gnized The invalid command message indicates that the command cannot be used in the currently active screen For example if you say Next Track while listening to the radio you will receive the invalid command message because the command is for the DVD player or CD changer not the radio If you experience difficulty with the system recognizing a command try saying it more softly Voice Recognition Com...

Page 95: ... the CD changer screen Once the screen is displayed you can use other CD changer commands See CD Commands listed later in this section for more information DVD This command instructs the system to display the DVD player screen Once the screen is displayed you can use other DVD commands See DVD Commands later in this section for more information Navigation This command instructs the system to displ...

Page 96: ...mmand instructs the system to change the DSP to Rear Seat for the current audio source DSP Spacious This command instructs the system to change the DSP to Spacious for the current audio source Set Day This command instructs the system to change the screen appearance to Day mode Set Night This command instructs the system to change the screen appearance to Night mode Set Day Night Auto This command...

Page 97: ...and instructs the system to turn on the RDS alternate frequency feature RDS Alternate Frequency Off This command instructs the system to turn off the RDS alternate frequency feature Radio Tune This command instructs the system to change the current radio station by saying the command and then the frequency of the radio station For example if you say radio tune ninety four point seven the station w...

Page 98: ... must know the number of the track you wish to hear For example if you want to hear the second track on the current CD say play track two Next Track This command instructs the system to advance the current CD to the next track Previous Track This command instructs the system to go to the previous track or re start the current track Next Disc This command instructs the system to advance the CD chan...

Page 99: ...to re start the current chapter if it has been less than five seconds since the current chapter started Eject Disc This command instructs the system to eject the DVD Voice Memo Commands The following are verbal commands that can be used when the Voice Memo screen is active Memo Play This command instructs the system to play the memo currently highlighted on the screen Memo Play X This command inst...

Page 100: ...sing the Voice Memo screen No This command cancels choices made while using the Voice Memo screen Navigation Commands North Up This command instructs the system to switch from the current map view to North Up Heading Up This command instructs the system to switch from the current map view to Heading Up Bird View This command instructs the system to switch from the current map view to the bird view...

Page 101: ...Vehicle Customization 102 Personalization 102 Driver Information Center DIC 117 Section 5 Vehicle Customization 101 ...

Page 102: ...personalization features the driver s preferences are recalled by pressing the unlock button on the remote keyless entry transmitter 1 or 2 or by pressing the appropriate memory button 1 or 2 located on the driver s door Certain features can be programmed not to recall until the key is placed in the ignition To change feature preferences you must use one of the following procedures Entering the Pe...

Page 103: ... a customized name is not programmed the system will show Driver 1 or Driver 2 to correspond with the numbers on the back of the remote keyless entry transmitters To program a name do the following 1 Enter the Personalization menu following the instructions listed previously 2 Turn the TUNE SEL knob until Personalization Name is highlighted Press the knob once to access the Edit Name screen 3 Use ...

Page 104: ...E SEL knob to view the modes 4 Scroll to Recall Driving Positions and press the knob once to select it When the mode is turned on an X will appear in the box This feature cannot be selected if Remote Exit Recall or Key In Recall Memory is selected If either of these was previously selected you must first de select it in order to be able to select Remote Recall Memory Recall Driving Positions The m...

Page 105: ...er exit the programming mode by following the instructions later in this section or program the next feature available on your vehicle Key in Recall Memory If your vehicle has the optional memory package you will have this feature When this feature is turned on you can recall any previously programmed seat and mirror positions when the key is inserted into the ignition The following modes are avai...

Page 106: ...s removed from the ignition and the driver s door is opened The following modes are available for selection Mode 1 ON Mode 2 OFF Before your vehicle was shipped from the factory it was programmed to Mode 2 The mode to which the vehicle was programmed may have been changed since it left the factory To program the vehicle to a different mode do the following 1 Enter the Personalization menu followin...

Page 107: ... to program the vehicle to a different mode do the following 1 Enter the Personalization menu following the instructions listed previously 2 Scroll to Twilight Delay using the TUNE SEL knob 3 Press the TUNE SEL knob to scroll through the available delay settings When the delay time you want is highlighted press the TUNE SEL knob once to select it When the mode is turned on an X will appear in the ...

Page 108: ... 1 Enter the Personalization menu following the instructions listed previously 2 Scroll to Remote Keyless Options using the TUNE SEL knob 3 Press the TUNE SEL knob to view the modes 4 Scroll to Lights Flash At Unlock and press the knob once to select it When the mode is turned on an X will appear in the box The mode you selected is now set You can either exit the programming mode by following the ...

Page 109: ...t You can either exit the programming mode by following the instructions later in this section or program the next feature available on your vehicle Horn Sounds at Lock This feature sounds the horn once when the remote keyless entry transmitter is used to lock the vehicle All doors must be closed for this feature to work The following modes are available for selection Mode 1 ON Mode 2 OFF Before y...

Page 110: ...remote keyless entry transmitter is used to lock the vehicle The following modes are available for selection Mode 1 ON Mode 2 OFF Before your vehicle was shipped from the factory it was programmed to Mode 1 The mode to which the vehicle was programmed may have been changed since it left the factory To program the vehicle to a different mode do the following 1 Enter the Personalization menu followi...

Page 111: ...iver Unlock In Park and press the knob once to select it When the mode is turned on an X will appear in the box This feature cannot be selected if Driver Unlock Key Out Off Doors Unlock Key Out Off or Doors Unlock in Park is selected If any of these was previously selected you must first de select it in order to be able to select Driver Unlock in Park The mode you selected is now set You can eithe...

Page 112: ...s Unlock in Park automatic transmission or Doors Unlock Key Out Off is selected If any of these was previously selected you must first de select it in order to be able to select Driver Unlock Key Out Off The mode you selected is now set You can either exit the programming mode by following the instructions later in this section or program the next feature available on your vehicle Doors Unlock in ...

Page 113: ...later in this section or program the next feature available on your vehicle Doors Unlock Key Out Off This feature allows the doors to automatically unlock when the key is removed from the ignition on automatic transmission vehicles or when the ignition is turned to OFF on manual transmission vehicles The following modes are available for selection Mode 1 ON Mode 2 OFF Before your vehicle was shipp...

Page 114: ...uctions later in this section or program the next feature available on your vehicle Delayed Locking This feature delays the locking of the vehicle s doors for up to five seconds after a power door lock switch or the lock button on the remote keyless entry transmitter is pressed The five second delay occurs after the last door is closed The following modes are available for selection Mode 1 ON Mode...

Page 115: ...g modes are available for selection Mode 1 ON Mode 2 OFF Before your vehicle was shipped from the factory it was programmed to Mode 2 The mode to which the vehicle was programmed may have been changed since it left the factory To program the vehicle to a different mode do the following 1 Enter the Personalization menu following the instructions listed previously 2 Scroll to Lock Passenger Window u...

Page 116: ...o Mirror to Curb in Reverse using the TUNE SEL knob 3 Press the TUNE SEL knob to switch back and forth between on and off When the mode is turned on an X will appear in the box The mode you selected is now set You can either exit the programming mode by following the instructions later in this section or program the next feature available on your vehicle Enhanced Chime Volume This feature allows y...

Page 117: ...t is also used to display driver personalization features and warning status messages All messages will appear on the navigation screen System Controls To operate the DIC use the following INFO Information Use this button to access the Vehicle Information menu that provides the status of various vehicle systems See Vehicle Information Menu later in this section for more information TUNE SEL Tune S...

Page 118: ...riptions Outside Air Temperature If you select this item the current outside temperature is displayed at the top of the screen It will be in either degrees Fahrenheit or degrees Celsius depending upon whether the system is set for English or metric units Trip Odometer A and B To access the trip odometer do the following 1 Press the INFO button located on the left side of the screen to access the V...

Page 119: ... on the number of mpg L 100 km recorded since the last time this menu item was reset To reset the Average Fuel Economy press and hold the reconfigurable key next to the Reset prompt The display will return to zero Instantaneous Fuel Economy If you select this item the current fuel economy will display This number reflects only the fuel economy that the vehicle has right now and will change frequen...

Page 120: ...charging system there are four possible DIC messages that may display See DIC Warnings and Messages later in this section for more information Engine Oil Life If you select this item the percentage of remaining oil life will display If you see 99 Oil Life on the display that means that 99 of the current oil life remains When the oil life is depleted the Change Engine Oil message will appear on the...

Page 121: ...ge the transmission fluid as soon as possible within 200 miles 322 km Be sure to keep a written record of the mileage and date of the fluid change so you will have it for future reference When you reset the Change Transmission Fluid message by clearing it from the display you still must reset the transmission fluid life monitor separately To reset the transmission fluid life indicator use the foll...

Page 122: ...r and battery charging systems Have the electrical system checked by your dealer as soon as possible Battery Saver Active This symbol appears with the Battery Saver Active message This message appears when the system detects that the battery voltage is dropping beyond a reasonable level The battery saver system will start reducing certain features of the vehicle that you may not be able to notice ...

Page 123: ...tage on the DIC by selecting Battery Voltage from the Vehicle Information menu Battery Voltage Low This symbol appears with the Battery Voltage Low message This message will appear when the electrical system is charging less than 10 volts or if the battery has been drained If this message appears immediately after starting the engine it is possible that the generator can still recharge the battery...

Page 124: ... motion You should have the passenger buckle their seat belt The reminder will be repeated if the ignition is on the vehicle is in motion the driver is unbuckled and the passenger is still unbuckled and the passenger airbag is enabled If the passenger s seat belt is already buckled this message and chime will not come on Buckle Seat Belt This symbol appears with the Buckle Seat Belt message This m...

Page 125: ...or separately For more information on resetting the engine oil life monitor see Vehicle Information Menu Item Descriptions previously in this section Change Trans Fluid Automatic Transmission This symbol appears with the Change Trans Fluid message This message indicates that the life of the transmission fluid has expired and it should be changed within 200 miles See Automatic Transmission Fluid an...

Page 126: ...s symbol appears with the Check Coolant Level message This message will appear when there is a low level of engine coolant Have the cooling system serviced by your dealer as soon as possible See Engine Coolant in your vehicle s owner manual Check Gas Cap This symbol appears with the Check Gas Cap message When this message appears on the display the gas cap has not been fully tightened You should r...

Page 127: ...on control button this message will be displayed on the DIC The TC light will be on when the competitive driving mode is on The traction control system will not operate while in competitive driving mode You should adjust your driving accordingly See the CTS V portion of Traction Control System TCS in your vehicle s owner manual Driver Door Ajar This symbol appears with the Driver Door Ajar message...

Page 128: ... normal idling speed See Engine Overheating in your vehicle s owner manual for more information Engine Coolant Hot AC Air Conditioning Off This symbol appears with the Engine Hot AC Off message This message displays when the engine coolant becomes hotter than the normal operating temperature To avoid added strain on a hot engine the air conditioning compressor is automatically turned off When the ...

Page 129: ...ne is overheating severe engine damage may occur If an overheat warning appears on the instrument panel cluster and or DIC stop the vehicle as soon as possible Do not increase the engine speed above normal idling speed See Engine Overheating in your vehicle s owner manual for more information Engine Power Reduced This symbol appears with the Engine Power Reduced message This message informs you th...

Page 130: ...e the vehicle is low and the exterior lamp control is off This message informs the driver that turning on the exterior lamps is recommended even though the DRL are still illuminated and it has become dark enough outside to require the headlamps and or other exterior lamps This message will also appear when the windshield wipers have been on for more than six seconds and the exterior lamp control i...

Page 131: ...f you drive your vehicle while the engine oil pressure is low severe engine damage may occur If a low oil pressure warning appears on the instrument panel cluster and or DIC stop the vehicle as soon as possible Do not drive the vehicle until the cause of the low oil pressure is corrected See Engine Oil in your vehicle s owner manual for more information Passenger Door Ajar This symbol appears with...

Page 132: ...when you remove the key from the ignition you must enable them in the DIC This message is also used to identify the driver 1 2 or 3 on the navigation display Right Rear Door Ajar This symbol appears with the Right Rear Door Ajar message When this message appears on the display it means that the passenger s side rear door was not closed completely You should check to make sure that the door is clos...

Page 133: ...ars Have your vehicle serviced by your dealer immediately See Airbag System in your vehicle s owner manual Service Charging System This symbol appears with the Service Charging System message This message will display when a problem with the charging system has been detected Have your vehicle serviced by your dealer Service Electrical System This symbol appears with the Service Electrical System m...

Page 134: ...rvice Stability System message Your vehicle may be equipped with a vehicle stability enhancement system called StabiliTrak See StabiliTrak System in your vehicle s owner manual The Service Stability System message will be displayed if there has been a problem detected with StabiliTrak If the Service Stability System message comes on while you are driving pull off the road as soon as possible and s...

Page 135: ...essage may stay on for a few seconds after StabiliTrak stops assisting you with directional control of the vehicle Stability System Off Message This symbol appears with the Stability System Off message The Stability System Off message will be displayed any time you turn off StabiliTrak if equipped using the TC traction control on off button See StabiliTrak System in your vehicle s owner manual Whe...

Page 136: ...ist you with directional control of the vehicle if needed Service Steering System This symbol appears with the Service Steering System message Your vehicle may be equipped with a speed variable assist steering system See Steering in your vehicle s owner manual The Service Steering System message will be displayed if a problem is detected with the speed variable assist steering system When this mes...

Page 137: ... usually restarts however you may want to take your vehicle to your dealer before turning off the engine Service Transmission This symbol appears with the Service Transmission message There is a problem with the transmission of your vehicle Have your vehicle serviced by your dealer Service Vehicle Soon This symbol appears with the Service Vehicle Soon message This message is displayed when a non e...

Page 138: ...to start the vehicle again If it still does not start try another ignition key or have your vehicle serviced by your dealer Starting Disabled Throttle Problem This symbol appears with the Starting Disabled Throttle Problem message This message appears when your vehicle s throttle system is not functioning properly Have your vehicle serviced by your dealer Theft Attempted This symbol appears with t...

Page 139: ...s message will appear when the traction control system is actively limiting wheel spin Slippery road conditions may exist if this message is displayed so adjust your driving accordingly The message will stay on for a few seconds after the traction control system stops limiting wheel spin See Traction Control System TCS in your vehicle s owner manual Trans Transmission Hot Idle Engine This symbol a...

Page 140: ...osed completely You should make sure that the trunk lid is closed completely Turn Signal On This symbol appears with the Turn Signal On message If you drive your vehicle for more than about 1 mile 1 6 km with a turn signal on this message will appear as a reminder to turn off the turn signal A multiple chime will sound when this message is displayed 140 ...

Page 141: ...with Waypoints 53 D Database Coverage Explanations 61 DIC Warnings and Messages 122 Display 28 DVD 9 Player 84 DVD Player 89 E Editing a Trip 54 Ejecting the DVD Map Disc 31 Enter Destination 44 Entering a Nearby POI 19 Entering a Point of Interest POI by Name Category or City 18 Entering an Address 17 Entering the Personalization Menu 102 Exiting the Personalization Menu 117 141 ...

Page 142: ...ing Started Navigation 15 Global Positioning System GPS 57 H Hard Keys 22 I Installing the DVD Map Disc 31 L Language 30 Loading a DVD Map Disc 17 M Main Menu 9 Map Adjustments 31 Map Scales 31 Maps 30 Measurement Units 27 Menu Navigation 33 Setup 27 142 ...

Page 143: ...ons 34 O OnStar System 57 Ordering Map DVDs 60 Overview Navigation System 4 Owners Canadian 2 P Personalization Features 103 Plan a Route 54 Playing a CD 85 Playing the Radio 70 Problems with Route Guidance 59 Programmable Steering Wheel Controls CTS 30 R Radio 9 64 Radio Screen 65 Route Option 39 143 ...

Page 144: ...d Points 41 Symbols 32 System Controls 117 System Needs Service If 60 T Traveling Across Regions 56 Traveling on a Planned Route 55 Trip Points 43 U Using the CD Player 84 V Vehicle Information 13 Vehicle Position 30 Vehicle Positioning 58 Voice Memorandum 12 Voice Recognition 94 Voice Recognition Commands 94 Voice Volume 28 X XM NavTraffic USA Only 76 XM Radio Satellite Service 69 144 ...

Reviews: