background image

Six-Disc DVD Changer Errors

Although the DVD or CD you are playing meets
regulation requirements, there are circumstances that
may cause the disc to not play correctly. Some of those
circumstances may include the recording conditions
of the disc, the disc condition, and the pick up
circumstances of the player.

If using the system in extremely low or high
temperatures, the video playback may become distorted.

Because of some types of compression techniques
used during recording MP3 discs, the sound quality of
the discs can be inferior. This is not caused by the
audio system.

Auxiliary Devices

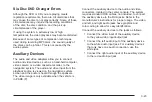
The audio and video adapters allow you to connect
audio and video devices, such as a hand-held computer,
video camera or a video cassette recorder, to the
navigation system. The audio and video input from the
playback source is viewed on the navigation system
screen and the audio is heard through the speakers.
The video image is only available when the vehicle is
in PARK (P).

Connect the auxiliary device to the audio and video
connectors, located in the center console. The system
requires standard RCA cables, not included, to connect
the auxiliary device to the RCA jacks. Refer to the
manufacturer’s instructions for proper usage. The video,
and left, and right audio jacks have graphics and
color coding to allow for easy identification.

Connect the auxiliary devices to the jacks as follows:

Connect the video input of the auxiliary device
to the yellow video input/output jack.

Connect the left audio input of the auxiliary device
to the white audio input jack. For auxiliary devices
that only have one audio connection, use the
white jack.

Connect the right audio input of the auxiliary device
to the red audio input jack.

3-23

Summary of Contents for 2005 STS

Page 1: ...2 1 Features and Controls 2 2 Navigation Audio System 3 1 Navigation Audio System 3 2 Voice Recognition 4 1 Voice Recognition 4 2 Vehicle Customization 5 1 Vehicle Customization 5 2 Phone 6 1 Phone 6...

Page 2: ...manual supplements the owner manual This manual includes the latest information available at the time it was printed We reserve the right to make changes in the product after that time ithout notice...

Page 3: ...Overview 1 2 Navigation System Overview 1 2 Getting Started 1 4 Section 1 Overview 1 1...

Page 4: ...Overview Navigation System Overview 1 2...

Page 5: ...2 for more information J Map DVD Loading Slot K CD DVD Changer Loading Key See Six Disc CD DVD Changer on page 3 13 for more information L CD DVD Changer Eject Key See Six Disc CD DVD Changer on page...

Page 6: ...ne Knob See Six Disc CD DVD Changer on page 3 13 for more information Getting Started Before you begin to operate the navigation system read this manual thoroughly to become familiar with it and to un...

Page 7: ...e see Personalization on page 5 2 When getting started you may set the navigation system to your preference using various options To do so reference the following topics To adjust screen appearance se...

Page 8: ...NOTES 1 6...

Page 9: ...stination 2 37 Keyless Access System 2 53 OnStar System 2 54 Configure Menu 2 55 Global Positioning System GPS 2 64 Vehicle Positioning 2 64 Problems with Route Guidance 2 65 If the System Needs Servi...

Page 10: ...Press the eject key next to the CD DVD changer loading slot to begin ejecting DVDs or CDs See Six Disc CD DVD Changer on page 3 13 for more information On Power Volume Press the power volume knob to t...

Page 11: ...page 3 2 Alpha Numeric Keypad Letters of the alphabet symbols punctuation and numbers when available to you will be displayed on the navigation screen as an alpha or numeric keypad The alpha keypad wi...

Page 12: ...vailable characters and darken the unavailable characters If you are unsuccessful when inputting a name it may need to be selected differently It is also possible that the map DVD database may not con...

Page 13: ...en When you have successfully selected a screen button a beep will sound These buttons will be highlighted when a feature is available and dim when they are unavailable There are also some toggle scre...

Page 14: ...to load the map DVD Read the following steps completely before operating this feature 1 Turn the ignition on 2 Load the map DVD into the slot located just below the navigation system screen by inserti...

Page 15: ...ove your finger from the map screen If scrolling while your vehicle is in PARK P the system will scroll initially at a slower rate It will increase if you continue touching the map screen If scrolling...

Page 16: ...ar on the map after a route has been planned marking your final destination The waypoint symbol will be displayed on the map after a waypoint has been added to your route The waypoint symbol will be n...

Page 17: ...he map with North Up known as North Up mode While in North Up mode the vehicle icon will follow the north direction on the map regardless of which direction the vehicle is traveling Select this screen...

Page 18: ...mation When a name is too long to be displayed an arrow symbol will appear Select the right or left arrow screen button to scroll through the entire name This symbol indicates the position of the next...

Page 19: ...ation on the screen as a memory point The system will automatically store the memory point in the Marked Point folder category Touch anywhere on the map to display the POI screen button on the bottom...

Page 20: ...n button Show Select this screen button to update the map screen and the list once a category has been selected Delete To delete a category do one of the following To delete the last added POI categor...

Page 21: ...bout the specific point Select the guidance window symbol from the map to display the guidance window options Select from one of the following six options that allow you different views and informatio...

Page 22: ...3D view and to turn the POIs on and off To change the heading direction in the right map touch the north up or heading up symbol Select the turn list symbol to display the next three upcoming maneuver...

Page 23: ...e next turn will be displayed As you approach the next turn the system will automatically display a zoomed in view of the upcoming maneuver Select the next maneuver symbol to display only the next man...

Page 24: ...r You can use the up and down arrows to scroll through the displayed list To view the available POIs for an exit select the exit then select the Map screen button The navigation system will display hi...

Page 25: ...rive across many states you may have to change the region selected to represent the area you are traveling to To do so do one of the following Change the selected region in the search area when you ge...

Page 26: ...Navigation Menu Select the Menu screen button to access the NAV Navigation MENU From the NAV MENU you can select Change Route or Memory Points 2 18...

Page 27: ...ons from this menu H Search Conditn Search Condition This option will take you to the SEARCH CONDITION screen The search condition screen allows you to view your current destination and also change th...

Page 28: ...option is only available while you are driving on your current planned route F Route Pref Route Preferences This feature will take you to the ROUTE PREFERENCES screen Touch any of the following optio...

Page 29: ...Allow Ferry This feature allows the system to use ferries when calculating a route Calculate W Back Select either screen button to calculate the route if a destination has been inputted o Dest Way Pt...

Page 30: ...te y z Scroll Arrows Select the up and down arrow screen buttons to scroll through the list of maneuvers Avoid Select this screen button to avoid a maneuver Select the Avoid screen button that is next...

Page 31: ...ll to Start Select this screen button to scroll to the starting position previous way point or previous POI depending on the mode selected This button will toggle between slow and fast speed j Pause S...

Page 32: ...n the current route Delete Select this screen button to delete the selected POI Select one of the categories to select a new POI category that will replace a current POI category Memory Points Selecti...

Page 33: ...er To store a point 1 Select the Memory Points screen button from the STORED LOCATIONS screen 2 Select one of the folders categories listed 3 Select Add 4 Select the desired method of entering a desti...

Page 34: ...ons to change the sort methods 5 Select the Name screen button 6 Use the backspace screen button to delete the current name or use the alpha keypad to make changes 7 Select the OK screen button to sto...

Page 35: ...have the name show on the map screen next to the POI icon by selecting the Show Name On or Off screen buttons Del Nametag Delete Once a nametag has been added the Add Nametag screen button will chang...

Page 36: ...STORED LOCATIONS screen 2 Select one of the folders categories listed 3 Select the Edit screen button 4 Select the memory point from the list 5 Select the Tel screen button 6 Use the numeric keypad to...

Page 37: ...te all the points in the folder category select No to not delete the points and to return to the DELETE POINTS screen To change the name of the folder category 1 Select the Memory Points screen button...

Page 38: ...ded See Destination on page 2 37 for more information A map screen will appear displaying the selected location 4 If desired reduce or enlarge the area around the point you want to avoid by using the...

Page 39: ...large keys 7 Select the OK screen button to store the area To delete a point to be avoided 1 Select the Avoid Area screen button from the STORED LOCATIONS screen 2 Select the Delete screen button 3 Se...

Page 40: ...RED LOCATIONS screen 2 Select the Add screen button 3 Using the desired method of entering a destination enter the way point See Destination on page 2 37 for more information A map screen will appear...

Page 41: ...om the STORED LOCATIONS screen 2 Select the Edit screen button 3 Select the Chg Loc screen button from the CHANGE ORDER screen 4 From the CHANGE LOCATION screen select the point whose location needs t...

Page 42: ...tton 3 Select a destination entry method See Destination on page 2 37 for more information 4 Select the OK screen button to store the destination The home icon will now be highlighted on the DESTINATI...

Page 43: ...CATIONS screen 2 Select the Del All screen button 3 The system will display the map screen with a pop up confirmation message Select Yes to delete all of the destinations select No to not delete all o...

Page 44: ...hanges You can choose whether or not to have the name show on the map screen next to the preset destination symbol by selecting the Show Name On or Off screen buttons To change the position of a prese...

Page 45: ...n from the STORED LOCATIONS screen to display memory point icons on the map screen When highlighted the feature is on When dark the feature is off Calculate Select this screen button from the STORED L...

Page 46: ...CAN for Canada Once your selection has been made you will see the area covered on the map highlighted Touch the back key to return to the DESTINATION ENTRY screen The new selection will be stored onc...

Page 47: ...names will be displayed if there are less than 5 items available You may select the list screen button at any time to view the available list 2 Select the desired street name with the correct prefix...

Page 48: ...e You may select the list screen button at any time to view the available list 6 Select the desired street name with the correct prefix Dr Ln St etc from the list A map screen will then appear with th...

Page 49: ...e system will display the alpha keypad 4 If the alpha keypad is displayed input the POI name until a list of available POIs appears You may also select the List screen button when it becomes available...

Page 50: ...s screen button to enter the map destination entry method To use the map destination entry method do the following 1 Touch the map for the desired area you wish to set as your destination 2 Use the zo...

Page 51: ...spell the street name to further reduce the number of available items Select the street with the correct prefix Dr Ln St etc 3 After the first street has been chosen enter the second street name The L...

Page 52: ...rieve the destination U Phone Number Touch this screen button to access the PHONE NUMBER screen To use the phone number destination entry method do the following 1 Input the area code and phone number...

Page 53: ...ist of freeways will appear 2 Choose a freeway from the list and then touch the Entrance or Exit screen button to choose a point You can choose an exit entrance point from the list of names that will...

Page 54: ...Select a destination point from the list Touch the Name Sort screen button to sort the list by name or Dist Sort to sort the list by distance from the vehicle s current position After selecting a dest...

Page 55: ...r Marked Point folders 2 Select the desired memory point within the selected category folder Use the sort button to sort the destinations within their category folder Touch the Dist screen button to s...

Page 56: ...se the arrow to the right of the destination to view the entire destination name as necessary 2 After choosing a destination from the previous destinations list a map screen will appear with the desti...

Page 57: ...xt to LAT to enter the direction of the latitude coordinate 2 Input the numeric portion of the latitude coordinate using the keypad 3 Touch E or W next to LONG to enter the direction of the longitude...

Page 58: ...his feature allows you to plan a route to one previously stored destination that you have selected as home If a home destination is not stored the home button will not be available In addition to pres...

Page 59: ...as a way point along the route See Dest Way Pt under Stored Locations under Navigation Menu on page 2 18 for more information Route Preference Touch this screen button to access the Route Preference...

Page 60: ...to the ROUTE OPTIONS menu and select from the available options Three Routes To access this screen touch the 3routes button on the map screen while planning a destination When applicable the system w...

Page 61: ...This icon shows the route s freeway distance information b Ferry This icon shows the route s ferry distance information Time Restricted Roads This icon shows the route s time restricted road informati...

Page 62: ...This button will become available during a phone call This function is used when you need to enter numbers in response to an automated phone request such as when check your voice mail or are asked to...

Page 63: ...propriate number s using the keypad and then touch the tone send button Once that set of numbers has been sent the tone send button will be dimmed until another set of numbers is input on the keypad 6...

Page 64: ...le when in FM or XM Select this button to turn information on The information will change depending on the audio source is selected When on the Info screen button will be available to select from the...

Page 65: ...of languages will depend on the languages supported by the disc Menu Language Select this button to view a list of languages to choose for the DVD menu text The list of languages will depend on the la...

Page 66: ...OI Selection This option allows you to set six Point of Interest POI categories that you can select from while driving To set the Quick POI selection do the following 1 Select the Quick POI Selection...

Page 67: ...map if your vehicle has been shipped for example or to change to the current position touch the Position Direction screen key If there are tire pressure differences or a spare tire is installed the Na...

Page 68: ...option will turn the guidance screen on and off Freeway Information When on this option will automatically display freeway information in the guidance window while on a route Select the Off screen but...

Page 69: ...ts and the voice recognition system You may also choose to turn voice guidance prompts off Vehicle Vehicle Touch this screen button to access the vehicle information menu From this menu you can adjust...

Page 70: ...reen button when setting the time in PM PST MST CST EST Touch one of these screen buttons to choose between Pacific Standard Time PST Mountain Standard Time MST Central Standard Time CST and Eastern S...

Page 71: ...l change the navigation system screen to a darker background for better viewing at night Auto mode will adjust the screen automatically depending on exterior lighting conditions _ Contrast This featur...

Page 72: ...ill not send signals if they are being repaired or improved after market glass tinting has been applied to the vehicle s windows Notice Do not apply after market glass tinting to the vehicle s windows...

Page 73: ...eed to calibrate the system This may be due to tire pressure differences or if a spare tire is installed To calibrate the system see Configure Menu on page 2 55 Problems with Route Guidance Inappropri...

Page 74: ...e map DVD is updated once a year provided that the map information has changed To order a new map DVD contact your dealer Database Coverage Explanations The United States excluding Alaska and Hawaii a...

Page 75: ...Navigation Audio System 3 2 Six Disc CD DVD Changer 3 13 Auxiliary Devices 3 23 Radio Personalization 3 24 Section 3 Navigation Audio System 3 1...

Page 76: ...Playing the Radio On Power Volume Press this knob to turn the audio system on and off Turn the knob to the right to increase or to the left to decrease the volume to the audio system BAND Press this...

Page 77: ...band If available on your vehicle you can also use the 1 6 preset seek steering wheel control Each press of this button will take you to the next preset station Auto Store Automatic Select this screen...

Page 78: ...s The list names are A G Press the left right arrow buttons to scroll through the list The name of the list is displayed between the two arrows and the presets for each list are displayed on the prese...

Page 79: ...lly adjusts the volume level so that it always sounds the same to you To use AudioPilot touch the Audio Pilot screen button To turn it off touch the screen button again When this feature is on the but...

Page 80: ...the Speakers Left Right Balance To adjust the balance between the right and the left speakers touch and hold the Left or Right screen buttons To center the balance and the fade touch the center where...

Page 81: ...SP setting makes spoken words sound clear Rear Seat For non surround sound sources only Select this screen button to adjust the audio to give the rear seat occupants the best possible sound quality St...

Page 82: ...current programming and the name of the program being broadcasted Info Information Select this screen button to display information broadcasted by the RDS station when in FM This is not available for...

Page 83: ...satellite radio service that is based in the 48 contiguous United States XM offers over 100 coast to coast channels including music news sports talk and children s programming XM provides digital qual...

Page 84: ...t a category and the system will start seeking for available stations within the selected category To view the available channels within the category select the category then use the tune knob or seek...

Page 85: ...should disappear shortly Channel Off Air Channel not in service This channel is not currently in service Tune in to another channel Channel Unavail Channel no longer available This previously assigned...

Page 86: ...r security purposes XM receivers cannot be swapped between vehicles If this message is received after having your vehicle serviced check with your GM dealer XM Radio ID Radio ID label channel 0 If tun...

Page 87: ...the disc into If a slot is not selected the system will load the first available slot 3 When the screen displays Insert Disc number insert the disc partway into the slot label side up The system will...

Page 88: ...eject the disc If a selection is not made the system will eject the disc from the current slot If the disc is not removed from the slot the system will pull it back in after 10 seconds and start play...

Page 89: ...m All Discs Select this screen button to hear the tracks on all of the loaded discs in random rather than sequential order Select the OFF screen button to turn off random play This function will rando...

Page 90: ...of each track on the selected disc Select the OFF screen button to stop scanning When the system has scanned through all of the tracks the system will automatically stop scanning SCAN Scan Folder Sele...

Page 91: ...s screen button to repeat the track you are listening to Select the OFF screen button to turn off repeat play RPT Repeat Folder Select this screen button to repeat the folder you are listening to Sele...

Page 92: ...n to resume play Fast forward Select this screen button to fast forward through the current track r Reverse Select this screen button to reverse through the current track Combined Disc This system wil...

Page 93: ...screen button to hear the first 10 seconds of each track on all loaded discs Select the OFF screen button to stop scanning When the system has scanned through all of the loaded discs the system will a...

Page 94: ...the down arrow hard key to go back to the beginning of the current track Press the down arrow hard key again to go to the previous track in the current group If you are in the first track of the curr...

Page 95: ...wing Touch anywhere on the screen again to display the DVD options Audio Select this screen button to change the audio language heard This may not be available on all DVDs Depending on the type of DVD...

Page 96: ...signs next to this symbol to increase or decrease the contrast Brightness Select the plus or minus signs next to this symbol to increase or decrease the brightness Tint Select the plus or minus signs...

Page 97: ...system The audio and video input from the playback source is viewed on the navigation system screen and the audio is heard through the speakers The video image is only available when the vehicle is in...

Page 98: ...ettings as adjusted the last time your vehicle was operated This feature allows two different drivers to store and recall their own audio system settings The settings recalled by the audio system are...

Page 99: ...Voice Recognition 4 2 Section 4 Voice Recognition 4 1...

Page 100: ...that best works for you When the system recognizes the command it will either perform the function ask you to confirm your choice by clearly stating yes or no or issue an error message such as System...

Page 101: ...nd List and the Operating Guide The Command List shows a list of available voice recognition commands to use Touch the Command List screen button and then touch one of the buttons on the right of the...

Page 102: ...ouch the Operating Guide screen button and then touch one of the buttons on the right of the screen to choose the instructions to list Use the up and down arrows to scroll through the instructions Sta...

Page 103: ...u on page 2 55 for more information Display set language French This command instructs the system to change the display instrument panel cluster HUD and Navigation System display Navigation System voi...

Page 104: ...earance under Configure Menu on page 2 55 for more information Display set auto mode This command instructs the system to switch the system display to auto mode See Screen Appearance under Configure M...

Page 105: ...D and 3 D map modes These commands are available while a map screen is displayed Point of Interest POI Commands The following is a list of POI commands State the commands exactly as they are written...

Page 106: ...traction Navigation Tourist Information Navigation Video Rental Navigation Winery Financial Locations Navigation ATM Navigation Bank Navigation Other Financial Services Governmental Offices Navigation...

Page 107: ...tion Fast Food Restaurant Navigation French Restaurant Navigation French Food Navigation Ice Cream Parlor Navigation Italian Restaurant Navigation Italian Food Navigation Japanese Restaurant Navigatio...

Page 108: ...mmand by stating cancel after the system talk back Navigation go home navigation select home These commands instruct the system to set the home preset as the destination Navigation go to previous dest...

Page 109: ...The system will then dial the number See Phone Book Screen under Bluetooth Phone on page 6 2 for more information on how to store a nametag Cancel This command instructs the system to cancel the most...

Page 110: ...M XM if equipped or WX if equipped Radio radio turn off These commands instruct the system to turn the audio system on and off Radio set balance center radio set balance middle radio set fade center r...

Page 111: ...the vehicle is stopped DVD Changer Commands The following are DVD commands you can access by clearly stating the commands exactly as they are written The commands are only available when a DVD is ins...

Page 112: ...imate control commands Help commands will be displayed on the map screen when the vehicle is stopped Personalization Commands The following are personalization commands you can access by clearly stati...

Page 113: ...ands instruct the system to dial a phone number after it is stated State the number including the area code ex 555 123 4567 then state dial You can state the phone number in partial segments or you ca...

Page 114: ...NOTES 4 16...

Page 115: ...Vehicle Customization 5 2 Personalization 5 2 Section 5 Vehicle Customization 5 1...

Page 116: ...ation chime personalization driver information center remote lock and unlock confirmation suspension system configuration and remote start climate control settings can be personalized Language This fe...

Page 117: ...creen See Getting Started on page 1 4 for more information This will take you directly to the Language screen Choose the desired language Your choice will be stored automatically All screens will disp...

Page 118: ...Driver 1 or Driver 2 The system will show the start up screen when the driver is changed 7 The Personal Settings button must be highlighted to continue programming If it is not highlighted touch it I...

Page 119: ...ed on Lights Horn Lights flash at UNLOCK on Lights flash at LOCK on Exterior lighting at UNLOCK on Horn chirps at LOCK off External Audible Keyless Entry Transmitter in vehicle reminder on Twilight De...

Page 120: ...o the feature name ALL doors unlock at OFF This feature allows all of the doors to automatically unlock when ignition is turned off When this feature is turned on the button will appear highlighted ne...

Page 121: ...anual for more information You may also choose to activate one or both of the following two options Keyless Access All Doors lock 5 sec after last door closed This feature delays the locking of the ve...

Page 122: ...s will flash when the doors are passively unlocked See Automatic Door Lock earlier in this section for more information When this feature is turned on the button will appear highlighted next to the fe...

Page 123: ...nsmitter remains in vehicle reminder This feature chirps the horn three times when the driver s door is closed and there is a keyless access transmitter left inside the vehicle This will only occur wh...

Page 124: ...eature you can select between performance or touring modes Performance mode is used where road conditions or personal preference demand more control This setting provides more feel or response to road...

Page 125: ...MOTE recall memory When on the previously programmed seat and mirror positions will be recalled when you press the unlock button on the keyless access transmitter Auto EXIT Seat Recall When on your pr...

Page 126: ...remote start feature is activated you can choose any or all of the features shown Climate Control If this feature is active the climate control system will engage when the vehicle is started using th...

Page 127: ...and the Voice Recognition system See Entering the Memory Menu later in this section for more information on recalling and programming the memory settings using the Navigation System screen buttons En...

Page 128: ...tarting your vehicle see Occupant Position earlier in this section Store Driver Settings This feature allows you to store the seat steering column and outside mirrors positions To store driver setting...

Page 129: ...he following procedure 1 Select the CONFIG hard key 2 Select the Vehicle screen button 3 Select the Memory screen button 4 Select the Recall Exit Settings screen button to recall your previously store...

Page 130: ...NOTES 5 16...

Page 131: ...Phone 6 2 Bluetooth Phone 6 2 Section 6 Phone 6 1...

Page 132: ...does support Bluetooth your phone will need to be paired to Bluetooth To connect or pair the Bluetooth system with the phone 1 Press the CONFIG hard key 2 Select the E Bluetooth screen button 3 Select...

Page 133: ...isplay a list of all Bluetooth phones that have been registered connected to your vehicle From this list you can set your default device change the phones to be used in the vehicle search for a new de...

Page 134: ...Bluetooth phones in a designated area Bluetooth Phone Screen This information on this screen depends on the information received from the phone Some phones may not support this feature While in this...

Page 135: ...in the Bluetooth system to be used to dial calls from This address book is independent of the phone s address book and data cannot be transferred from the Bluetooth phone book to the phone s address...

Page 136: ...up the list one entry at a time z Scroll Down This screen button scrolls down the list one entry at a time z Page Down This screen button scrolls down the list one page at a time Q OnStar Select this...

Page 137: ...the name you wish to associate with this entry 6 The system will playback the name and request confirmation Say Yes to confirm or No to cancel To delete a nametag 1 Select the g phone book screen butt...

Page 138: ...Save This screen button will allow you to save the entry in your phone book Y All Delete All This screen button deletes all phone book entries in the screen you are currently in either received or sen...

Page 139: ...x Disc CD Changer 3 13 Change Route 2 19 Configure Menu 2 55 D Database Coverage Explanations 2 66 Destination 2 37 Dialing and Making Calls Using Your Bluetooth Phone 6 5 Dialing from Navigation Scre...

Page 140: ...sitioning System GPS 2 64 H Hard Keys 2 2 I Installing the Map DVD 2 6 J Jacks Auxiliary Devices 3 23 K Keyless Access System 2 53 L Language 5 2 Lights Horn 5 8 Lock Unlock 5 6 M Map Adjustments 2 6...

Page 141: ...s 2 66 Overview Navigation System 1 2 P Personalization 5 2 Phone Bluetooth 6 2 Playing an Audio CD 3 14 Playing an Audio or Video DVD 3 18 Playing an MP3 CD 3 16 Playing the Radio 3 2 Preset Stations...

Page 142: ...Changer 3 13 Six Disc DVD Changer Errors 3 23 Symbols 2 8 System Needs Service If 2 66 T Three Routes 2 52 Traveling Across Regions 2 17 V Vehicle Positioning 2 64 Voice Recognition 4 2 Voice Recogni...

Reviews: