12
♦
Never clean the oven cavity with acids, abrasives or aggressive detergents.
♦
Never use a spray of water to clean the outside of your oven. This may damage the electrical
components and void your warranty.
5.3
DAILY CLEANING
♦
Unplug oven and let it cool down for 10-15 minutes.
♦
Clean the oven cavity and oven door gasket using only proper products (degreaser, damp cloth.)
(Never clean the oven cavity with acids, abrasives, or aggressive detergents.)
♦
Pull out and clean oven side racks and wire shelves separately, then replace when done.
♦
For heavily soiled areas, let degreaser sit to penetrate before wiping with damp cloth or scrub pad.
♦
Wipe door handle, door glass (inner and outer), and oven control panel using only proper products
(detergent, damp cloth.)
♦
Wipe dry after each cleaning process.
5.4
WEEKLY CLEANING
♦
Follow protocol for Daily Cleaning.
♦
Remove and clean oven door gasket
Pull gasket out of the channel.
Clean with detergent & water or dishwasher.
Dry and let sit.
To replace after cleaning, push back into channel around oven door.
♦
Clean the outside of the oven using only proper products (degreaser, damp cloth.)
♦
Remove the inner door glass & clean (follow separate instructions below.)
♦
Never clean the oven with acids, abrasives, or aggressive detergents.
♦
Wipe dry after each cleaning process.
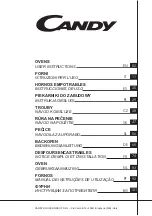
5.5 CLEANING THE OVEN DOOR GLASS
Open oven door and
remove inner door
glass using the
following directions.
(Glass holder clips on
left & right sides of
door keep inner door
glass in place.)
1) With oven door open
completely, use fingers
to pull left and right
glass holder clips
forward until fully
extended and the
corner of the door glass
is visible.
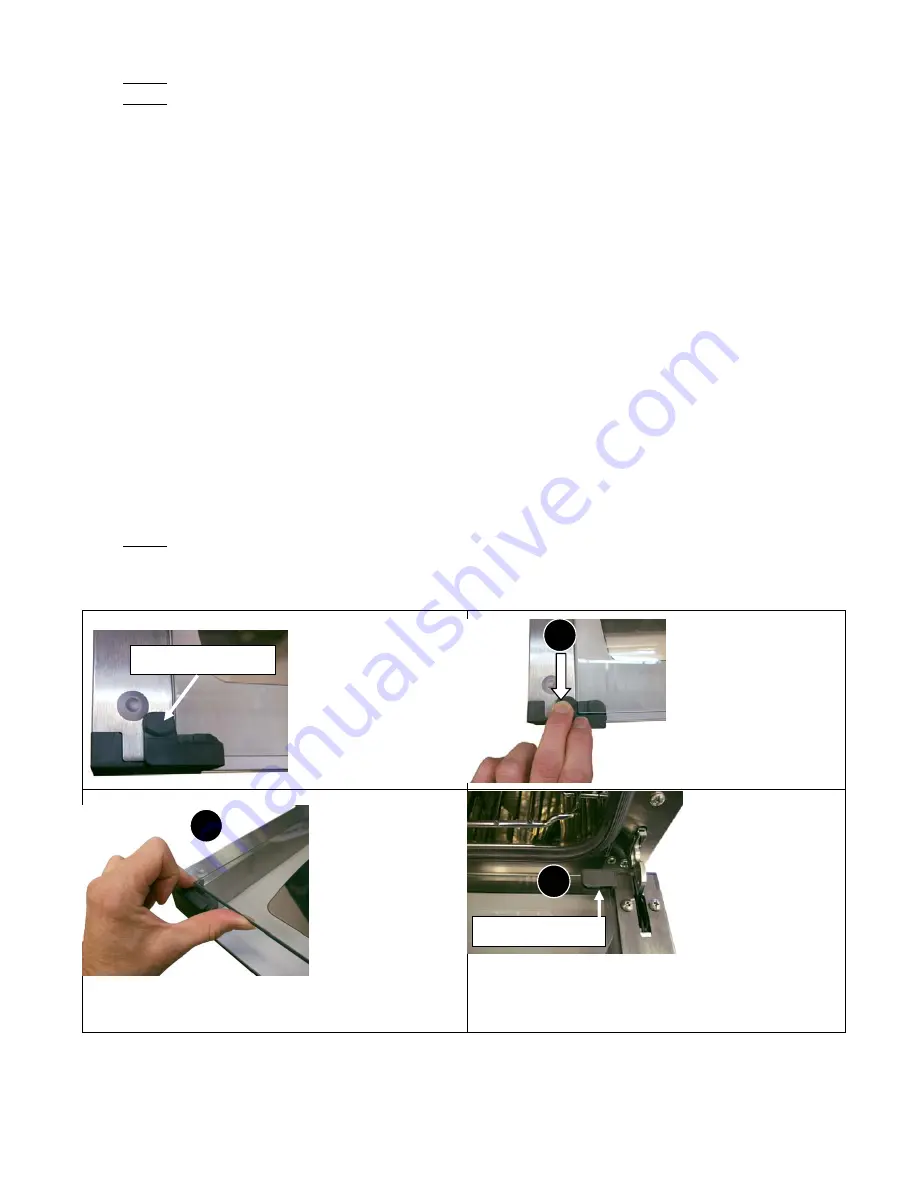
2) Using fingers to
hold glass holder
clips open, position
thumbs under the
inner door glass
and push glass up
until it just clears
the glass holder
tabs.
Release glass holder
clipcs while supporting the door glass with thumbs.
3) Grasp both sides
of the glass firmly
and pull the glass
toward you until it
clears the door glass
slots at the bottom of
the door.
(Be careful to
support the glass
when pulling it toward you, to avoid the back edge of
the glass dropping onto the outer door glass below it.)
Lift the glass and place gently on countertop.
Glass holder tab
Door glass slot
2
3
1